Step-by-Step Guide to Crafting an Adorable Crochet Clutch

Unleash your creativity and embark on a delightful journey into the world of crochet with our step-by-step guide to crafting an adorable clutch. This project is perfect for both beginners and experienced crocheters looking to add a touch of elegance to their accessory collection. With just a few basic crochet stitches and some colorful yarn, you'll be able to create a unique and eye-catching clutch that will turn heads wherever you go. From selecting the perfect yarn to mastering the art of crocheting intricate patterns, our guide will walk you through each stage of the process, ensuring your finished clutch is nothing short of perfection.
Materials for Lily Crochet Clutch Pattern
Yarn
Lion Brand Coboo, DK weight, #3 (51% Cotton, 49% Rayon, 232 yards/212 m per 3.5 oz/100g Ball)
Estimated Yardage
- 180 yards in Main Color
- 80 yards in Contrasting Color
Hook and Other Materials
- 5 mm Crochet Hook
- Button/Velcro
Gauge
12 sts over 12 rows = 4”/10 cm Square made in hdc, before blocking. Adjust hook size if necessary, to obtain gauge.
Pattern Notes
- Please kindly read through the pattern before starting.
- Similar #3 weight yarn can be substituted, please check the gauge.
- Ch 2 does not count as a stitch.
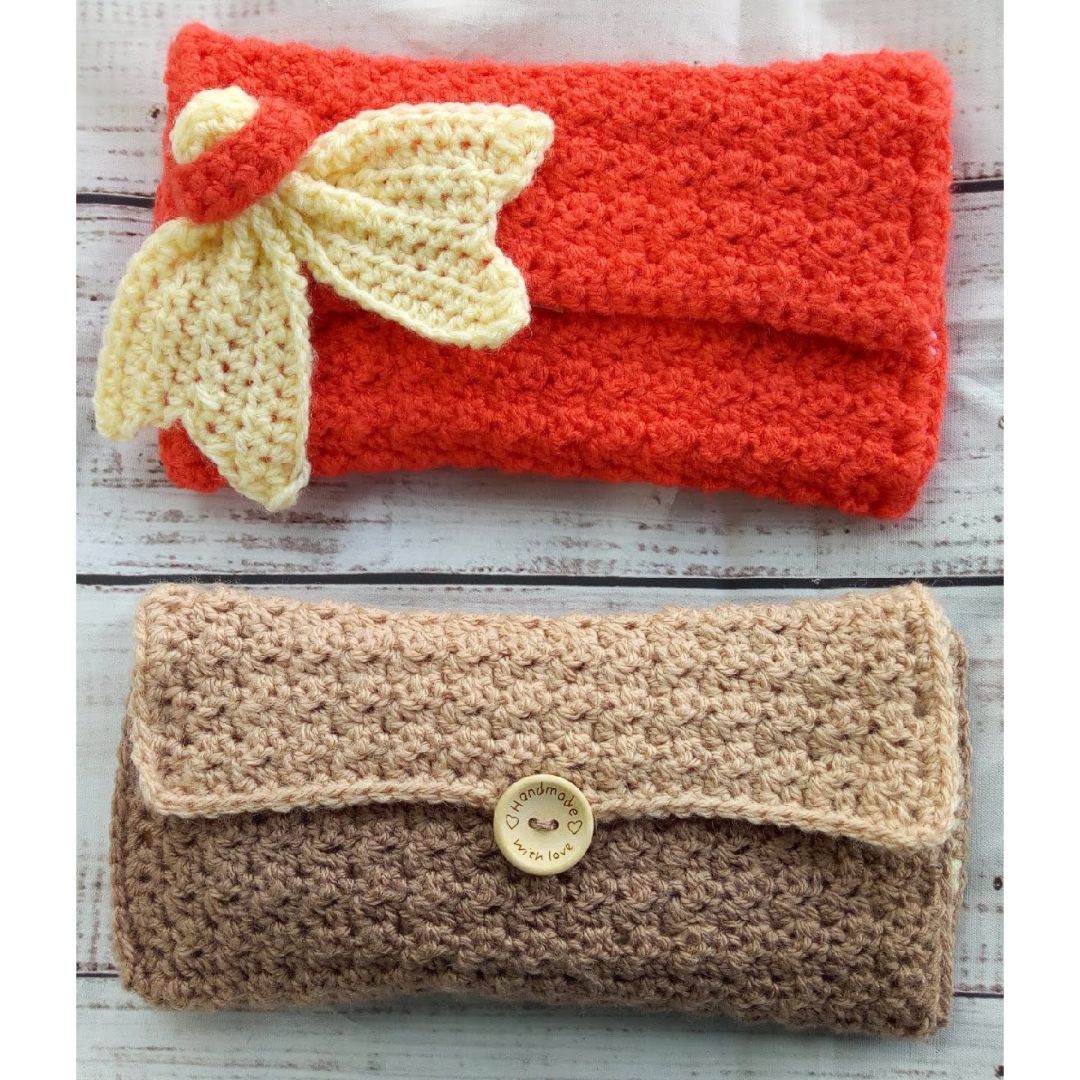
- Please note that I made 2 different wallets and have used both pictures from these in the pattern.
Difficulty Level
Intermediate
Terms
US Terminology
Stitch Abbreviations
- Ch(s) – Chain(s)
- St – Stitch
- sc – Single Crochet
- hdc – Half Double Crochet
- hdc2tog – Half Double Crochet 2 Together
- hdc3tog – Half Double Crochet 3 Together
- dc – Double Crochet
- sl st – Slip Stitch
- MC – Main Color
- CC – Contrasting Color
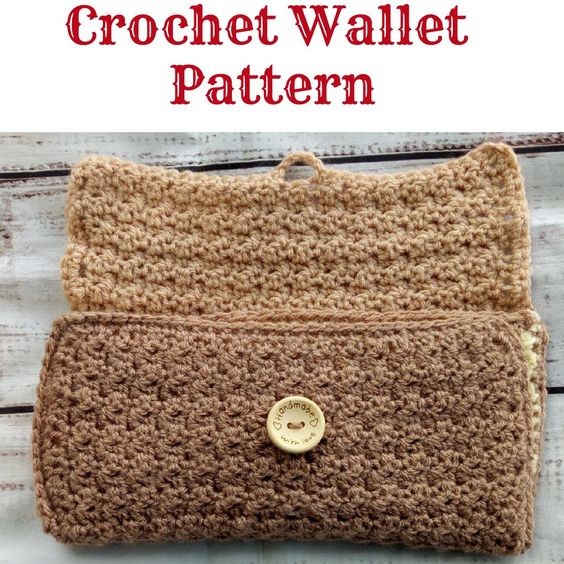
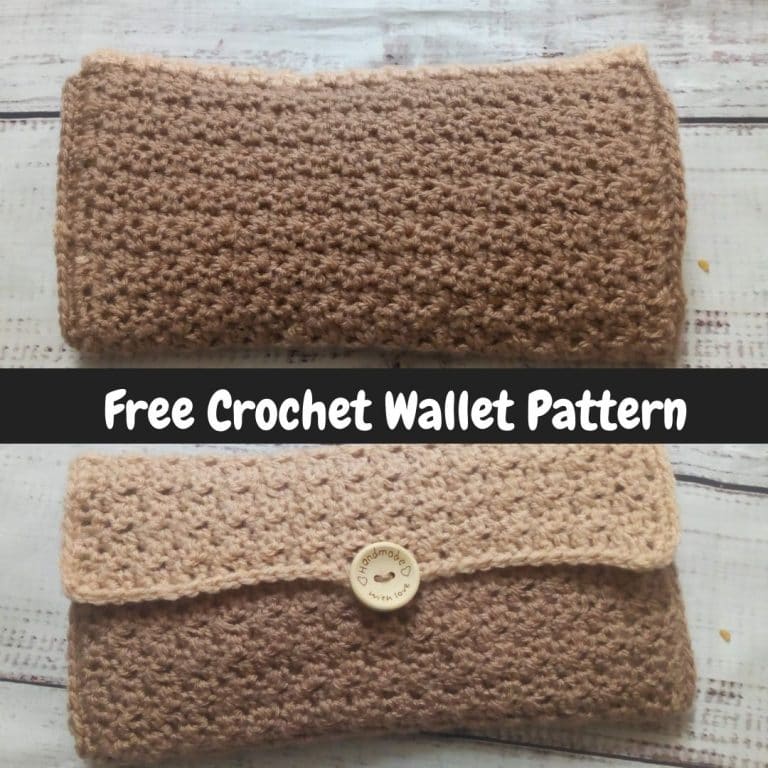
Finished Measurements
- Opened – 12.5” by 8.5”
- Folded – 12.5” by 4”
Construction Notes
- The wallet is worked in 2 sections.
- Section 1 – The cover, is crocheted in rows and in one piece.
- Section 2 – The inner part is also crocheted in rows with different pieces made and then sewed to the cover made in section 1.
Adjustments
- Length: Increase or decrease the repeats in section 1; you would also need to replicate any changes made in section 1 when making the pieces in section 2 as you would prefer.
Instructions for This Clutch Pattern
Section 1 – Outer Cover
With MC, Chain 35
Row 1:
Sc in 2nd ch from hook, dc in next st, *sc in next st, dc in next st, rep from * to the end of the row, turn. 17 sc, 17 dc
- Note – You’ll end with a dc, and always start with sc
- Sc is made on dc of the previous row and dc is made on sc
Row 2:
Ch 1, sc in first st, dc in next st, *sc in next st, dc in next st, rep from* to the end of the row, turn. 17 sc, 17 dc
Rows 3 – 20:
Rep Row 2
Edging and Buttonhole
Ch 1, turn work by 90°, working down the sides, *sc in each st along the edges, ch 1 at the corner, rep from * to 4th side, sc into next 16 sts, ch 5, skip 2 sts, sc into last 16 sts. Join with a sl st into the first ch.
Skip ch 5 if using Velcro
Fasten off.
Section 2 – Inner Lining Layers (3)
- Using CC for the body and MC for the last row.
- Make 2 – label as A and B
If you want to leave yours a clutch, then skip the layers and proceed to join the sides of your just-completed panel. For the wallet version, continue with the instructions below.
First Layer
- Label as A
Chain 34
Row 1:
Hdc in 3rd ch from hook and in each of the remaining chs, turn. 32 hdc
Row 2:
Ch 2, hdc in each st across, turn. 32 hdc
Row 3 – 13:
Rep Row 2
Fasten off CC, join MC
Row 14:
Rep Row 2
Fasten off.
Second Layer
- Label as B
- Repeat Rows 1 – 14.
Third Layer
- Label as C
Chain 34.
Row 1:
Hdc in 3rd ch from hook and in each of the remaining chs, turn. 32 hdc
Row 2:
Ch 2, hdc in each st across, turn. 32 hdc
Rows 3 – 10:
Rep Row 2
Fasten off CC, join MC
Row 11:
Rep Row 2
Fasten off.
Cardholder
Using MC, chain 52, join with a sl st to the first chain to make a circle
Round 1:
Ch 2, *hdc in next 8 chs, hdc3tog, hdc in next 12 sts, hdc3tog, repeat from * till the end of the row, join with a sl st to the 2nd Ch.
Leave a long yarn for sewing.
Using a yarn needle, sew in the outer edges of the cardholder to A (one of the layers), do not sew the inner edges as you’ll pass your card through it.
Fasten off.
Section 3 – Bow
Using CC
Chain 52
Row 1:
Hdc in 3rd ch from hook, hdc in the remaining chains, turn. 50 hdc
Row 2:
Ch 1, hdc2tog, hdc in the remaining sts till last 2 sts, hdc2tog, turn. 48 hdc
Rows 3 – 5:
Rep Row 2. 42 hdc
Row 6:
Ch 1, 2 hdc in first st, hdc in the remaining sts till last st, hdc, turn. 48 hdc
Rows 3 – 5:
Repeat Row 6. 50 hdc
Fasten off.
Band
Using MC, chain 11 – join to make a ring
Round 1:
Ch 3, dc in each ch around, join with a sl st with the 3rd ch. 11 dc
Fasten off.
To Assemble
Bow
Fold the bow in half, with the center pinched, pass the pinched part of the bow through the band and sew it together.
Wallet
- Place C over A, using CC, join/sew with a sl st/mattress st to last row.
Ch 1, sc across the sides (short sides and bottom edge, leaving the 4th opening unsewn). Place this on the lower end of the outer layer.
Secure the edges with stitch markers.
These slots would be for checkbook or cash.
- Place B 2 rows above the first liner, and secure the edges with a stitch marker.
- Using MC and working around the wallet, with the inside of the wallet facing you, attach yarn with a sl st at the edge, Ch 1, sc around the sides.
Fasten off.
Sew in edges.
Button/Velcro
Fold the wallet over the liners made.
Sew in button/Velcro on the outer cover.
- Funny Pictures
-
 Feline Memes to Feel Better
-
 Best Funny Pics of the Day Especially for You
-
 Pictures That Have No Right to be This Funny
- Recipes
-
 Strawberry Banana Bread
-
 Baked Beans and Hot Dogs with Biscuit Topping
-
 Roasted Rosemary Lemon Chicken Breasts
- Lifehacks
-
 Crochet Tutorial: Flower Puff Stitch
-
 8 Basic Crochet Tips
-
 7 Crochet Tips And Tricks
- Crochet Ideas
-
 Crochet Snorlax Plushie Doll
-
 Crochet Cat in 1 Row
-
 Crochet Beautiful Penguin Toy
- DIY
-
 Popsicle Stick and Jingle Bell Christmas Tree Ornament
-
 Upcycled Mason Jar Chicken Vase
-
 Make A Candle Holder From Plastic Spoons
- Knitting Ideas
-
 Knitted Newborn Striped Beanie
-
 Knitted Chunky Newborn Pixie Hat
-
 Knitted Big Bow Hat