How to Create an Adorable Winnie the Pooh Crochet Keychain

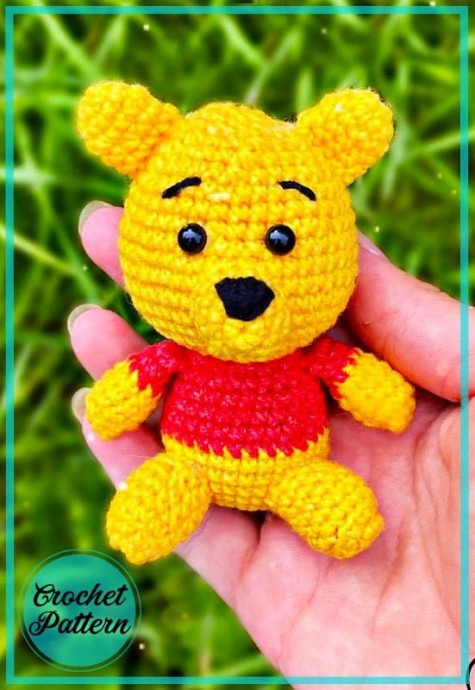
Create your very own adorable Winnie the Pooh keychain using the art of crochet! This fun and creative project involves using colorful yarn to bring this beloved character to life in the form of a cute amigurumi keychain. With just a few basic crochet stitches and some stuffing, you can make a miniature version of Winnie the Pooh that you can carry with you wherever you go. Whether you are a beginner or an experienced crocheter, this project is perfect for anyone looking to add a touch of whimsy to their keychain collection. So grab your crochet hook, pick out your favorite yarn colors, and get ready to embark on a fun and rewarding crafting adventure with Winnie the Pooh!
Materials
- 1. Yarn (red, yellow)
- 2. Hook 1.5 mm
- 3. Plastic eyes
- 4. Scissors, needle
- 5. Filler
Abbreviations
AR – Amigurumi Magic ring
LL – Lifting loop
MR – Amigurumi Magic ring
App – Application
sc – Single Crochet
inc – Increase
dec – Decrease
tr – Triple Crochet/Treble Crochet
st – Stitch
dc – Double Crochet
hdc – Half Double Crochet
sl-st – Slip Stitch
ch – Chain
..in – Make increase into the same stitch as many as the number which is given in front of “inc” abbreviation (e.g., 3inc, 4inc).
FLO – Crochet into front loops only
BLO – Crochet into back loops only
Bobble Stitch
BL – Bobble Stitch – do 5dc all in the same stitch and then yarn over and pull through all the loops on your hook (the original loop + 1 loop for each partially completed dc)
Hind Legs
1 -6 in MR
2 -inc (12)
3 -BLO 12sc
4 -12 sc
5 - (2sc, dec.)*3 (9)
6 -9 sc
Leave the yarn for sewing.
Fill.
Front Legs
1 -6 in MR
2 - (1 sc., inc.)*3 (9)
3-5 -9 sc
Change the color to red
6-7 -9 sc
Sew the part.
Body and Head
We sew the front legs while crocheting the body. The body and head are crochet in one piece.
1 -6 in MR
2 -6 inc (12)
3 -12 inc (24)
4 - (3 sc, inc)*6 (30)
5-8 -30 sc
Change the color to red.
9 -30 sc
10 - (8 sc, dec)*3 (27)
11 - (7 sc, dec)*3 (24)
12 -24 sc
13 – we sew hands 24 sc
14 -12 dec (12)
Change the color to yellow.
15 -12 inc (24)
16 - (1 sc, inc)*12 (36)
17 - (2 sc, inc)*12 (48)
18-21 -48 sc
22 -3 sc, dec, (6 sc, dec)*5, 3 sc (42)
23 -42 sc
24 - (5 sc, dec)*6 (36)
25-26 -36 sc
27 -2 sc, dec, (4 sc, dec)*5, 2 sc (30)
28 - (3 sc, dec)*6 (24)
29 - (2 sc, dec)*6 (18)
30 - (1 sc, dec)*6 (12)
31 -6 dec
Muzzle
1 -6 in MR
2 -6 inc (12)
3 - (3 sc, inc)*3 (15)
4 -15 sc
Leave the end to be sewn on.
Ears
1 -6 in MR
2 - (1 sc, inc)*3 (9)
3-5 – 9 sc
Leave the end to be sewn on.
Assembly
The rows are assembled from above.
1 - Sew on the ears at a distance of 2-6 rows on the sides of the head.
2 - Sew on the muzzle at a distance from 10 to 14 rows, embroider the nose with a triangle on the muzzle.
3 - Glue the eyes between the 8-9 row, between the eyes 5 sc.
4 - Embroider eyebrows at a distance of 5-6 rows.
5 - Sew on the legs (either for Winnie to sit or to stand).
- Funny Pictures
-
 Hilarious Memes for Those Bored to Tears
-
 Weekly Treat of Funniest Parenting Memes for Good Laugh out Loud Right Now
-
 Really Funny Pics to End These Weekend Perfectly
- Recipes
-
 Crispy Baked Avocado Fries
-
 Scrambled Chickpea and Spinach Pitas
-
 Cinnamon Pancakes
- Lifehacks
-
 Crochet Basics: Aligned Cobble Stitch
-
 Brick Stitch Crochet Tutorial
-
 Crochet Basics: Wattle Stitch
- Crochet Ideas
-
 Crochet Snorlax Plushie Doll
-
 Crochet Beautiful Penguin Toy
-
 Crochet Tiny Snowman
- DIY
-
 DIY Santa Craft For Kids
-
 Paper Plate Angel Craft
-
 Upcycled Mason Jar Chicken Vase
- Knitting Ideas
-
 Knitted Bridger Cowl
-
 Knitted Keepsake Bag
-
 Knitted Cutie Cupcake Dolls