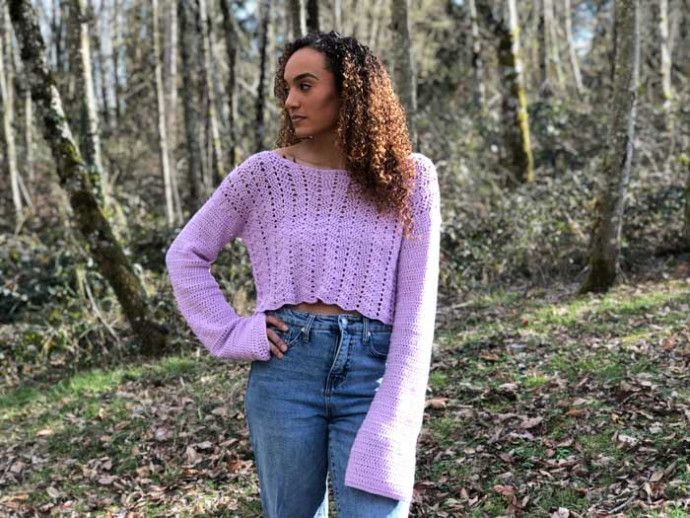
Crochet Sweater Pattern with Detailed Instructions

You’ll Need:
4-7 balls of Lion Brand Coboo (weight: 4/worsted – 400 yards, 3.5 oz) in Lilac (#835-143) color;
Crochet hook 5.5 mm;
Tapestry needle;
Stitch markers;
Scissors;
Measuring tape.
Size:
- XS: 15” Length, 15” Width, 21” Sleeve (860 yds/4 skeins)
- S: 16” Length, 17” Width, 21” Sleeve (980 yds/5 skeins)
- M: 17” Length, 19” Width, 21” Sleeve (1100 yds/5 skeins)
- L: 18” Length, 21” Width, 21” Sleeve (1240 yds/6 skeins)
- XL: 19” Length, 23” Width, 21” Sleeve (1380 yds/6 skeins)
- 2XL: 20” Length, 25” Width, 21” Sleeve (1520 yds/7 skeins)
Stitches Control:
20 sts x 7 rows = 4” x 4”.
Instructions
Back
The panels can be made in cropped or full-length depending on how long you want your sweater to be. Row count recommendations are included for both crop and full length. However, to tailor your sweater, simply add or subtract rows to adjust the length.
Ch 102 (82, 92, 102, 112, 122, 132).
Row 1: DC in 3rd chain from hook (Note: Ch spaces count as first stitch throughout panels). DC in each of the next 3 stitches. *Skip 2 Ch. DC in next 4 Ch spaces. Ch 2. DC in each of the next 4 Ch spaces.* Repeat from * until you reach the last Ch space. DC 2 in the last Ch space.
Row 2: Ch 3 and turn. DC in first stitch (same stitch as Ch 3). *DC in next 3 stitches. Sk 2 stitches. DC in each of the next 3 stitches. DC 1, Ch 2, DC 1 in the Ch 2 spaces from the previous row.* Repeat from * until you reach the turning Ch. DC 2 in the turning Ch.
Repeat Row 2 until work reaches desired length, taking note of how many rows were worked.
For Crop: (30, 32, 34, 36, 38, 40)
For Full Length: (48, 50, 52, 54, 56, 58)
Tie off and weave in ends.
Front
Ch 102 (82, 92, 102, 112, 122, 132).
DC in 3rd chain from hook (Note: Ch spaces count as first stitch throughout panels). DC in each of the next 3 stitches. *Skip 2 Ch. DC in next 4 Ch spaces. Ch 2. DC in each of the next 4 Ch spaces.* Repeat from * until you reach the last Ch space. DC 2 in the last Ch space.
Row 2: Ch 3 and turn. DC in first stitch (same stitch as Ch 3). *DC in next 3 stitches. Sk 2 stitches. DC in each of the next 3 stitches. DC 1, Ch 2, DC 1 in the Ch 2 spaces from the previous row.* Repeat from * until you reach the turning Ch. DC 2 in the turning Ch.
Repeat Row 2 until you have reach 6 (6, 6, 6, 6, 8, 8) rows less than the back panel. Do not tie off, but continue to neckline shaping without breaking yarn.
Neckline Shaping
We will now begin to shape the neckline by continuing with the working yarn. This will involve ending the rows early and turning. Each row will end in the peak of a chevron. If you would prefer a boxy, straight-across neckline, skip the shaping steps and make the front panel exactly the same as the back panel.
Shoulder
Row 1: Ch 3 and turn. DC in first stitch (same stitch as Ch 3). *DC in next 3 stitches. Sk 2 stitches. DC in each of the next 3 stitches. [DC 1, Ch 2, DC 1] in the Ch 2 spaces from the previous row.* Repeat from * 2(1, 1, 2, 2, 3, 3) more times. DC in next 3 stitches. Sk 2 stitches. DC in each of the next 3 stitches. DC 1 in the chain space from the previous row.
Row 2: Ch 3 and turn. DC in first stitch (same stitch as Ch 3). DC in next 2 stitches. Sk 2 stitches. DC in each of the next 3 stitches. [DC 1, Ch 2, DC 1] in the Ch 2 spaces from the previous row. *DC in next 3 stitches. Sk 2 stitches. DC in each of the next 3 stitches. [DC 1, Ch 2, DC 1] in the Ch 2 spaces from the previous row.* Repeat from * until you reach the turning Ch. DC 2 in the turning Ch.
Row 3: Ch 3 and turn. DC in first stitch (same stitch as Ch 3). *DC in next 3 stitches. Sk 2 stitches. DC in each of the next 3 stitches. [DC 1, Ch 2, DC 1] in the Ch 2 spaces from the previous row.* Repeat from * 1 (0, 0, 1, 1, 2, 2) more times. DC in next 3 stitches. Sk 2 stitches. DC in each of the next 3 stitches. DC 1 in the chain space from the previous row.
Row 4: Ch 3 and turn. DC in first stitch (same stitch as Ch 3). DC in next 2 stitches. Sk 2 stitches. DC in each of the next 3 stitches. [DC 1, Ch 2, DC 1] in the Ch 2 spaces from the previous row. *DC in next 3 stitches. Sk 2 stitches. DC in each of the next 3 stitches. [DC 1, Ch 2, DC 1] in the Ch 2 spaces from the previous row.* Repeat from * until you reach the turning Ch. DC 2 in the turning Ch.
Row 5: Ch 3 and turn. DC in first stitch (same stitch as Ch 3). *DC in next 3 stitches. Sk 2 stitches. DC in each of the next 3 stitches. [DC 1, Ch 2, DC 1] in the Ch 2 spaces from the previous row.* Repeat from * (0, 0, 1, 1, 2, 2) more time. DC in next 3 stitches. Sk 2 stitches. DC in each of the next 2 stitches. DC 2 in the turning ch.
Row 6: Repeat Row 4 (For sizes XS-Large, tie off and weave ends after Row 6)
Row 7: Ch 3 and turn. DC in first stitch (same stitch as Ch 3). *DC in next 3 stitches. Sk 2 stitches. DC in each of the next 3 stitches. [DC 1, Ch 2, DC 1] in the Ch 2 spaces from the previous row.* Repeat from * (-,-,-,-,2,2) more time. DC in next 3 stitches. Sk 2 stitches. DC in each of the next 2 stitches. DC 2 in the turning ch.
Row 8: Repeat Row 4. Tie off and weave in ends.
Opposite Shoulder
Attach Yarn on opposite side of top and repeat Rows 1-6(8).
Sleeves
To tailor sleeves to fit your needs, you can measure your arm at its widest point, just below the armpit. Take this measurement and add 2” and that will be the length of the starting chain you will need for your sleeve.
For Bell Sleeves:
Row 1: Ch 55 (51, 53, 55, 59, 63, 67). DC in the 4th Ch from hook (Ch spaces count as first stitch throughout sleeves). DC in next Ch space each Ch across.
Row 2-4: Ch 3 (counts as first stitch) and turn. DC in next stitch and each stitch across. (48, 50, 52, 56, 60, 64)
Row 5: Ch 3 and turn. DC2Tog over next 2 stitches. DC in each stitch across until 3 stitches (including the turning Ch) remain. DC2Tog over next 2 stitches. DC in turning Ch.
Row 6-8: Repeat Rows 2-4
Row 9: Repeat Row 5
Row 10-12: Repeat Rows 2-4
Row 13: Repeat Row 5
Row 14-16: Repeat Rows 2-4
Row 17: Repeat Row 5
Row 18: Ch 3. DC in same stitch. DC in each stitch across.
Row 19-40: Repeat Row 18 (continue repeat until sleeve reaches desired length)
Make 2 sleeves.
For Short Sleeves:
Row 1: Ch 55 (51, 53, 55, 59, 63, 67). DC in 4th Ch from hook (counts as first stitch). DC in next Ch space and each Ch across. (48, 50, 52, 56, 60, 64)
Row 2-6: Ch 3 and turn. DC in next stitch and each stitch across. (continue repeat until sleeve reaches desired length)
Make 2 sleeves.
Fold sleeve in half lengthwise for bell sleeves (short ends together for short sleeved version). Whip stitch along the length of the sleeve using a tapestry needle. Tie off and weave in ends.
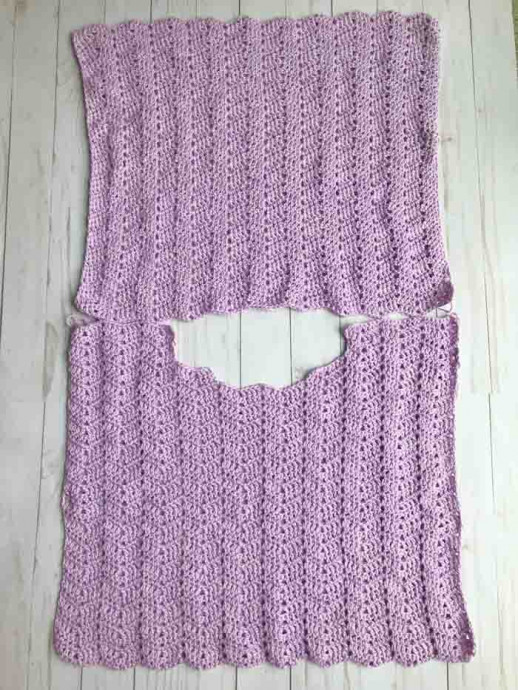
Assembly
Connecting Panels:
Line up the top edges of the Front Panel with the top edges of the Back Panel.
Whip stitch the top edges of both pieces together, stopping when you reach the edge of the last row of Neckline Shaping.
Attaching Sleeves:
- Open the Front and Back Panels, so that the right sides are facing up. Turn your sleeves right side out.
- Lay first sleeve across the Back Panel with the top (shoulder portion) of the sleeve meeting the point where the panels are sewn together. The sleeve seam should be pointing toward the bottom edge.
- Fold the Front Panel down over the sleeve. You should now have your sleeve sandwiched between the two panels with the wrong sides of the panels facing out. The edge of the top of the sleeve should line up along the top one side.
- Whip stitch the sleeve into place, then continue to whip stitch down the side of the two panels. When you open the panels, you should have one sleeve and one side seam finished with all the whip stitches on the wrong side.
- Repeat with opposite sleeve.