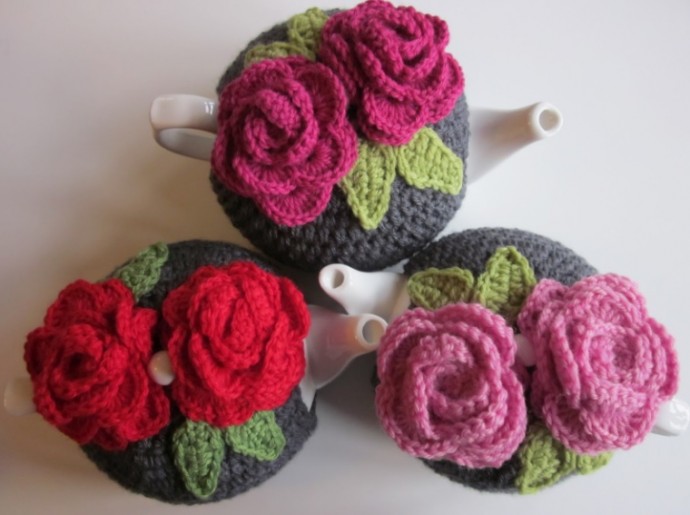
Crochet Teapot Cozy and Flower Patterns


You’ll Need
Worsted weight yarn;
Crochet hook 4 mm;
Stitch markers;
Needle;
Small button.
Instructions
To get started, make an initial chain just long enough to go around the base of your pot so it sits just to the sides of your handle. The chain will need to be an odd number of stitches so you have a perfect center stitch.
Then Ch2 and work one HDC into the third chain from the hook. Continue working across into all spaces in HDC. Ch2 then turn.
Work enough rows of HDC (always adding a Ch2 before turning) so that your cozy sits just below the base of your spout. Don't worry about it fitting the handle as this is joined at the very end.
Now place a stitch marker in the center stitch.
Leave a space of 5 stitches to accommodate it. You could leave just 3 stitches for a more slender spout. For the next few rows, you'll be working up one side at a time. As before, always Ch2 to start the first row and then at the end of the row before turning and continue working your rows until you reach the same level as the top of your spout base.
You can now fasten off this section.
Now it's time to start the other side, working from the middle of the cozy now. So if you are using a 5 stitch gap, you will now start in the 3rd space to the left of your stitch marker. Pull your wool through and chain 2, then continue working across in HDC, remembering to Ch2 before turning.
Continue working in rows until both sides are the same height, just tall enough to reach the top of your spout where it joins to the pot. Don't fasten off this time as you are going to work it as one piece now. Ideally, the next row will be Right Side Facing - this always seems to work out by fluke with my teapots, but you may need to add an additional row, so bear this in mind.
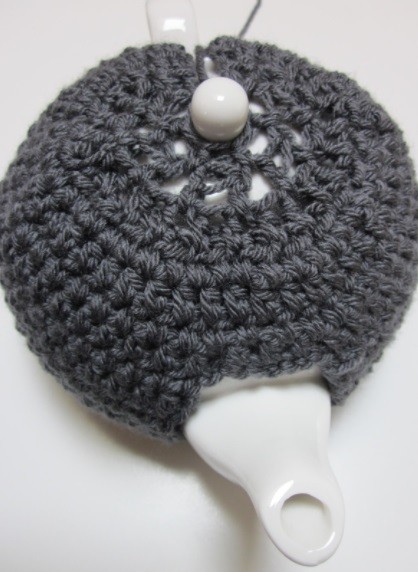
Now work across the next row until you get to the middle gap. This is where you join it up with the other side.
Then, working into the first chain (making sure to insert through both posts/strands), YOH, pull through stitch (2 loops on hook), YOH and pull through the first loop, YOH and pull through both loops. Repeat twice more.
There it is - nice and chunky. The single crochet here ends up being level with the HDC in the rest of the row. Now I join to the other side with an HDC into the first space. Make sure you keep your wool nice and firm for this part so you don't end up with a gape in this stitch.
And carry on across the rest of the row.
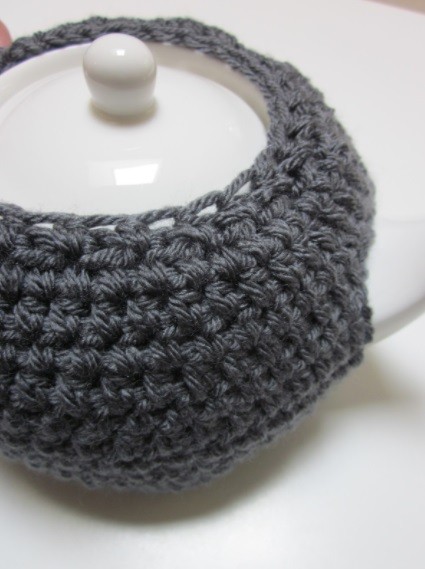
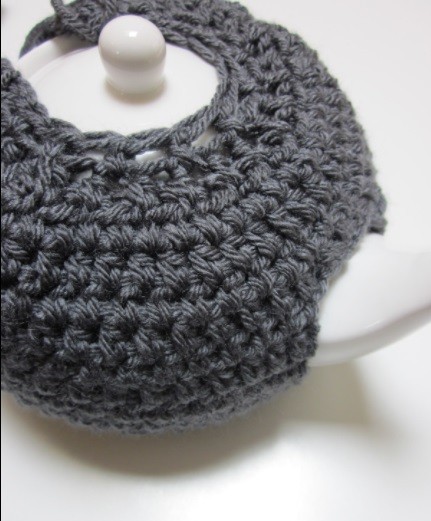
Continue on in HDC rows until you are sitting just above the top of your teapot where it starts to shape in towards the lid.
From here on you still work in HDC but only into every 2nd space. Keep working in rounds until you get to the top of your lid.
You could stop here and add a little picot edge or leave it plain.
You should point out that you can also join your sides together just about the handle height and continue on in rounds if the top of your cozy is going to be visible. So now you've reached the top, you can fasten off and leave a nice long thread to sew in your ends.
Then it's just a case of sewing down this seam until you reach just above the handle. Fasten off and weave in your ends.
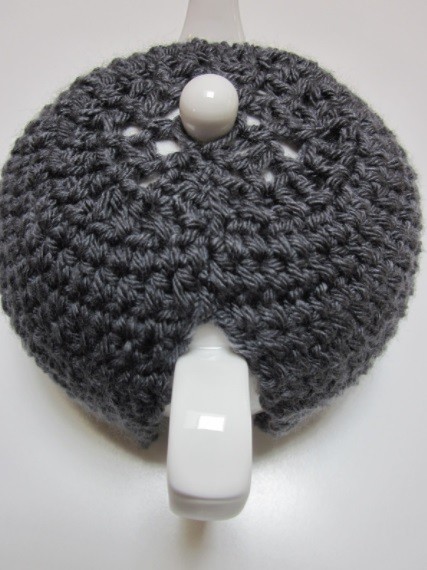
Now you can make a wee loop at the base of your cozy which will secure to a button on the opposite side - making it a breeze to remove the cozy from the pot.
Insert your hook into the edge of your first row and Ch5. Slip stitch into the row above to create the loop and fasten off. Sew in your ends.
Sew a button on to the opposite side.
Flowers
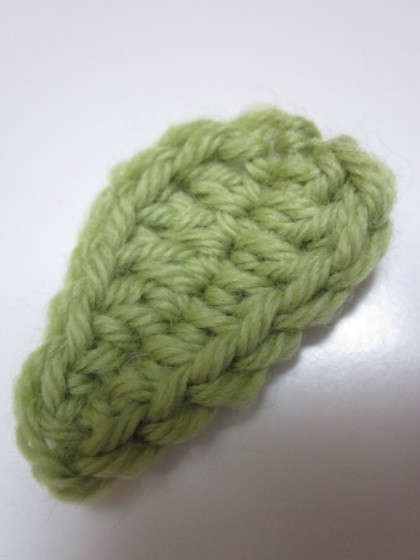
Ch10, DC into 3rd chain from hook, HTR in next chain, DC in next chain, HDC in next chain, SC in remaining 3 chains.
Now working the opposite side, SC in first 2 chains, HDC in next 2 chains, DC in next chain, HTR in next chain, DC in next chain, SC in last chain and fasten off. Sew in ends.
Apologies to anyone who has been trying to use the link I had provided for the large rose pattern. It seems the original source is no longer active. And thank you for all your lovely emails asking questions about the pattern. I hope the written pattern below helps!
Large Crochet Rose Pattern
Leave a 10” tail. Chain 57.
Row 1: (wrong side) (DC, Ch2, DC) in 6th chain from hook. (5 skipped chains count as first DC+Ch2). *Ch2, skip next 2 chains, (DC, Ch2, DC) in next chain. Repeat from * across to end. 36 spaces.
Row 2: Ch3, turn. 5DC in next ch-2 space, SC in next ch-2 space. (6DC in next sp then ch-2 space, SC in next ch-2 space) 5 times. (9DC in next ch-2 space, SC in next ch-2 space). 5 times. (12 DC in next ch-2 space, SC in next ch-2 space). 7 times.
Finish off and sew in loose ends. With the 10” tail, thread a needle from the beginning chain. With the right side facing and beginning with the first petal made, roll the rose, sewing to secure as you roll with stitches on the back of the rose. Make sure you're rolling it evenly, layering the petals to give a nice full rose when you're finished.