Crochet Roses Headband

If you're looking to add a touch of whimsy and charm to your outfit, a Crochet Roses Headband is the perfect accessory for you! This delightful headband features intricately crafted crochet roses that will elevate your style and showcase your love for all things cozy and romantic. Whether you're heading to a brunch with friends or a casual day out, this headband will effortlessly add a sweet and feminine touch to your look. Embrace your inner flower child and adorn yourself with this lovely Crochet Roses Headband for a touch of floral flair that is sure to make you stand out in the best way!
Materials Needed
- Paintbox Cotton DK:
- Daffodil Yellow (A)
- Rose Red (B)
- Grass Green (C)
- White plastic headband, tapered, 1 inch wide
- Crochet hook – B, 2.25mm
- Tapestry needle
- Scissors
- Hot glue stick
- Hot glue gun
Terms and Abbreviations to Know
- Magic ring
- Rnd, rnds – round, rounds
- St, sts – stitch, stitches
- Sl st – slip stitch
- Sc – single crochet
- Hdc – half double crochet
- Dc – double crochet
- Tr – triple crochet
- Inc – increase, 2 sc sts in same st
- BLO – back loop only
Notes
The headband portion of this pattern is made into 2 parts, to slip over the ends of the headband, and sew together at the top middle. The reason for this is because I like the style of the tapered, 1 inch wide headbands. I used a cotton DK weight yarn, but the pattern can easily be adjusted for a worsted weight. Simply test the fit on the headband as you go. The headband portion is made with joining rnds. The chs won’t count as sts, and the first st will be worked into joining st. While working the halves of the headband cover, continually try it onto the headband to assure the fit. It may be tight at first, but it should stretch.
Headband Cover (Make 2) in A
*PRO TIPS:
- Continually try your piece on the headband to make sure it fits, and stretch the stitches a little bit. Each piece of the headband should come just short of the middle top of the headband before sewing them together. They should not already be touching or overlapping.
- Multiply the number of rnds by the stitches per rnd to be sure you make the correct number of rnds. ex: rnds 2 through 10 = 9 rnds x 8 sts = 72, simply count to 72 from the beginning rnd 2
Begin with magic ring, and ch 2.
- Rnd 1: 8 dc in magic ring, join to first st with sl st; 8 sts
- Rnds 2-10: ch 1, hdc in each st around, join to first st with sl st; 8 sts
- Rnd 11: ch 1, 2 hdc in first st, hdc in next 7 sts, join to first st with sl st; 9 sts
- Rnds 12-20: ch 1, hdc in each st around; join to first st with sl st; 9 sts
- Rnd 21: ch 1, 2 hdc in first st, hdc in next 8 sts, join to first st with sl st; 10 sts
- Rnds 22-30: ch 1, hdc in each st around, join to first st with sl st; 10 sts
- Rnd 31: ch 1, 2 hdc in first st, hdc in next 9 sts, join to first st with sl st; 11 sts
- Rnds 32-37: ch 1, hdc in each st around, join to first st with sl st; 11 sts
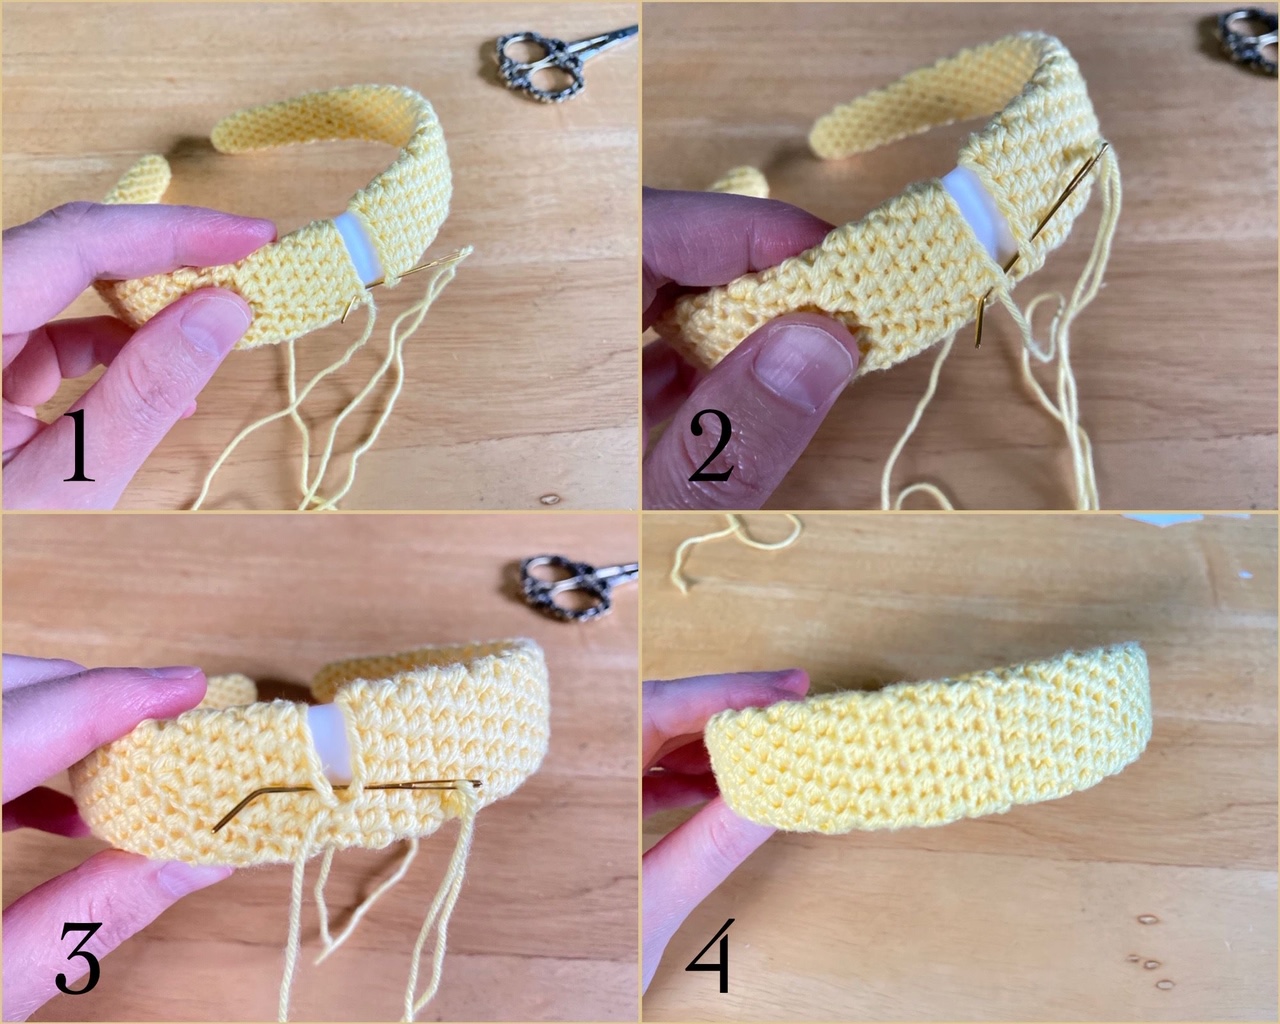
Fasten off, leaving a long tail on one of them, for sewing them together. Pull each half of the headband cover up the sides of the headband, to meet at the top middle, and sew them together. To make it seamless, sew over the tops of the stitches of one side, and under the stitch on the other side, consistently, going from a new stitch to a previously sewn st, then from the previously used st, to a new stitch. Weave in ends.
Roses Section
Roses
- Ch 51
- Row 1: turn, and beginning in 2nd ch from hook, [sc in next ch, (sc, hdc, ch 1, hdc, sc) tog in next ch, sc in next ch] 5x, [sc in next ch, (hdc, dc, ch 1, dc, hdc) tog in next ch, sc in next ch] 5x, [sc in next ch, (hdc, dc, tr) tog in next ch, ch 1, (tr, dc, hdc) tog in next ch, sc in next ch] 5x; 100
- Fasten off, leaving a long tail for sewing.
- Roll tightly from the first st to the last, to form the flower. Make sure the last 4-5 petals appear to be overlapping between the previous row of petals, and not popping up in the same places. They should roll up somewhat alternately. Then use your long tail to sew the roses together, from the outside to the inside, several times. Knot and weave in ends.
Leaves Section

Leaves
- Ch 6
- Working rnd around both sides of the ch
- Rnd 1: sl st into 3rd ch from hook, sc in next ch, hdc in next ch, 4 dc in last ch, turn over to work on the bottom side of the ch, hdc in next ch, sc in next ch, sl st in last ch; 10 sts
- Fasten off, and weave in ends.
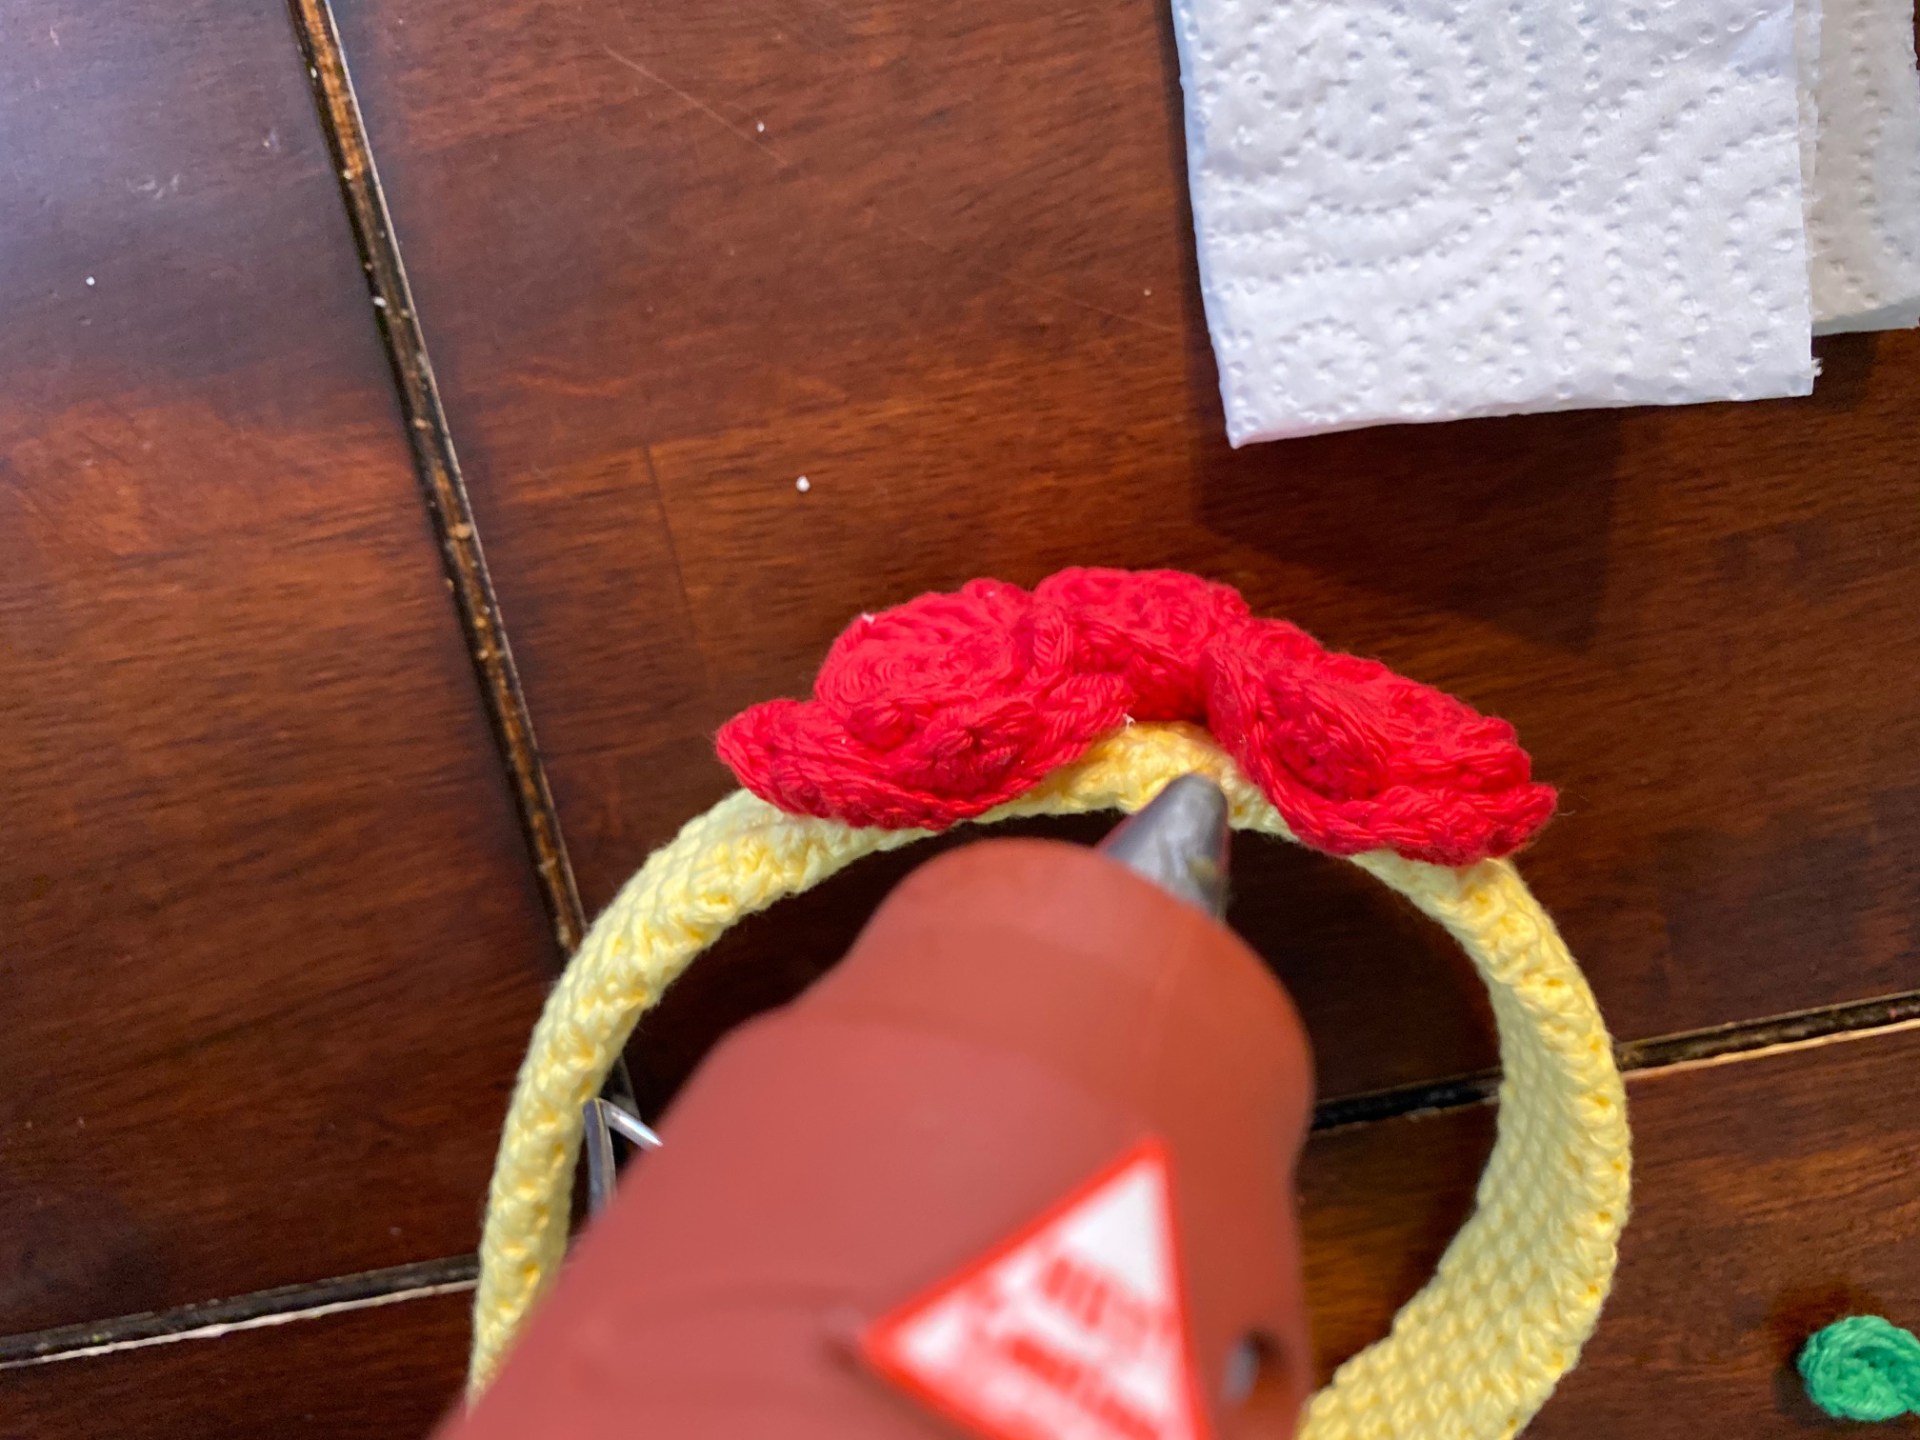
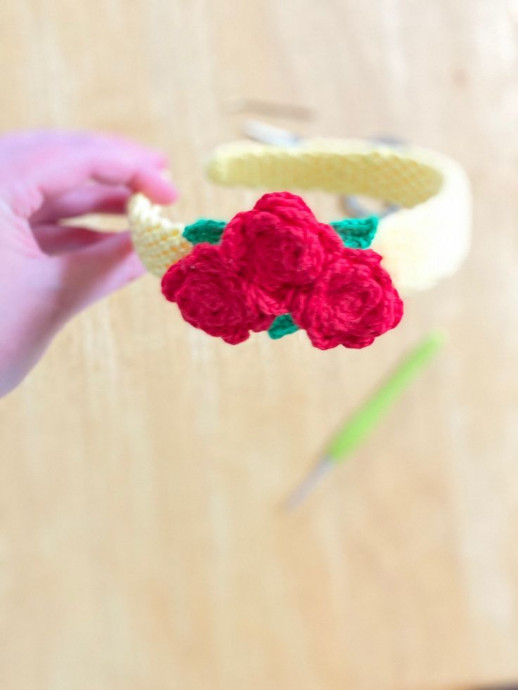
You can glue your roses on wherever you would like! I chose to place mine off center, in a cluster V, with one rose more toward the front, and the other two slightly behind and to the sides. I glued the roses on first, close together, and then used my hot glue gun to work the leaves in, spread out throughout the roses as pictured. Two of the leaves are in the front to the sides of the frontmost rose. The other leaf is in the back between the two other roses.