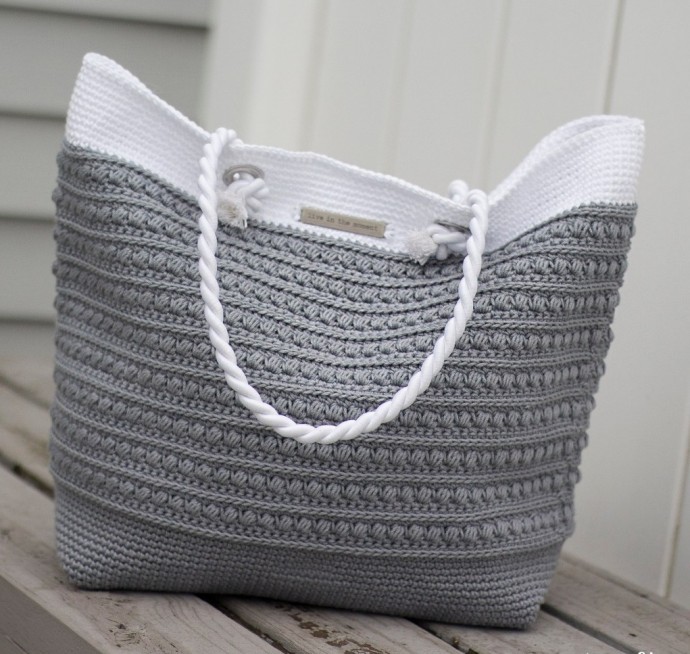
Complete Guide to Crochet Bag Creation


You'll Need:
Lion Brand 24/7 Cotton in 2 colors. 24/7 Cotton is a worsted-weight, mercerized yarn. You will need 4 skeins of COLOR A (Silver) and 1 skein of COLOR B (White);
Crochet hook 3.5 mm;
Yarn needle;
Scissors;
Two 36″ lengths of 3/8″ twisted rope for handles;
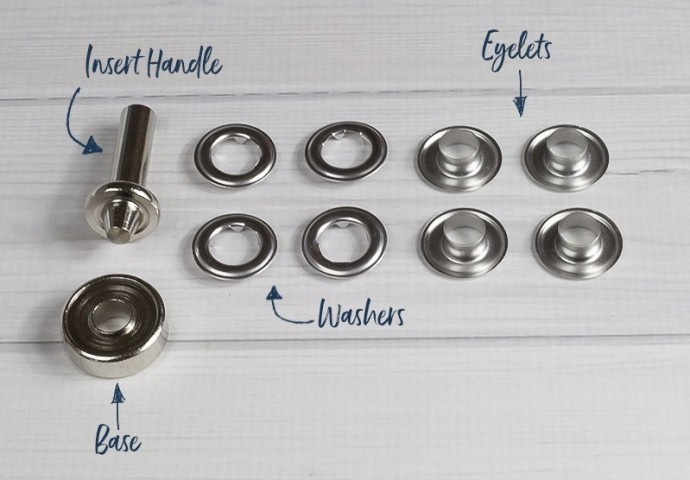
Optional but recommended: Either a size 4 (1/2″ diameter) grommet kit or a size 15/32″ (12mm) eyelet kit;
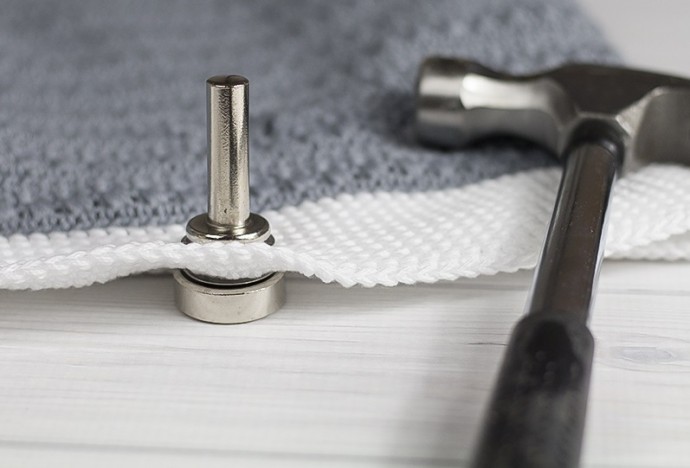
Hammer.
Size:
38 cm width, 30 cm height, 15 cm depth.Gauge:
10 rows of 10 SC = 2″ square.Special Stitches
Large Bean Stitch (LBS)
Insert hook into stitch, yarn over and pull through (2 loops on hook). Yarn over, insert hook into same stitch, yarn over and pull through (4 loops on hook). Yarn over, insert hook into same stitch, yarn over and pull through (6 loops on hook). Yarn over, insert hook into same stitch, yarn over and pull through (8 loops on hook). Yarn over and pull through all 8 loops. Chain 1 to close the stitch. (Because this stitch creates two sets of loops – one when creating the bean, and one when closing the stitch – each completed Large Bean Stitch will count for two stitches in the row or round’s final stitch count.)
3rd Loop Only
Half double crochet stitches have a 3rd loop that we utilize in this pattern. When working in turned rows, as in this pattern, the 3rd loop can be found just below the front loop on the side of the work that is facing you. When instructed to work in “3rd loop only”, insert your hook into this special loop. This creates a delicate braided look on the opposite side of the pattern.
Instructions
To begin: With COLOR A, CH157.
Round 1: SC in 2nd CH from hook and in each remaining CH. Place a stitch marker in the final stitch, then join with a SL ST to the top of the first SC, being careful not to twist the round. (156)
Round 2: CH1. SC in first ST. Place a stitch marker in that stitch. SC in each remaining ST around. Do not join. (156)
Note:
We are now transitioning to a seamless round. Once you SC in the final stitch for Round 2, which we marked with a stitch marker, you can remove the stitch marker – you don’t need it for now. When you move on to Round 3, instead of chaining up, simply put your first SC right into the first stitch of the previous round (also marked with a stitch marker). Continue on seamlessly, moving that stitch marker up with each round to keep track of the first stitch of the round so that you don’t lose your place.Rounds 3-24: SC in each ST around. (156)
At the completion of Round 24, join to the first ST of the round with a SL ST.
Round 25: CH1. HDC in each ST around. Join to the first ST of the round with a SL ST. (156)
Round 26: CH1, turn. SC in 3rd loops of each ST around. Join to the first ST of the round with a SL ST. (156)
Round 27: CH1, turn. SC in each ST across. Join to the first ST of the round with a SL ST. (156)
Round 28: CH1, turn. SK first ST, LBS in next ST. (SK next ST, LBS in next ST) across. Join to the first ST of the round with a SL ST. (156)
Round 29: CH1, turn. HDC in each ST around. Join to the first ST of the round with a SL ST. (156)
Round 30: CH1, turn. SC in 3rd loops of each ST around. Join to the first ST of the round with a SL ST. (156)
Rounds 31-62, or until bag measures between 12-13″ high: Repeat Rounds 27-30. (156)
Round 63: CH1, turn. SC in each ST around. Join to the first ST of the round with a SL ST. (156)
Switch to COLOR B. Fasten off COLOR A.
We are now switching back to a seamless round. Do not join, chain or turn unless instructed.
Rounds 64-68: Do not chain up or turn. SC in first ST and in each ST around. Do not join. (156)
Round 69: SC in each of the first 24 STS. CH2; SK 3 STS. SC in each of the next 24 STS. CH2; SK 3 STS. SC in each of the next 48 STS. CH2; SK 3 STS. SC in each of the next 24 STS. CH2; SK 3 STS. SC in each of the next 24 STS. (144 SC + 4 CH2 holes)
Round 70: SC in each ST around, putting 3SC in each CH2 space from previous round. (156)
Rounds 71-72: SC in each ST around. (156)
Round 73: SC in each ST around. Join with a SL ST to the first SC of the round. (156)
Round 74: CH1, turn. SC in each ST around. Join with a SL ST to the first SC of the round. (156)
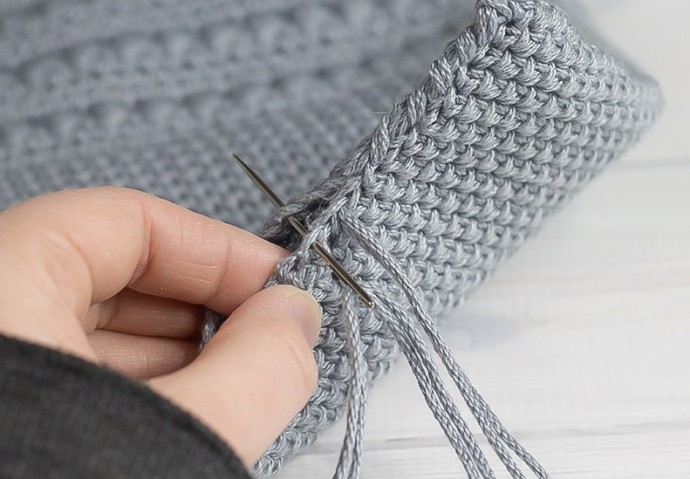
Fasten off. Use your starting tail to sew the gap between the first and last stitches of Round 1 closed, then weave it, and all of your other ends, in.
If you’re wondering what those metallic circles are where the rope attaches to my bag – they’re eyelets. I highly recommend them, but I’ve outlined 3 different options below, and I urge you to read through them to decide which option is best for you:
Attach Eyelets or Grommets
Turn your bag inside out, and follow the instructions on your eyelet/grommet kit to add eyelets/grommets to each of the four holes at the top of the bag.
Sewing the Bottom
Keeping the bag inside out, lay it flat, lining up the grommets. Use COLOR A (a length about 5x the width of the bag) to sew the bottom of the bag closed, stitch by stitch. Fasten off and weave in ends.
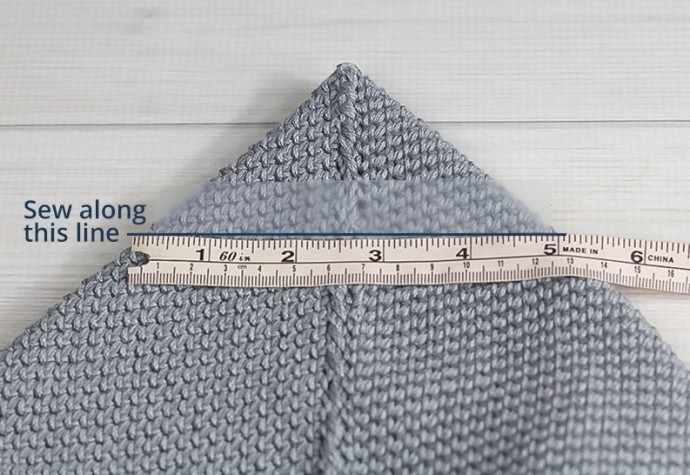
With the bag still inside out, turn it upside down and position the bottom so that one end lays out in a triangular shape, with the seam centered. Use a ruler and a piece of tape to measure and mark a 5″ line across the corner of the base. Sew a seam across the line (through both layers) with COLOR A. Repeat on the opposite side. This will make the inside of the bag roomy.
Adding Rope Handles
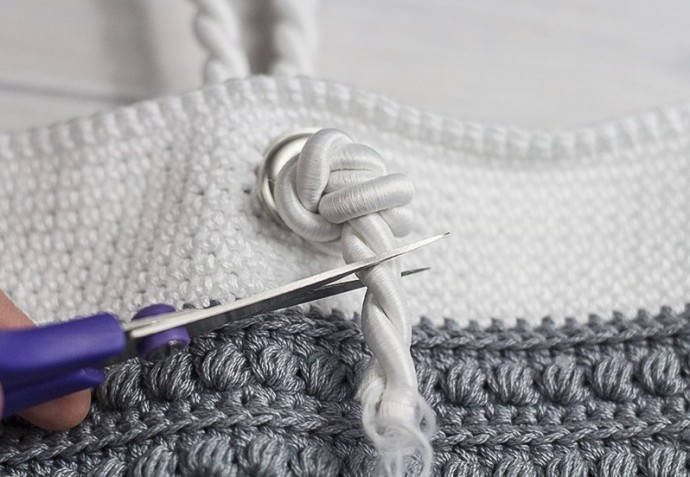
Take your first rope handle and insert it through one of the eyelets, going from the inside of the bag to the outside. Tie a knot near the bottom of the rope on the outside of the bag and pull it tight (you can use your eyelet to help by gently but firmly pulling the rope from the inside of the bag, which will pull the knot against the eyelet and tighten it up). Then, use good scissors to cut the excess rope about 1/2″ below the knot.
Then, do everything again for the 2nd handle on the other side. Note that you’ll want both handles to be the same length, so be sure to compare them when you’re about to tie your final knot to ensure that the handle sizes match.