

DIY Crochet Cat Doorstop: Easy Chunky Yarn Pattern & Step-by-Step Guide

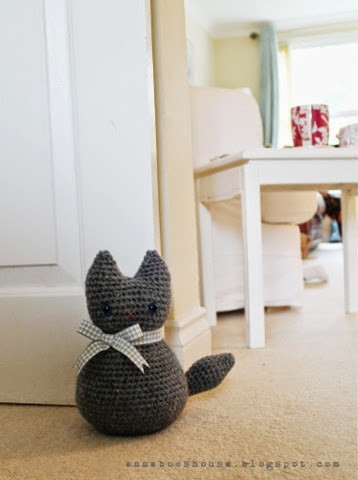
Create a charming crochet cat doorstop to hold doors open and add personality to your home. This project uses chunky yarn for a quick, squishy finish and makes a lovely handmade gift for cat lovers. Below is a complete pattern, materials list, and finishing tips to help you make your own Moggy doorstop.
Materials Needed
You'll need:
- Yarn and hook to match (I used Sublime Chunky Merino x2 50g balls and a 6.5mm hook)
- Polyester toy filling/a bag of sand/rice to add weight
- Stitch marker
- 2x 13mm safety eyes
- Length of contrasting yarn for nose
- Ribbon
Stitches and Abbreviations
I use US terms, so single crochet = same as UK double crochet here.
- Chain (ch)
- Single crochet (sc)
- Stitches (sts)
- Single Crochet 2 Together (sc2tog)
How to Single Crochet 2 Together
To single crochet 2 together:
- Insert hook into next stitch.
- Yarn over, pull up a loop. (2 loops on hook)
- Insert hook into next stitch.
- Yarn over, pull up a loop (3 loops on hook)
- Yarn over and pull through all 3 loops.
Pattern Instructions
Starting from the bottom and working up:
Make 6 sc in magic ring OR ch2, 6 sc in 2nd chain from hook.
- 2sc in each sc (12 sts)
- 2sc in each sc (24)
- Sc 24
- (Sc 1, 2scs in next st) repeat around (36)
- Sc 36
- (Sc 3, 2scs in next st) repeat around (45)
- (Sc 2, 2scs in next st) repeat around (60)
- 8-21. Sc 60
- 22. (Sc 2, sc2tog) repeat around (45) - Begin stuffing/add your bag of sand
- 23. (Sc 3, sc2tog) repeat around (36)
- 24. (Sc 1, sc2tog) repeat around (24)
- 25. Sc 24
- 26. (Sc 1, 2scs in next st) repeat around (36)
- 27-28. Sc 36
- 29. (Sc 5, 2scs in next st) repeat around (42)
- 30-33. Sc 42
- 34. (Sc 5, sc2tog) repeat around (36)
- 35-36. Sc 36
Ears
Ear 1
To make the ears, you will work both 'halves' of the head separately:
- Sc 9, turn, sc 9 (18)
- Add eyes and stitch nose. Stuff as you go.
- Sc2tog, sc 5, sc2tog, sc2tog, sc 5, sc2tog (14)
- Sc2tog, sc 4, sc2tog, sc 6 (12)
- Sc2tog, sc 3, sc2tog, sc 5 (10)
- Sc2tog around (5)
Sew closed.
Ear 2
Repeat rows 37-41.
You will have a slight gap between the ears, which can be sewn closed at the end.
Tail
Make 6 sc in magic ring OR ch2, 6 sc in 2nd chain from hook.
- (Sc 1, 2scs in next st) repeat around (9)
- Sc 9
- (Sc 2, 2scs in next st) repeat around (12)
- Sc 12
- (Sc 1, 2scs in next st) repeat around (18)
- 6-9. Sc 18
- 10. (Sc 1, sc2tog) repeat around (12)
- 11. Sc 12
- 12. (Sc 2, sc2tog) repeat around (9)
- 13-14. Sc 9
Fasten off, leaving a 30cm tail for sewing on later.
Finishing Touches
Stuff the body.
Sew the tail to the side of the body.
Add a ribbon to your Moggy's neck.
Sew the gap between the ears closed.
Tips
- For weight: place a sealed bag of sand or rice inside before finishing with toy filling around it to keep the doorstop steady.
- If the doorstop will be for a child, consider embroidering eyes instead of using safety eyes for extra safety.
- Use a stitch marker to keep track of rounds and ensure shaping stays correct.