Crochet Mini Pocket Tissue Holder

Introduction
Crochet Mini Pocket Tissue Holders are the perfect blend of style and functionality! These adorable little accessories are not only a great way to keep your tissues clean and within easy reach but also add a touch of charm to your everyday essentials. Whether you're on the go or just want to add a pop of color to your bag, these pocket tissue holders are a delightful choice. The beauty of crochet is the endless possibilities for customization - you can choose your favorite colors, patterns, and embellishments to make each holder uniquely yours. So, embrace the cozy and cute vibe of crochet and treat yourself to a practical and charming Mini Pocket Tissue Holder today!
Materials Needed
I used a 6mm hook as my yarn was bulky. You can choose the yarn and suitable hook of your choice.
Starting Chains and Rows
The starting chains will determine how wide the opening will be for tissue to come out. You may want to increase the foundation chain based on the size of your tissue.
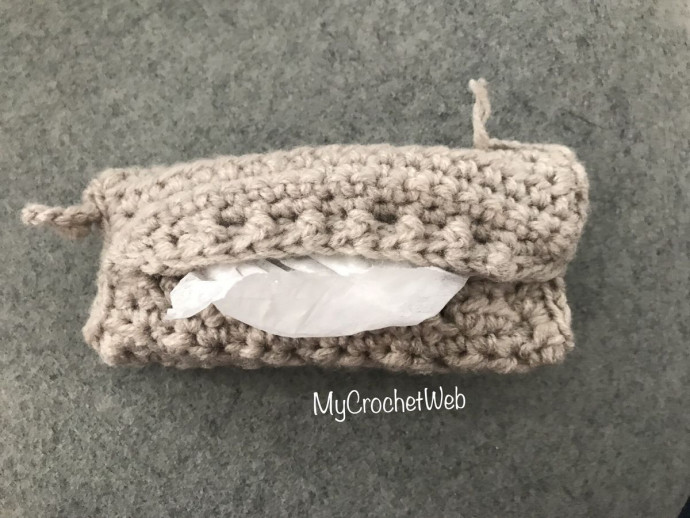
The number of rows will decide the size; I did 18 rows plus a final row and got a rectangle-shaped holder. You may want to increase the number of rows to make it squarish.
Pattern Instructions

Pattern:
- Chain (Ch) 19, sc in second ch from the hook.
- Ch1, turn, hdc in the same stitch, (skip (sk) 1 stitch (sc, hdc) in the next stitch, hdc in the next stitch) repeat till end. The row will end with sk 1 stitch and hdc in the last stitch.
- Ch1, turn, sc in the same stitch and all other stitches.
Repeat row 2
Repeat row 3
Repeat the above two rows until you get the desired size. I did about 18 rows. Do any number of rows you would like but end it with row 3 that is with sc row so the final row can be easy to work.
Final Row
Final Row: ch1, turn, hdc in the same stitch, work (fphdc in next, bphdc in next) repeat till end. Work hdc in the last stitch.
Fasten off.
Assembly Instructions
You will see a square or rectangle shape. I did the sewing keeping the good side facing me so you see the seam. I liked it that way; however, you can do sewing with the wrong side facing you and then flip it inside out to hide all seams.
Folding and Sewing
Holding the piece good side face down, fold the piece by overlapping the last two rows (18th & 19th) over the first two rows (1st & 2nd). Sew 3 stitches from both sides holding the pieces overlapping. Then sew both side openings. While sewing the left side, I did 10-12 chains at the corner and slip stitched at the bottom where I started chaining. This created a loop which you can use to hang this holder onto anything. You can add a keyring to this loop.
Optional Loop Creation
If you want the seam inside, while folding, hold the piece with the wrong side face down, then fold the first two rows above the last two rows and sew 3 stitches at both sides. Also sew the side openings. Flip the piece inside out. The front post back post ribbing row should come on top.
Final Touches
If you forgot to make that loop or you did the seam inside, you can attach yarn at the corner and repeat the same steps. Or simply tie a ribbon or any decorative thread you like.
Your Creation is Ready!
Your holder is ready. The pattern is completely customizable, so use your creativity keeping in mind the size of the tissue you are going to use in it.