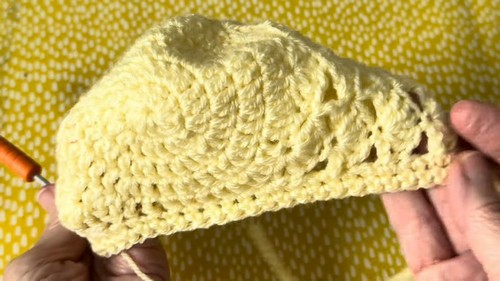
Crochet Baby Bonnet: A Step-by-Step Guide

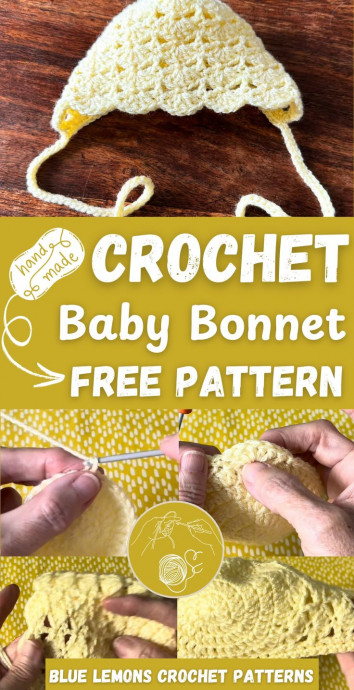
Crochet baby bonnets are just the sweetest little accessories for your tiny bundle of joy! Not only are they incredibly adorable, but they're also practical in keeping your little one snug and cozy. The intricate patterns and soft yarn used in crocheting these bonnets make them a delightful gift for a new parent or a lovely keepsake to cherish for years to come. Whether you're making one yourself or buying one handmade, a crochet baby bonnet is sure to add a touch of charm to any baby's outfit!
Materials
- Double knit weight 3 yarn
- Crochet hook (choose size based on baby’s age):
- 0 to 6 months: 3.0 mm
- 6 to 12 months: 3.5 mm
- 1 to 3 years: 4.0 mm
- Yarn needle
- Stitch marker (optional but helpful)
Gauge
Ensure your gauge matches the tutorial for accurate sizing.
Adjust hook size if your stitches are too tight or too loose.
Instructions
Crown of the Bonnet (Rounds 1–5)
Round 1: Forming the Circle
- Start with a slip knot.
- Chain 3.
- Work 10 double crochets into the first chain.
- Slip stitch to the first DC to join.
- Pull the tail to close the center hole.
Round 2: First Increase Round
- Chain 2.
- Work 2 double crochets into each stitch around.
- You should have 20 stitches at the end.
- Slip stitch to the first DC to join.
Round 3: Second Increase Round
- Chain 2.
- Pattern: 2 DC into first stitch, 1 DC into next stitch. Repeat around.
- You should have 30 stitches.
- Join with a slip stitch.
Round 4: Third Increase Round
- Chain 2.
- Pattern: 2 DC into first stitch, 1 DC into each of next 2 stitches. Repeat around.
- You should have 40 stitches.
- Join with a slip stitch.
Round 5: Final Increase Round
- Chain 2.
- Pattern: 2 DC into first stitch, 1 DC into each of next 3 stitches. Repeat around.
- You should have 50 stitches.
- Join with a slip stitch.
Shell Stitch Section (Worked in Rows)
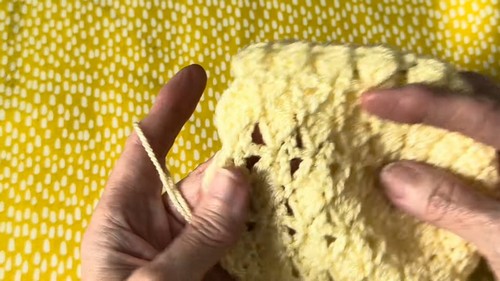
Row 1: Start Shell Pattern
- Chain 1 and turn.
- 1 single crochet in the first stitch.
- Pattern: Skip 2 stitches, work 5 DC in the next stitch (shell), skip 2 stitches, 1 SC in next stitch. Repeat.
- Leave a gap of 6 stitches unworked at the end for the neck opening.
- End with 1 SC after the final shell.
Row 2: Chain Bridge Row
- Chain 5 and turn.
- 1 SC into the third DC of the shell below.
- Chain 2.
- 1 DC into the SC below.
- Chain 2.
- Repeat the pattern of SC into shell, chain 2, DC into SC below.
- End the row with 1 DC into the first SC of the row below.
Row 3: Stacking Shells
- Chain 1 and turn.
- 5 DC into the SC from the row below.
- 1 SC into the top of the DC from the previous row.
- Repeat shell and SC placement across.
- End with 1 SC into the turning chain from Row 2.
Repeat Shell Rows
Repeat Row 2 and Row 3 three more times. Adjust the number of repeats as needed to ensure the bonnet depth fits the baby comfortably.
Finishing the Bonnet
Edging and Ties
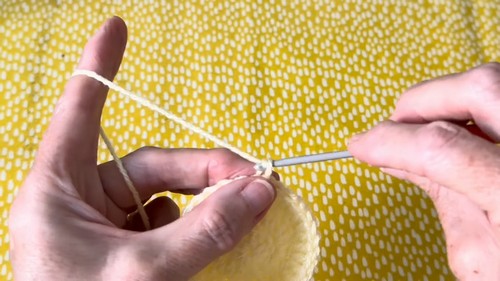
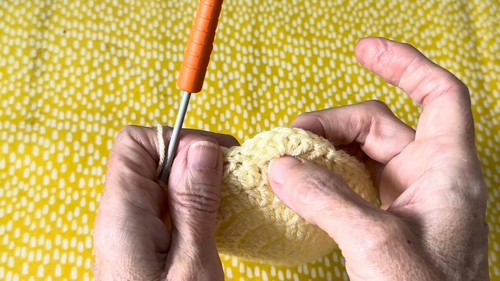
Border
- Chain 1.
- Work single crochet stitches along the side, back, and other side of the bonnet.
First Tie
- After completing one side, chain 45.
- Slip stitch into each chain, starting from the second chain from the hook, back toward the bonnet.
- Continue working SC across the back of the bonnet to the other side.
Second Tie
- At the opposite corner, chain 45 again.
- Slip stitch back to the bonnet starting from the second chain from the hook.
Finishing Touches
- Cut the yarn and pull through to fasten off.
- Use a yarn needle to weave in all loose ends.
- For durability, split the yarn as you weave to secure it better.