Crochet Wedding Shrug: A Perfect Handmade Touch for Your Special Day

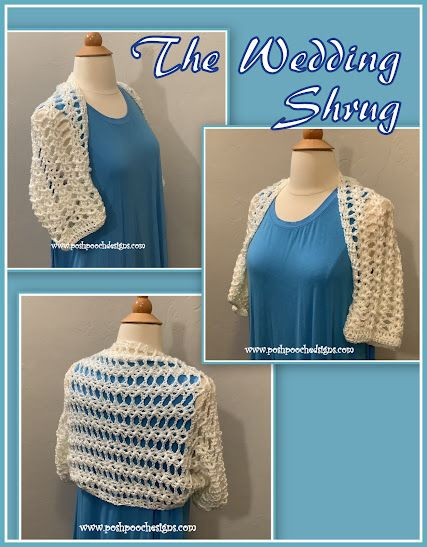
If you're looking to add a touch of handmade charm to your wedding attire, a Crochet Wedding Shrug is the perfect choice! Delicate and elegant, this piece can provide warmth and style on your special day. Whether you opt for intricate lace patterns or simple stitches, the handmade nature of a crochet shrug adds a personal touch to your ensemble. Plus, it's a versatile accessory that can be cherished and worn for years to come, reminding you of your beautiful day every time you slip it on. So, embrace the cozy and whimsical vibes of a Crochet Wedding Shrug, and get ready to swoon over its unique beauty!
Skill Level
Easy
Materials
- Crochet Hook – I / 5.5mm
- Yarn – Med (4) Acrylic – Yarn Bee/ Soft Secret/ White – 8 oz. / 400 yds.
- Yarn Needle
- Tape Measure - measure as you go for a good fit.
Stitches Used
- Chain (ch)
- Double Crochet (dc)
- Skip (sk)
- Space (sp)
- Foundation Double Crochet (FDC)
- Shell Stitch (shst) – (2dc, ch1, 2dc in the same st)
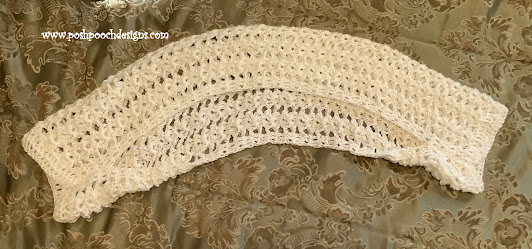
Dimensions
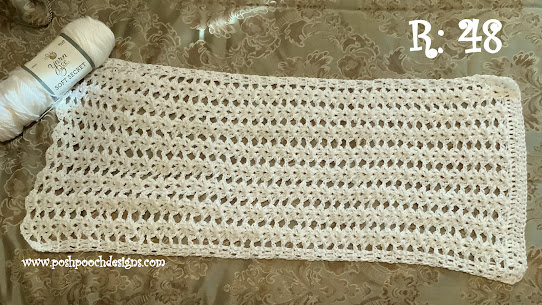
Size: 15 X 43 inches
3 rows of Shst = 2 inches
Multiples: 4 + 9 FDC
Notes
Ch3 counts as a dc
Pattern Instructions
RND 1: 41 FDC, turn, ch3 (41 FDC)
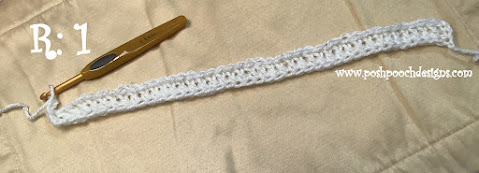
RND 2: 1 dc in each FDC, turn, ch 3 (41 dc)
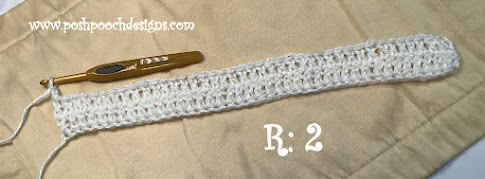
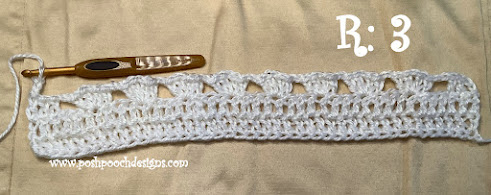
RND 3: 1 dc in the next 2 dc, ch2, sk 3 dc, shst in the next dc,
*ch2, sk 3 dc, shst in the next dc*
Repeat from * to * 6 more times,
Ch2, sk 3 dc, 1 dc in the last 3 dc, turn, ch 3
(6 dc, 8 shsts)
RND 4: 1 dc in the next 2 dc, ch2, shst in the ch1 sp of the next shst,
*ch2, shst in the ch1 sp of the next shst*
Repeat from * to * 6 more times,
Ch2, 1 dc in the last 3 dc, turn, ch 3
(6 dc, 8 shsts)
RND 5: 1 dc in the next 2 dc, ch2, shst in the ch1 sp of the next shst,
*ch2, shst in the ch1 sp of the next shst*
Repeat from * to * 6 more times,
Ch2, 1 dc in the last 3 dc, turn, ch 3
(6 dc, 8 shsts)
Repeat RND 6 – RND 48
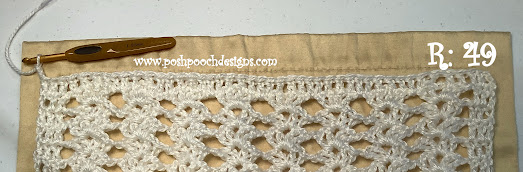
RND 49: 1 dc in the next 2 dc,
*1 dc in the next 2 dc of the next shst,
Sk the ch1 sp, 2 dc in the next 2 dc, 1 dc in the next ch2 sp*
Repeat From * to * across,
Sk the last ch2 sp, 1 dc in the last 3 dc, turn, ch 3 (41 dc)
RND 50: 1 dc in each dc across, tie off weave in your ends.
Forming The Arm Holes
The Shrug in half, lengthwise.
Join yarn to the outside edge, wrong side facing out.
Single crochet evening, stitching 2 sides together for approximately 3 inches. Tie off, weave the end in securely.
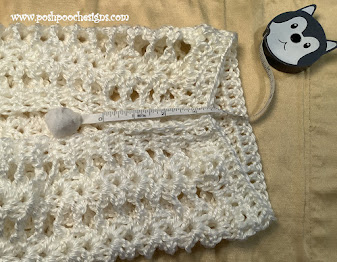
Repeat on the other side.