Crochet Distressed Shrugs: A Stylish Wardrobe Essential

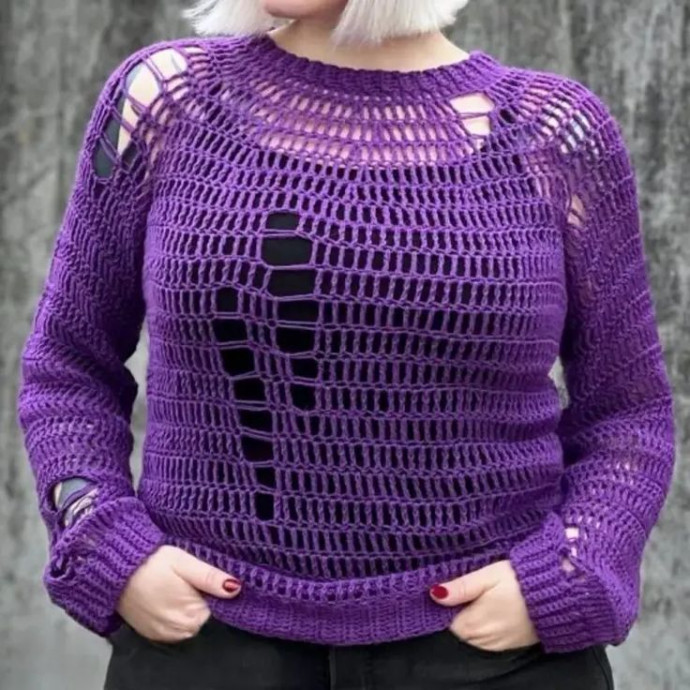
Crochet distressed shrugs are the perfect versatile addition to any wardrobe! With their cozy yet stylish design, they effortlessly elevate any outfit. The distressed detail adds a touch of edginess, making it a unique and trendy piece. Whether you're looking to layer up for a chilly evening or add a chic flair to a simple top, this shrug has got you covered. Plus, the handmade crochet adds a personal touch that will surely make you stand out in the best way possible. So, wrap yourself in comfort and style with a crochet distressed shrug - you'll be turning heads and feeling fantastic!
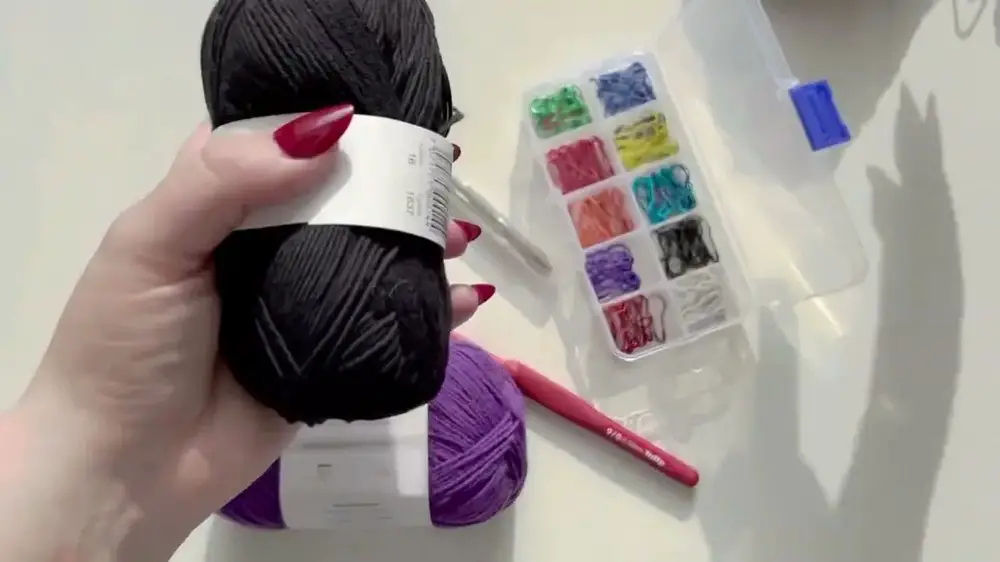
Materials
- Yarn (recommended size: 3 mm, use a 5.5 mm hook; for 4 mm yarn, use an 8 mm hook)
- Crochet hook (5.5 mm or 8 mm depending on yarn used)
- Stitch markers (12 for foundation, additional for marking holes)
- Scissors
- Needle
Glossary
- CH: Chain
- SC: Single Crochet
- DC: Double Crochet
- TR: Triple Crochet
- SL ST: Slip Stitch
- inc: Increase (2 stitches in one stitch)
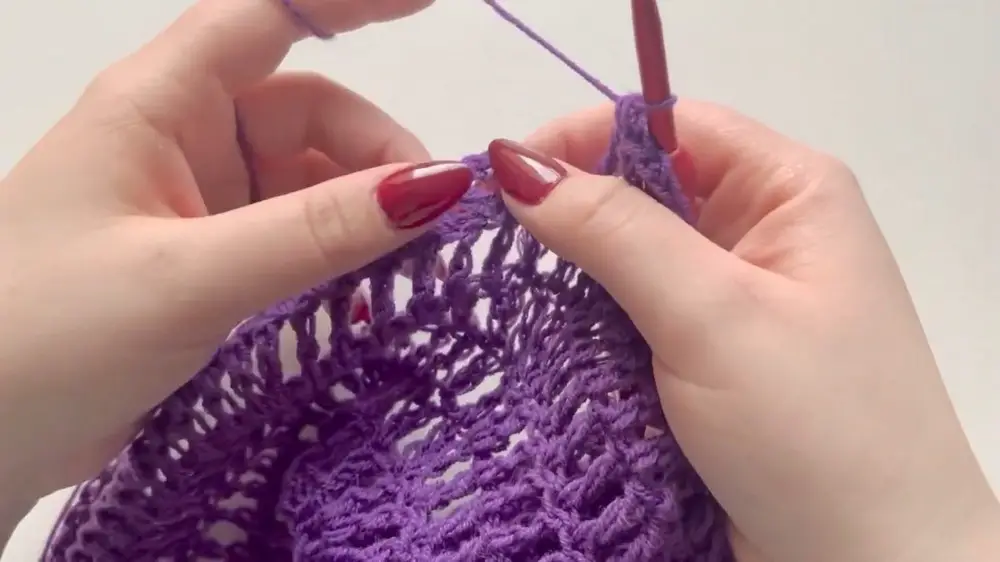
Step-by-Step Pattern
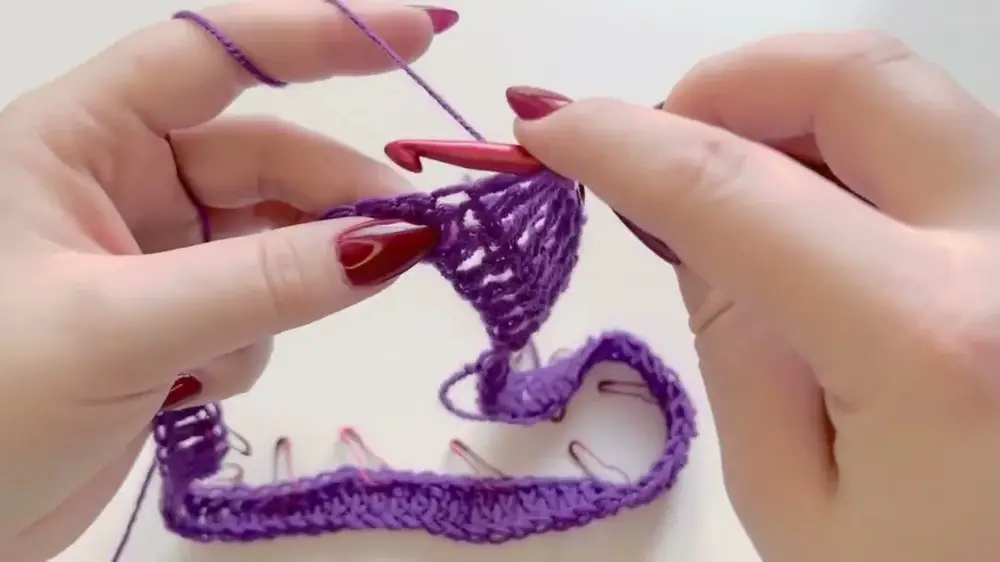
Foundation Chain and Neckline
Chain
Chain multiple of 12 stitches that fit over your head.
Example: 72 stitches (which is 6 multiples of 12)
Place Stitch Markers
Divide the chain by 12 and place a stitch marker at each division.
Place the first stitch marker at the first stitch from the hook.
Join to Work in Rounds
Ensure the chain isn’t twisted. Join with a SL ST to form a loop.
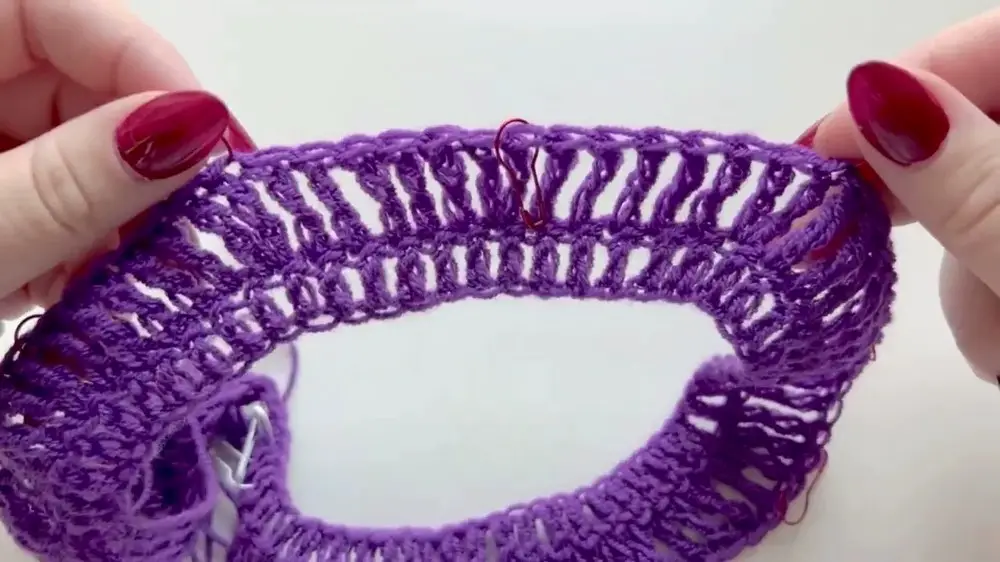
Row 1 (DC Row)
DC in Each Stitch
Start with a stacked SC (1 SC in the first stitch, 1 SC in the left loop of the first SC).
DC in each stitch around, working around the stitch markers. Join with a SL ST to complete.
Row 2 (TR Row)
TR and Increase
Start with a stacked SC (3 single crochets in one stitch).
TR in each stitch until reaching the first stitch marker.
At each stitch marker: 1 TR, place stitch marker in TR, then inc (another TR in the same stitch). Continue with TR in between markers.
Creating Holes
Mark the Holes
Skip the desired number of stitches for the hole and mark them with stitch markers (e.g., skip 3 stitches).
Pull up a loop to the length of the skipped stitches and continue TR in the stitch after the marked area.
Adjust Holes Size
Next rows: Continuously adjust holes by either adding or removing stitches.
To make the hole bigger, skip more stitches. To make the hole smaller, TR in some part of the skipped area.
Ensure holes are randomly placed for a distressed look.
Repeating Rows
Continue Rows
Repeat TR rows until desired length, adding or closing holes as needed.
If making a crop length: stop when reaching the desired length. For full length: continue pattern until reaching underarm.
Creating Armholes
Separate Sleeves and Body
Count stitches and mark for sleeves, front, and back (Example: divide stitches into 22 for sleeves, 44 for front, 44 for back).
Add chains under the arm to create armholes (e.g., 11 CH).
Body
Continue Body
DC/TR in round, adding holes as desired. Continue without increases. Adjust length as desired.
Sleeves
Starting Sleeves
Attach yarn at the bottom of the armhole.
TR in each chain underarm and around the sleeve. For each row: SL ST to join, turn, and continue TR.
Optional Ribbing
Change to smaller hook size and use two strands for a tighter fit.
Chain as per desired length of ribbing. SC in each stitch of the chain. Attach to body or sleeve with slip stitches, turn, and repeat.
Optional Neckline Ribbing
Neckline Ribbing
With a smaller hook, chain about 4 chains long. SC in each chain. Attach to neckline with slip stitches. Turn and repeat until the full neckline is covered with ribbing.
Final Adjustments
Finishing Up Sleeves
Ensure both sleeves have the same stitch count and hole placement. Add any final holes or tighten rows.
Fasten Off
Finish with a slip stitch and weave in ends with a needle.
Tips
- Regularly try on the shirt to ensure it fits properly.
- Make new holes in different rows to achieve a used, distressed look.
- Always ensure symmetry for the best final appearance.