Crochet Top With Puff Sleeves


Introduction
Have you seen the adorable Crochet Top with Puff Sleeves? It is the perfect blend of trendy and comfortable! The puff sleeves give it a fun and stylish look, while the crochet detailing adds a touch of elegance. Whether you're heading to a brunch with friends or a casual day out, this top is sure to make you stand out. You can easily pair it with your favorite jeans or skirt for a chic and effortless outfit. Embrace your unique style with this charming Crochet Top with Puff Sleeves!
Materials Needed
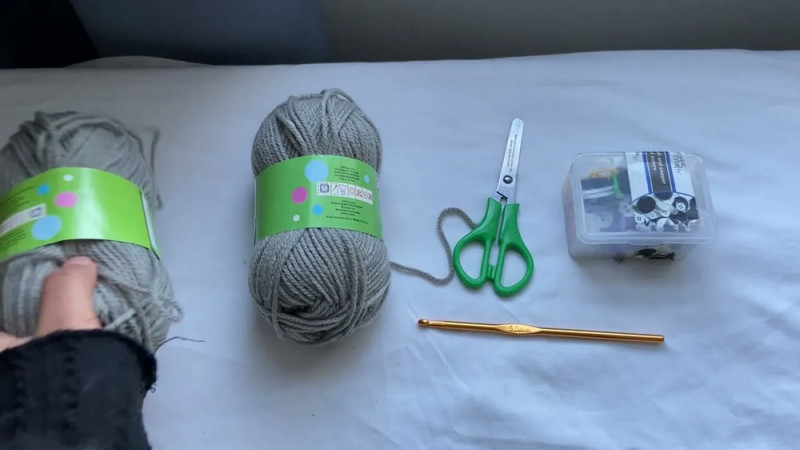
- Yarn: Weight 4 yarn (Light Gray recommended).
- Crochet Hook: 5mm for the body of the top, 4mm for the puff sleeves.
- Scissors: For cutting loose ends.
- Stitch Markers: Optional but helpful for marking straps and puff sleeves.
Abbreviations
Below are the abbreviations for stitches used in the pattern:
- Ch: Chain
- SC: Single Crochet
- HDC: Half Double Crochet
- DC: Double Crochet
- SL ST: Slip Stitch
Step-by-Step Pattern
1. Creating the Body Panel
Step 1: Chain Foundation
Make a slip knot and chain 81 stitches. This will form the starting row for the body panel. This foundation chain is designed to cover the back but not fully (ideal for sizes Small to Medium).
Step 2: Row 1 (HDC)
Starting from the second chain from the hook, yarn over, insert your hook, pull through, yarn over again, and pull through all three loops for a Half Double Crochet. Continue working HDC across the row.
Step 3: Building Rows
Row 2: Chain 1, turn your work, and HDC across the row. Repeat this process, chaining 1 at the end of every row to maintain consistency.
Step 4: Continue Rows
Work 27 rows or until the rectangle reaches your desired length. This rectangle will act as the base panel of the top.
2. Building the Border
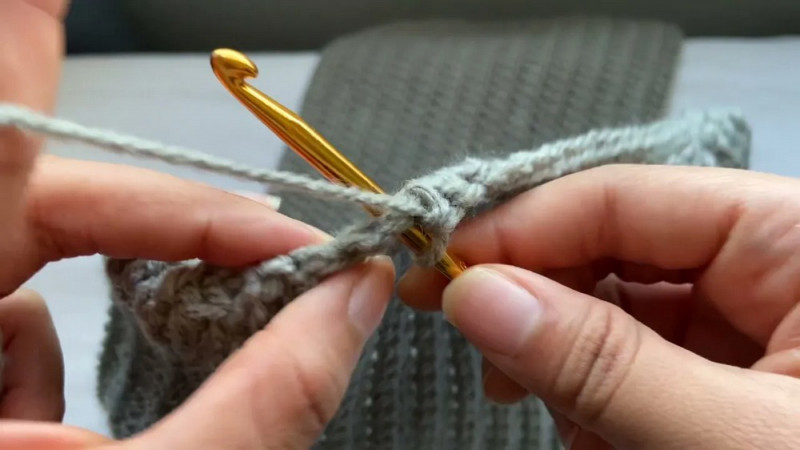
Step 5: Adding HDC Around Edges
Chain 1 and work HDC stitches across the edges of the rectangle. Ensure the spacing is even, without too many or too few stitches.
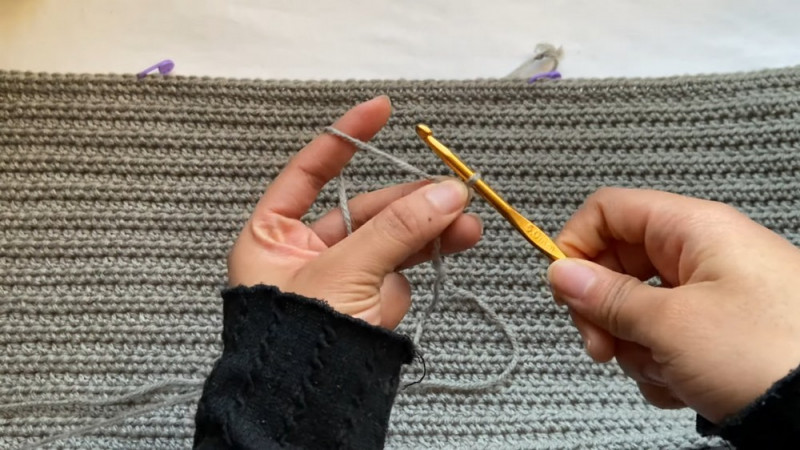
Step 6: Decorative Border
Sequence:
- HDC into the first stitch.
- Chain 1, skip one stitch, insert 3 DC stitches into the next stitch. Repeat this sequence: Chain 1, skip one stitch, 3 DC, and finish the row.
- For the next row, work SC stitches all across.
3. Creating the Straps
Step 7: Mark Strap Placement
Measure your rectangle and mark where the straps will attach using stitch markers.
Step 8: Adding Chains for Straps
At the marked points, insert your hook, yarn over, and create 42–44 chains (or measure straps against your body for accuracy).
Step 9: Reinforcing Straps
Switch to a 4mm hook and work DC stitches along the straps. Ensure they are straight and not curving.
Crafting Puff Sleeves
Step 10: Preparing Sleeves
Attach yarn starting from the base of your straps.
Step 11: Building Sleeves
Row 1: Work DC stitches all around the sleeve opening. Row 2: Work 2 DC into every stitch to increase the puff sleeve size.
Step 12: Continuing Rows
Work 8 rows of DC stitches without any increases.
Step 13: Decreasing for Puff Shape
Begin decrease rows: Work stitches together to reduce the sleeve circumference (Yarn over, insert hook into stitch, yarn over and pull through two loops, work into next stitch, and pull through the remaining loops). Repeat decrease rows until sleeves form a puff shape.
Step 14: Final Row (SC)
Finish sleeves with a row of SC stitches to define the edges and give a clean finish.

Back Lace Tie
Step 15: Creating Chains
Chain 200–250 stitches, depending on how long you want the lace ties to be.
Step 16: Reinforcing Chains
Work SL ST stitches across all chains for durability.
Step 17: Threading
Insert the lace tie through the edges of the back opening, threading it back and forth like shoelaces.
Finishing Touches
Step 18: Securing Loose Ends
Cut all excess yarn and weave in ends.
Step 19: Final Adjustments
Try on the top to assess fit. Adjust straps and lace ties if necessary.