Crochet Cardigan For Baby Girl With Flowers


Crocheting a cardigan for a baby girl with delicate flowers is such a sweet and special project that will surely bring joy to both the crafter and the recipient! The soft yarn in gentle hues combined with the intricate flower details create a lovely and charming garment perfect for your little one. Imagining the coziness and cuteness of a handmade cardigan adorned with pretty flowers just warms the heart. It's a delightful way to show love and care through the art of crafting, making each stitch a little piece of handmade happiness for your precious baby girl to cherish. Happy crocheting!
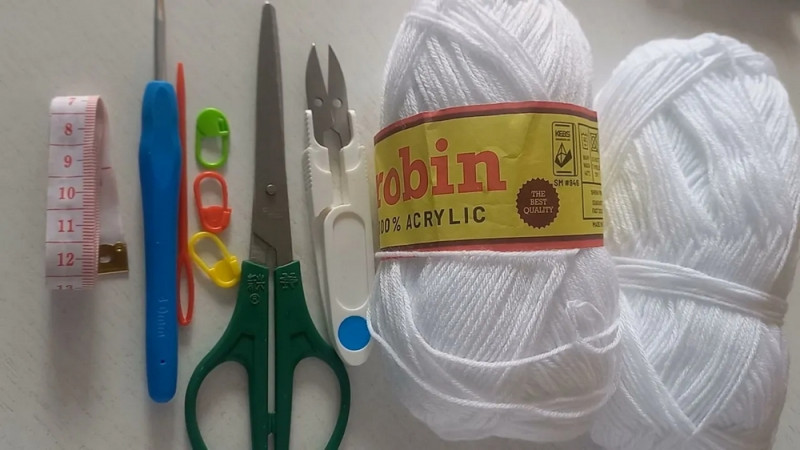
Materials Needed
- Yarn: Robin yarn (small size, doubled)
- Crochet hook: 4.0 mm for the body, 3.5 mm for the ribbing
- Scissors
- Needle for sewing
- Measuring tape
- Stitch markers
Abbreviations
Below are the common crochet abbreviations used in the pattern:
- Ch: Chain
- SC: Single crochet
- SS/Slip Knot: Slip stitch
- Turn: Change directions to begin working back across
Step-by-Step Instructions
1. Sleeves
Start the Sleeve
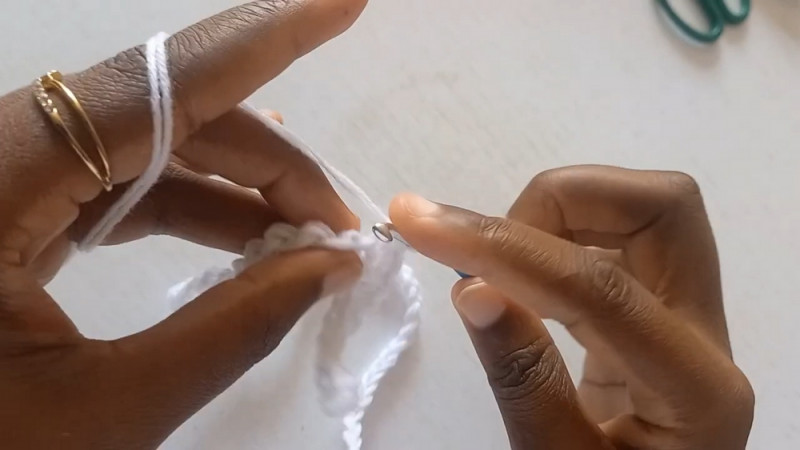
Double your yarn since the yarn is small, and make a slip knot.
Using a 4.0 mm hook, chain 45 chains.
Work the First Row
Make a single crochet (SC) along the back loop of the chain. Place a stitch marker at the 10th chain. At this point, make 10 slip stitches for the marked chains, then SC for the rest of the row.
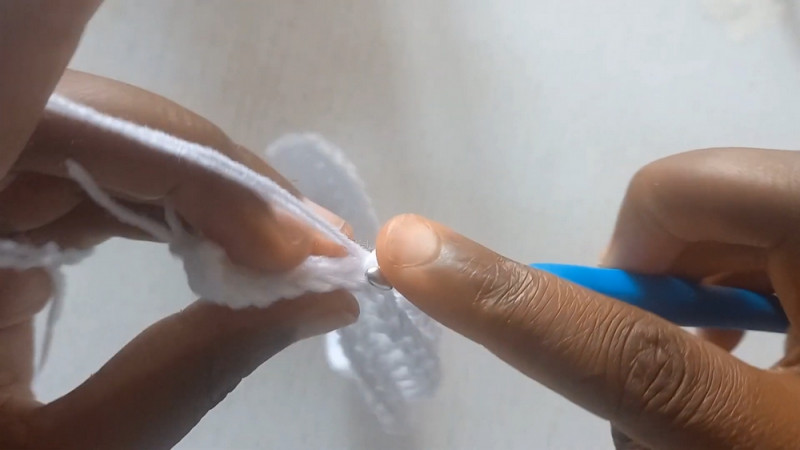
Turn Your Work
Chain 1 and work 10 slip stitches, then proceed with single crochets for the remainder of the row. Repeat this pattern.
Continue
Crochet using the same pattern (10 slip stitches at the beginning, SC for the rest) until the sleeve reaches the desired length.
Finish the Sleeve
Once you complete the rows, chain 1 and cut your yarn.
Make the Second Sleeve
Repeat the exact steps to make the second sleeve, ensuring both sleeves are equal in size.
2. Front Panels
Start the First Front Panel
Chain 35 chains (recommended measurement is 7.5–8 inches based on the baby’s size).
Work the First Row
Similar to the sleeves, work with SC across the back loop. Add 8 slip stitches at the beginning of each row and SC for the rest.
Continue
Keep adding 8 slip stitches at the beginning of each row, then crochet SC for the remaining chains until the panel reaches the required length.
Finish the Panel
Once you complete the rows, chain 1 and cut your yarn.
Make the Second Front Panel
Follow the same steps to make the second front panel, ensuring both panels are equal in size.
3. Back Panel
Start the Back Panel
For the back panel, make a chain that matches the same length as the front panels (35 chains or more, depending on customization).
Work the First Row
Similar to the front panels, work with SC across the back loop, then add 8 slip stitches at the beginning of each row.
Additional Rows
Continue working in the same pattern until the back panel has more rows than the front panels (to provide a proper fit).
Finish the Panel
Chain 1 and cut your yarn when complete.
4. Ribbing
Start the Ribbing
Use a 3.5 mm hook for tighter ribbing. Chain 8 chains.
Work in Rows
SC across the ribbing, chain 1 at the end, and turn your work. Continue with SC rows, ensuring a consistent thickness in the ribbing.
Finish the Ribbing
Adjust the length of ribbing to fit the bottom edge of the cardigan. Since this depends on the cardigan size, measure your work carefully.
5. Assembly
Prepare All the Pieces
Lay out both sleeves, front panels, back panel, and ribbing. Ensure all pieces match up equally in measurement and size.
Join the Sleeves
Using a needle, sew the sleeves together first.
Attach the Sleeves
Sew the sleeves onto the front panels and back panel. Make sure the seams are neat and align properly.
Join the Front and Back Panels
Sew the front panels to the back panel using a needle.
Attach the Ribbing
Connect the ribbing to the bottom edge of the cardigan, ensuring it fits snugly and is evenly distributed.
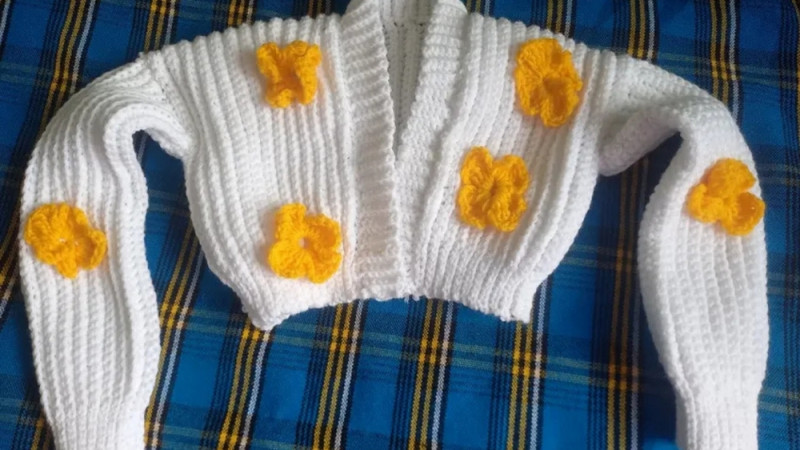
Decoration
Optional Embellishments
Add yarn flowers or other decorations to the cardigan for personalization.