Crochet Sailboat Hanging Towel

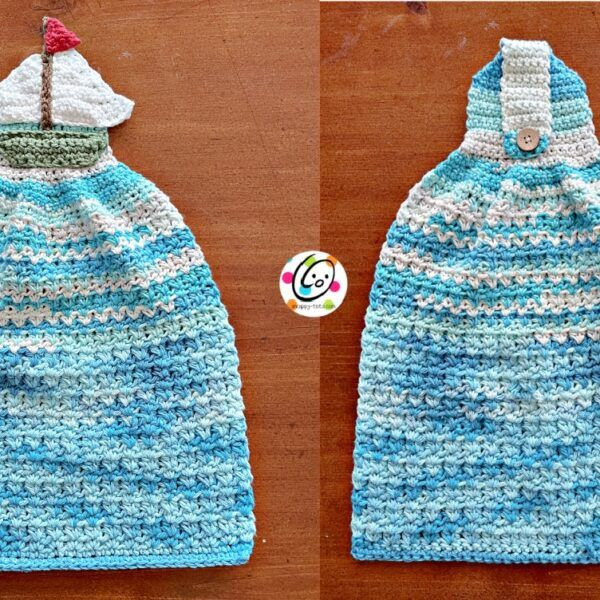
Add a touch of seaside charm to your kitchen with the adorable Crochet Sailboat Hanging Towel! This nautical-inspired towel not only looks cute but is also super handy for keeping within reach while you cook or clean. The crochet sailboat design brings a whimsical flair to your decor and is sure to make you smile every time you see it hanging in your kitchen. Perfect for adding a cozy and coastal vibe to your home, this delightful towel is a great choice for anyone who loves a bit of quirky charm in their everyday items.
Materials
Yarn: 320-340 yds worsted weight COTTON yarn
Sample Yarns: Sugar and Cream in the following colors
Towel: 140 yds (I did the bottom half with “Swimming Pool” and the top half with “Spring Blue Stripes”)
Boat: less than 20 yards each – White, Jade Mist (bottom of boat), Red
Crochet Hooks: H (5mm), I (5.5mm)
Notions
Yarn needle for weaving in ends, ¾” button, sewing needle, matching thread.
Optional: Measuring tape, scissors
Measurements
Finished Measurements: 17” long x 12” wide
Gauge: not needed for this project.
Tips
The first stitch of each row is worked into the same stitch as the turning chain.
Numbers at the beginning of each line may refer to steps and not indicate the number of rows.
Stitch count remains the same unless noted at the end of row/round.
You could use a different applique on the top or leave it empty.
Directions
This project starts at the bottom of the cloth. Note: There is an additional row of sc on the bottom edge that will be added when the rest of the cloth is complete.
RND 1: With an I hook and cotton yarn, ch 41, sc in 2nd ch from hook and in each ch across. (40sts)
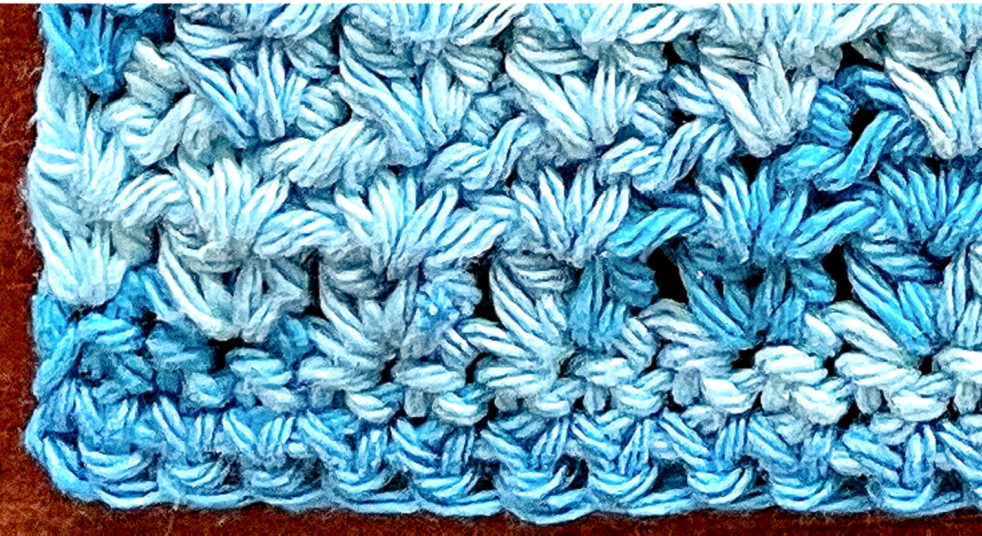
RND 2: The beginning ch 2 counts as a stitch until noted in pattern. Ch 2, turn, hdc in the same st, *sk 1, 2hdc in the next st*, repeat to end of row. (40 sts, 20 pairs of hdc)

RND 3: Ch 2, turn, hdc before the first post below, 2hdc in the middle of each pair of hdc from previous row.
Note: Make sure the st count remains at 40 sts and 20 pairs of hdc until the main part of the cloth is complete. Remember the beginning ch 2 + hdc counts as a pair.
RND 4: Ch 2, turn, hdc before the first post below, 2hdc in the middle of each pair of dc from previous row.
RND 5: Repeat the previous row until there are a total of 33 rows of hdc.
RND 6: Ch 1, turn, *sc 8, sc2tog*, repeat to end of row. (36sts)
RND 7: Ch 1, turn, *sc 7, sc2tog*, repeat to end of row. (32sts)
RND 8: Ch 1, turn, *sc 6, sc2tog*, repeat to end of row. (28sts)
RND 9: Ch 1, turn, *sc 5, sc2tog*, repeat to end of row. (24sts)
RND 10: Ch 1, turn, *sc 4, sc2tog*, repeat to end of row. (20sts)
RND 11: Ch 1, turn, *sc 3, sc2tog*, repeat to end of row. (16sts)
RND 12: Ch 1, turn, sc in the same st and in each st to end of row.
RND 13: Repeat the previous row for an additional 10 rows.
RND 14: Ch 1, turn, *sc 3, sc2tog*, repeat to end of row. (16sts)
RND 15: Ch 1, turn, sc2tog, sc 12, sc2tog. (14sts)
RND 16: Ch 1, turn, sc2tog, sc 10, sc2tog. (12sts)

RND 17: Ch 1, turn, sc2tog, sc 8, sc2tog. (10sts)
RND 18: Ch 1, turn, sc2tog, sc 6, sc2tog. (8sts)
RND 19: Ch 1, turn, sc2tog, sc 4, sc2tog. (6sts)
RND 20: Ch 1, turn, sc in the same st and in each st to end of row.
RND 21: Repeat the previous row for an additional 13 rows.
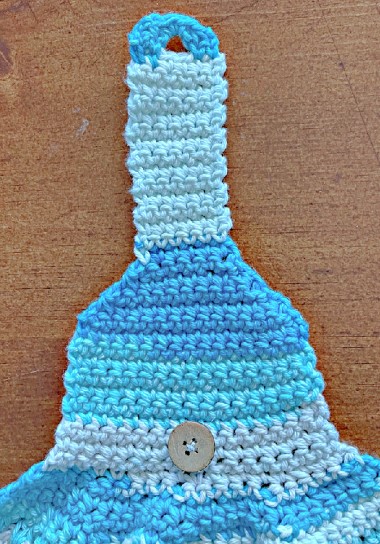
RND 22: This step creates the buttonhole. Ch 1, turn, sc in the same st, sc, ch 2, sk 2, sc 2.
RND 23: Ch 1, turn, sc in the same st, sc, 2sc in the ch space, sc, sl st in the last st. Finish off and weave in ends.

Button
The button is sewn to the wrong side of the cloth. Make sure the button is slightly bigger than the buttonhole. Use a sewing needle and matching thread to sew the button to the center bottom of the smaller top section.
Boat
Bottom
1. With an H hook and worsted weight yarn (green in sample), ch 16, sc in 2nd ch from hook and in each ch across. (15sts)
2. Ch 1, turn, sc2tog, sc 11, sc2tog. (13sts)
3. Ch 1, turn, sc2tog, sc 9, sc2tog. (11sts)
4. Ch 1, turn, sc2tog, sc 7, sc2tog. (9sts) Finish off, leaving a long tail for sewing in place.
Large White Sail
1. With an H hook and white yarn, ch 12, sc in 2nd ch from hook and in each ch across. (11sts)
2. Ch 1, turn, sc in same st, sc 8, sc2tog. (10sts)
3. Ch 1, turn, sc2tog, sc 8. (9sts)
4. Ch 1, turn, sc in same st, sc 6, sc2tog. (8sts)
5. Ch 1, turn, sc2tog, sc 6. (7sts)
6. Ch 1, turn, sc in same st, sc 4, sc2tog. (6sts)
7. Ch 1, turn, sc2tog, sc 4. (5sts)
8. Ch 1, turn, sc in same st, sc 2, sc2tog. (4sts)
9. Ch 1, turn, sc2tog, sc 2. (3sts)
10. Ch 1, turn, sc in same st, sc2tog. (2sts)
11. Ch 1, turn, sc2tog. (1st) Finish off, leaving a long tail for sewing in place.
Small White Sail
1. With an H hook and white yarn, ch 10, sc in 2nd ch from hook and in each ch across. (9sts)
2. Ch 1, turn, sc in same st, sc 6, sc2tog. (8sts)
3. Ch 1, turn, sc2tog, sc 6. (7sts)
4. Ch 1, turn, sc in same st, sc 4, sc2tog. (6sts)
5. Ch 1, turn, sc2tog, sc 4. (5sts)
6. Ch 1, turn, sc in same st, sc 2, sc2tog. (4sts)
7. Ch 1, turn, sc2tog, sc 2. (3sts)
8. Ch 1, turn, sc in same st, sc2tog. (2sts)
9. Ch 1, turn, sc2tog. (1st) Finish off, leaving a long tail for sewing in place.
Pennant Flag
1. With an H hook and worsted weight yarn (red in sample), ch 5, sc in 2nd ch from hook and in each ch across. (4sts)
2. Ch 1, turn, sc2tog, sc 2. (3sts)
3. Ch 1, turn, sc2tog, sc. (2sts)
4. Ch 1, turn, sc2tog. Finish off, leaving a long tail for sewing in place.
Center Pole
1. With an H hook and worsted weight yarn (brown in sample), ch 16, sc in 2nd ch from hook and in each ch across. (15sts)
2. Ch 1, turn, sl st in each st to end of row. Finish off, leaving a long tail for sewing in place.
Assembly
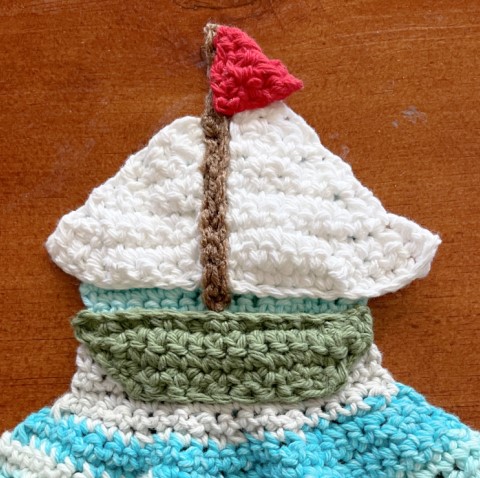
The boat is sewn to the opposite side of the button. Use a yarn needle and the yarn tail from each piece to sew the boat in place. Refer to the main photo for placement.
Bottom Edge
With an I hook and matching yarn (blue in sample), attach the yarn to the first st on the bottom row. Ch 1, sc in the same st and in each st to end of row. Finish off and weave in ends.
