How to Make a Crochet Hanging Towel Loop with Granny Squares

Transform your kitchen with a charming handmade touch by creating a crochet hanging towel loop featuring a classic Granny Square design. This practical and stylish accessory will not only keep your towel within easy reach but also add a cozy and nostalgic vibe to your space. Choose your favorite yarn colors to match your kitchen decor and showcase your crochet skills with this fun and functional project.
Materials
Red Heart Super Saver - 4ply worsted weight (White)
3-1/2" plastic ring
7/8" button
Sewing needle & thread (white)
Hook Size: G
Stitches: ch, dc, sc, sc2tog, sl st.
Difficulty: MEDIUM
Granny Squares
Make 2 Squares
RND 1: Ch4, 2dc in 4th ch from the hook.
(Ch1, 3dc in same ch.) 3 times.
Ch1. Join with a sl st in the top of the beg ch4. (Right Side)
RND 2: Ch3, turn.
(2dc, ch1, 3dc) in the first ch-sp.
Ch1.
*(3dc, ch1, 3dc) in the next ch1-sp.
Ch1.
Repeat from * twice.
Join with a sl st in the top of the beg ch.
RND 3: Ch3, turn. 2dc in the ch-sp.
Ch1.
* (3dc, ch1, 3dc) in next corner ch-sp.
Ch1, 3dc in side ch-sp. Ch1.
Repeat from * twice.
(3dc, ch1, 3dc) in last corner ch-sp.
Ch1.
Join with sl st in the top of the beg ch3. (Right Side)
Fasten off.
Ring Assembly
Holding both squares together and the plastic ring in between them, sc over the ring and through the corner stitches on each square simultaneously until the stitches along one side of the squares are joined and the ring is encased from one corner of the square to the next.
Fold the squares up together so they are side by side, with the towel ring at the bottom.
Continue sc over the ring until the entire ring is filled.
Join with a sl st in the first sc.
Fasten off.
Flap Creation
RND 1: With the backside facing you, working on the top edge of the back square, join the same yarn with a sc in the first ch-sp on the top edge to the right of the center 3dc group.
Sc in next 3dc, sc in the next ch-sp. (5sc)
RND 2-3: Ch1, turn. Sc in each sc. (5sc)
RND 4: Ch1, turn. Sc in the first 2 sts.
Ch2, sk 1sc. [button hole] Sc in the last 2 sc.
RND 5: Ch1, turn. Sc2tog. 3sc in the ch-sp. Sc2tog.
Fasten off.
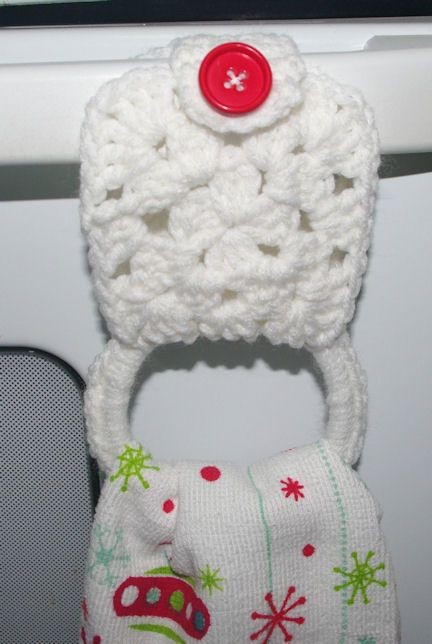
Finishing Touches
Sew a button on at the base of the center 3dc group on the top edge of the front square.
(see photo) Insert towel through the loop, fold flap over the oven handle and button.