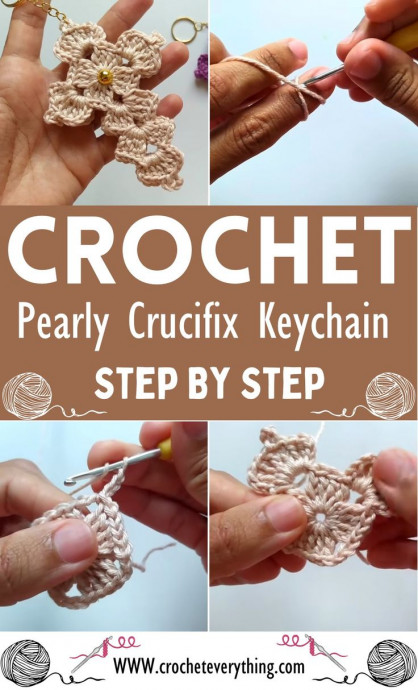
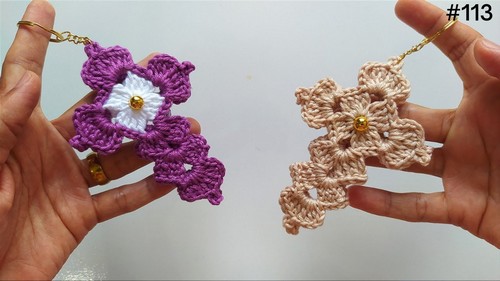
Crochet Pearly Crucifix Keychain Guide

Penelope
Jun 02, 2025 09:07 AM
Introduction
If you're looking to add a touch of charm to your everyday items, a Crochet Pearly Crucifix Keychain Amigurumi could be the perfect choice! This little creation combines the art of crochet with a touch of whimsy, making it a delightful addition to your key ring. The pearly beads add a subtle shine, making this keychain both stylish and unique. Whether you're a crochet enthusiast or simply enjoy cute accessories, this keychain is sure to bring a smile to your face every time you reach for your keys.
Materials Needed
- Yarn
- Crochet hook
- Tapestry needle
- Scissors
- Liquid silicone glue for assembling
- Decoration (optional, e.g., dove, pearl)
- Keyring and/or earring ring for hanging
Pattern Overview

Magic Ring Start
- Create a magic ring.
- Chain 3 (this counts as your first elongated double crochet).
- Make 3 elongated double crochets inside the magic ring.
Creating the Arms of the Crucifix
- Chain 3.
- Inside the same magic ring, make 4 elongated double crochets.
- Repeat the process of chaining 3 and making 4 elongated double crochets until you have four groups, each separated by 3 chains.
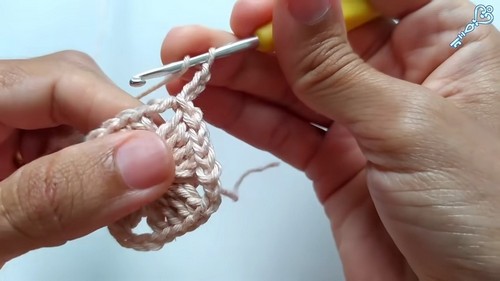
Closing the Circle
- Close the magic ring by slip stitching into the third chain of the initial chain-3.
- Tighten the magic ring to secure.
Building the Next Layers
- Transition to the next space by slip stitching.
- Chain 3 and make 3 elongated double crochets in the same space.
- Chain 3, then perform a spike stitch in the corresponding spot (outside the last stitch).
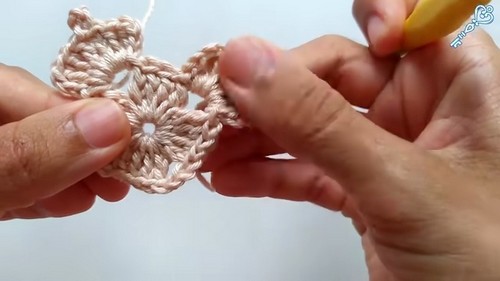
Repeating the Pattern
- In the same space, make another 4 elongated double crochets.
- Chain 3 and slip stitch in the same space.
- Continue this pattern for all spaces, ensuring you replicate the layout symmetrically for all arms of the crucifix.
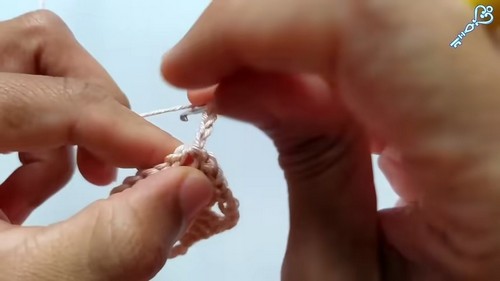
Finalizing the Shape
- After completing all sides, fasten off the yarn and weave in the ends using a tapestry needle.
- For the color-changing technique, follow the narrative provided in the scrap to change colors seamlessly between rows.

Assembling and Decoration
- If making a double-sided crucifix, create another piece following the same pattern.
- Use liquid silicone glue to attach both pieces together.
- Decorate with your choice of ornament (e.g., dove, pearl) by gluing it to the center or desired location on the crucifix.
- Attach a keyring to the top of the crucifix for hanging. Alternatively, use a ring from an earring to serve as the hanging loop.
This would make a lovely Christmas Tree decoration.