Crochet Textured Washcloth

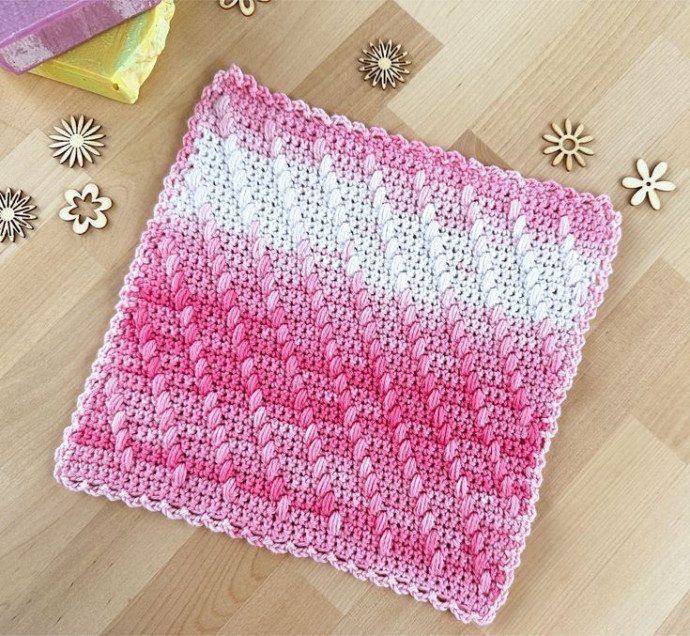
Crochet Textured Washcloths are a delightful addition to your home, adding a touch of handmade charm to your daily routine. These washcloths are not only practical for a variety of uses in the kitchen or bathroom but also offer a cozy and comforting texture. The intricate stitches create a lovely design that makes them a great option for personal use or as a thoughtful gift for friends and family. Whether you are a novice crocheter or an experienced crafter, creating your own crochet textured washcloth can be a fun and rewarding project to enjoy.
Difficulty Level
Intermediate.
Dimensions
8″ x 8″ (20cm x 20cm)
Gauge
11 Sts x 15 rows in single crochet = 2′′ (5cm)
Abbreviations (US Terms)
- Ch = chain
- St = stitch
- Sl St = slip stitch
- SC = single crochet
- YO = yarn over
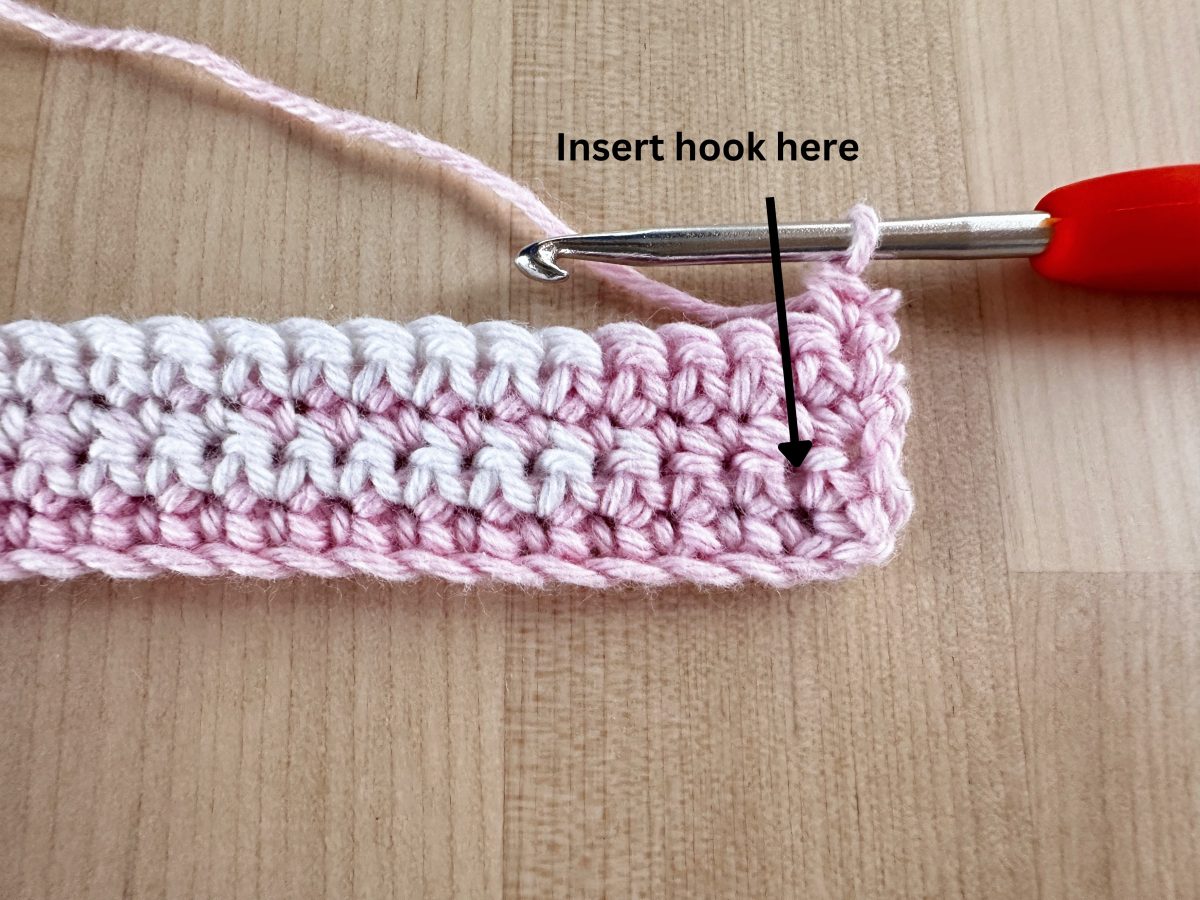
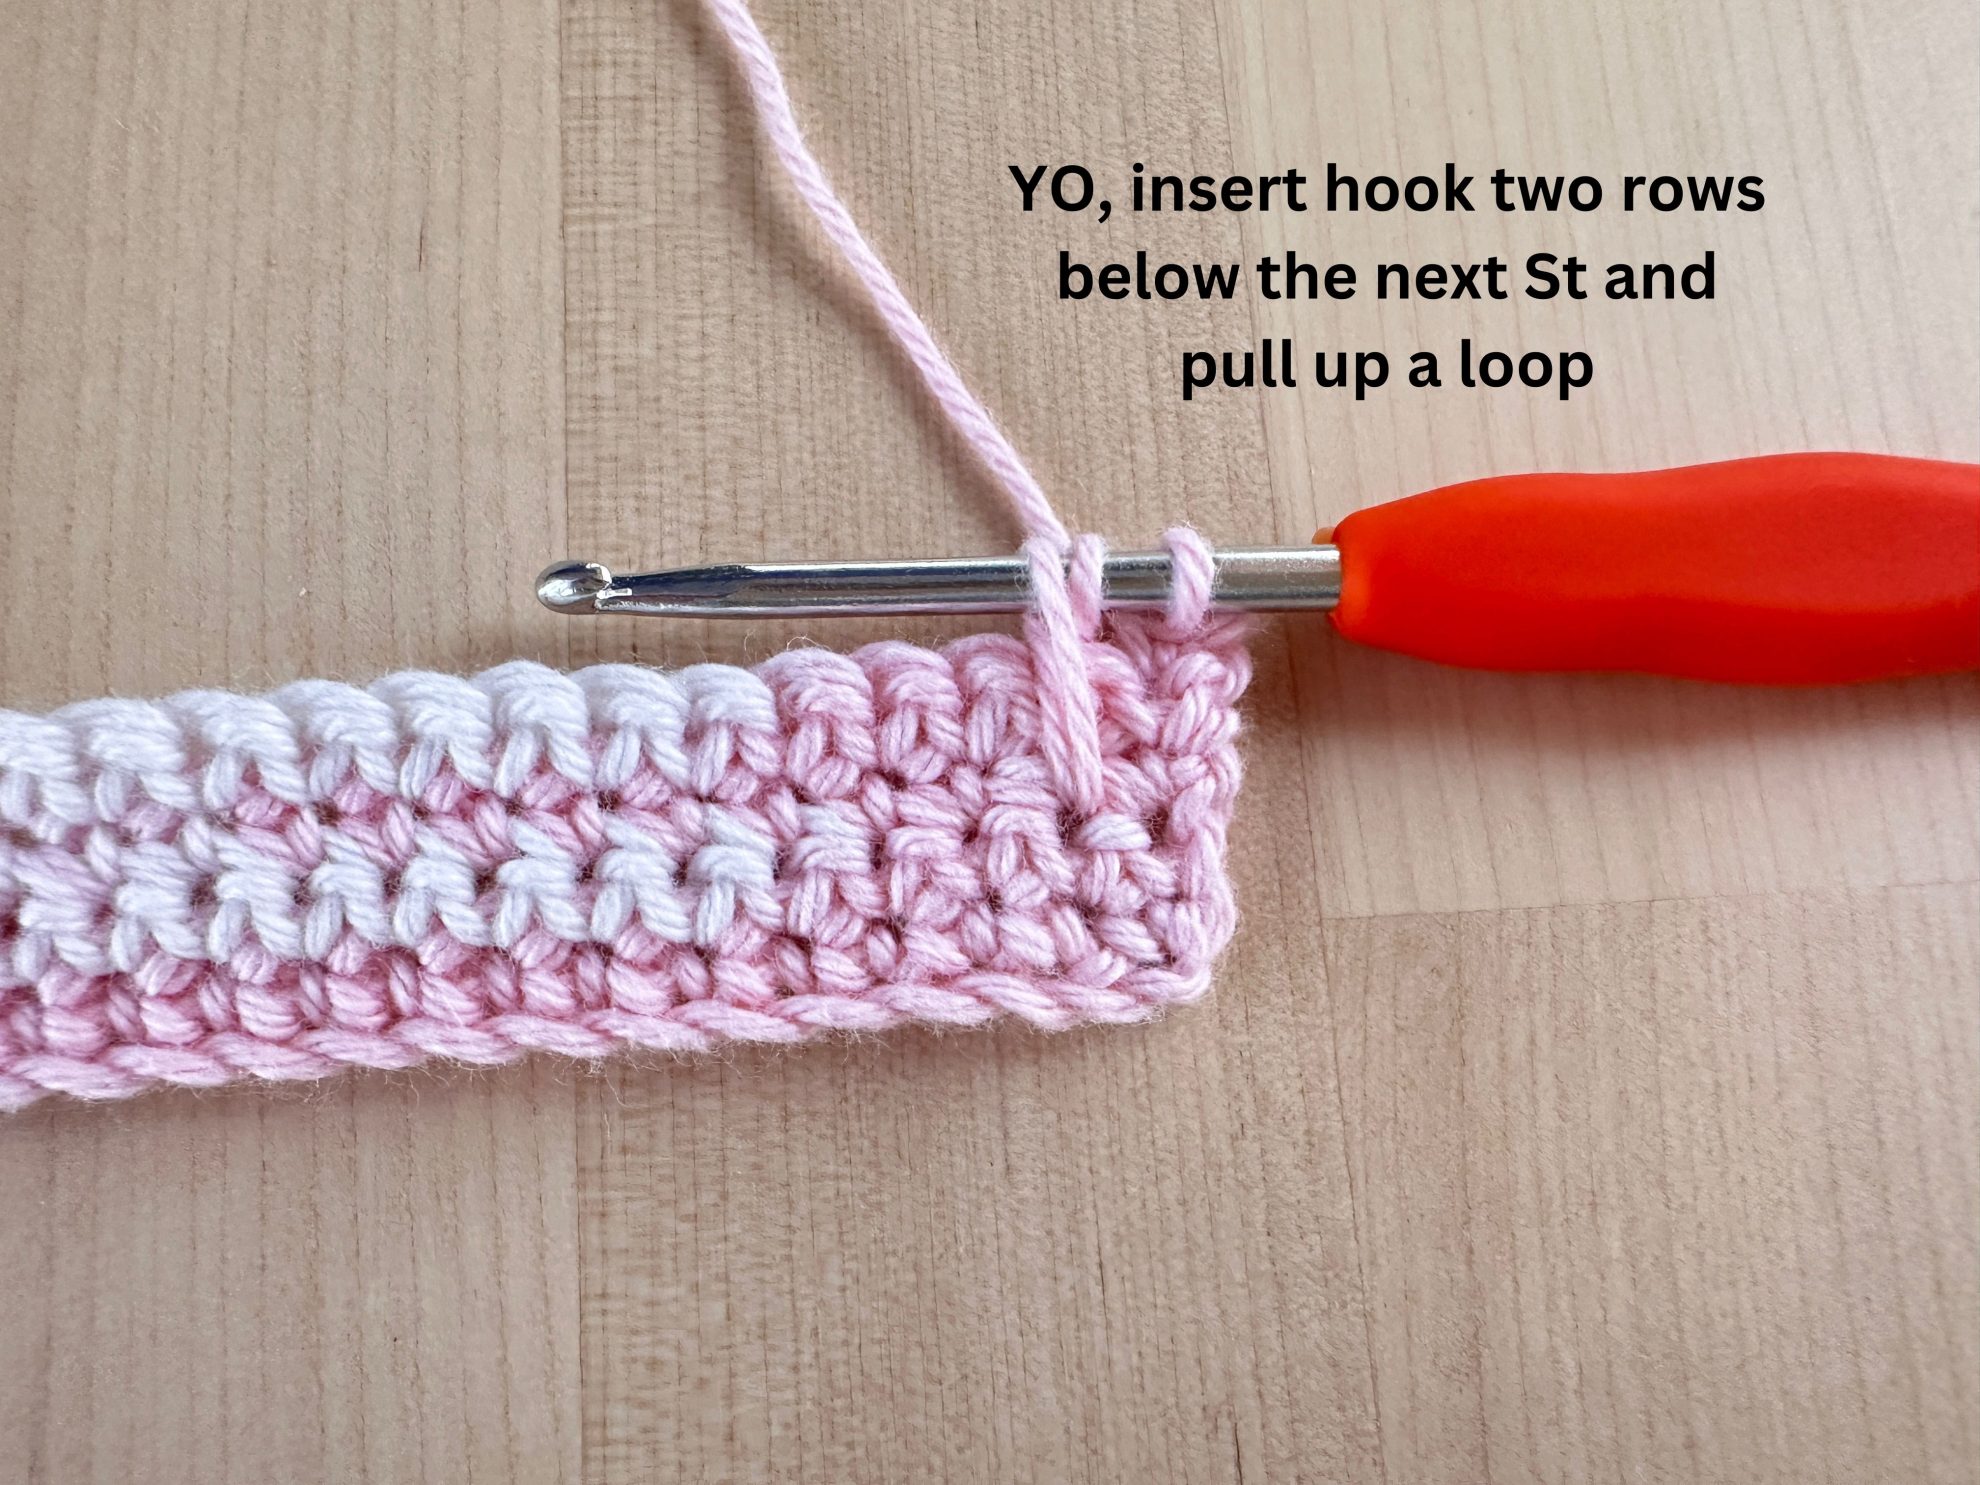
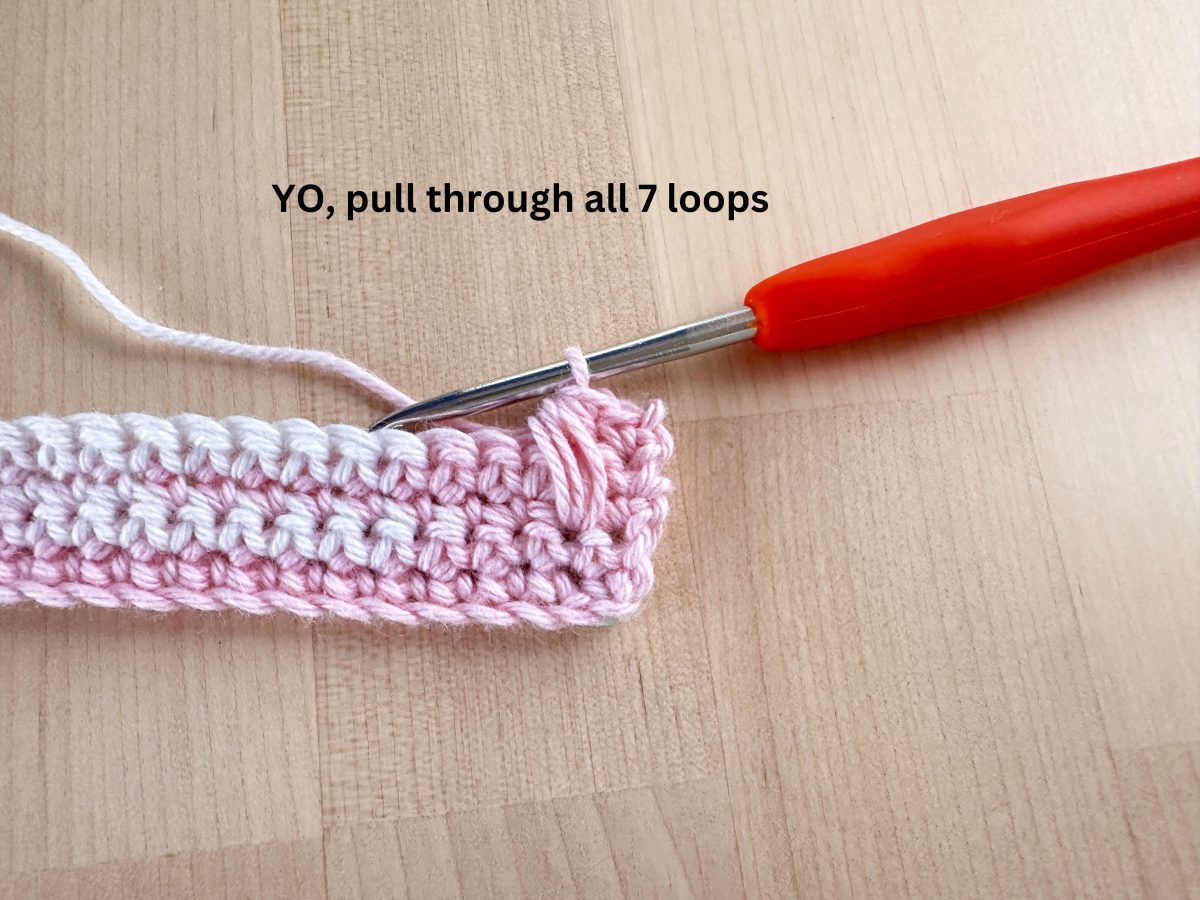
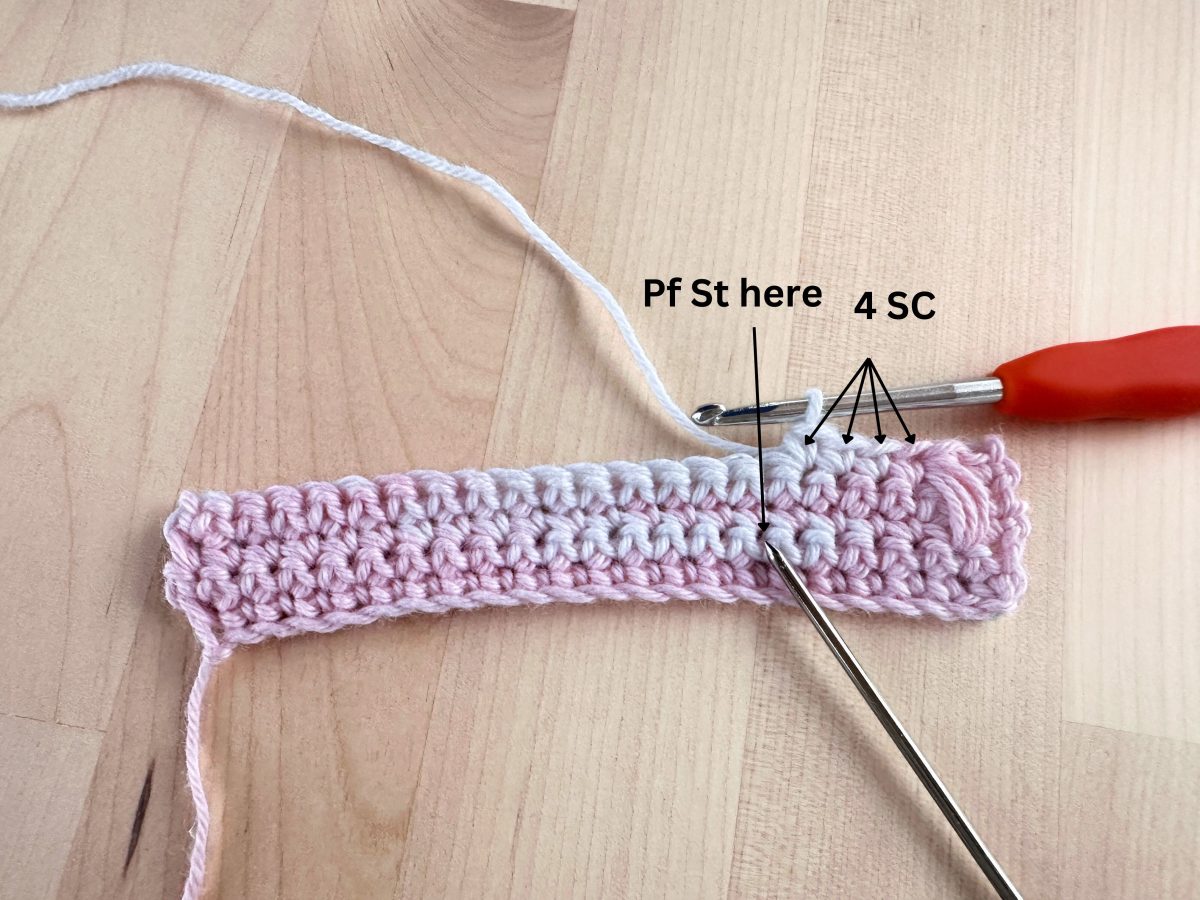
- Pf St = puff stitch (*YO, insert hook two rows below the next St, pull up a loop to the height of the current row, repeat 3x from * all in the same stitch. You’ll have 7 loops on your hook. YO, pull through all 7 loops, see photos below for row 5.)
Materials
I used Bella Baby Tootgarook 4-ply yarn in pink-white self-striping yarn, one skein (159 yards /145 meters).
You can use any fingering weight yarn (4ply), 100% cotton, in any colour of your choice.
Crochet hook 3mm.
Scissors, yarn needle, tape measure.
Crochet Washcloth Pattern Notes
Adjust the size of your washcloth by chaining any multiple of 5 plus 8. For example, a multiple of 5 in this pattern is 35, then add 8 to this number, so we chain 43.
Work as many rows as you need to get to your desired size (square).
Ch 1 at the beginning of a row does not count as a stitch.
Puff stitches are worked into the stitches two rows below (see photos for row 5).
When the pattern indicates ‘2 SC’ or any other numerical value before a stitch, it instructs you to crochet one single crochet into each of the next two stitches.
Crochet Washcloth Instructions
Ch 43 or a multiple of 5 plus 8 for your desired length.
Row 1: SC in second Ch from hook and each Ch across the row (42).
Rows 2-4: Ch 1, turn. SC in first and in each St across the row.
Row 5: Ch 1, turn. SC in first St, Pf St in next St (two rows below, see photos below), *4 SC, Pf St, repeat from * across the row until you have 5 stitches left, work one SC into each of the last stitches.

Rows 6: Ch 1, turn. SC in first and in each St across the row.
Row 7: Ch 1, turn. 2 SC, Pf St,*4 SC, Pf St, repeat from * across the row, 4 SC in last.
Row 8: Ch 1, turn. SC in first and in each St across the row.
Row 9: Ch 1, turn. 3 SC, Pf St,*4 SC, Pf St, repeat from * across the row, 3 SC in last.
Row 10: Ch 1, turn. SC in first and in each St across the row.
Row 11: Ch 1, turn. 4 SC, Pf St,*4 SC, Pf St, repeat from * across the row, 2 SC in last.
Row 12: Ch 1, turn. SC in first and in each St across the row.
Row 13: Ch 1, turn. 5 SC, Pf St,*4 SC, Pf St, repeat from * across the row, SC in last.
Row 14: Ch 1, turn. SC in first and in each St across the row.
Row 15-55 or until you have a square: repeat rows 5-14.
Row 56: Ch 1, turn. SC in first and in each St across the row.
Border (Optional)
Ch 3, turn. Skip one St, work a Sl St into next St. *Ch 3, Sk 1, Sl St in next. Repeat from * around the washcloth.
The exact number of stitches in the border doesn’t matter as long as they are spread out evenly on each side and you like the look the way it looks.
Blocking
If you’re gifting this washcloth to someone, it’s a good idea to block your washcloth and make it look pretty!
If the edges and corners of your washcloth are curling, blocking can help. Simply wet the finished project under running water or with a spray bottle. Then, lay it out on a blocking foam board (or a piece of clean cardboard) in the desired shape and secure the corners with pins. Ensure that the sides and edges are perfectly straight with no curling-up corners. This will help maintain the shape as it dries.