How to Make Your Own Crochet Mushroom Buddy Amigurumi

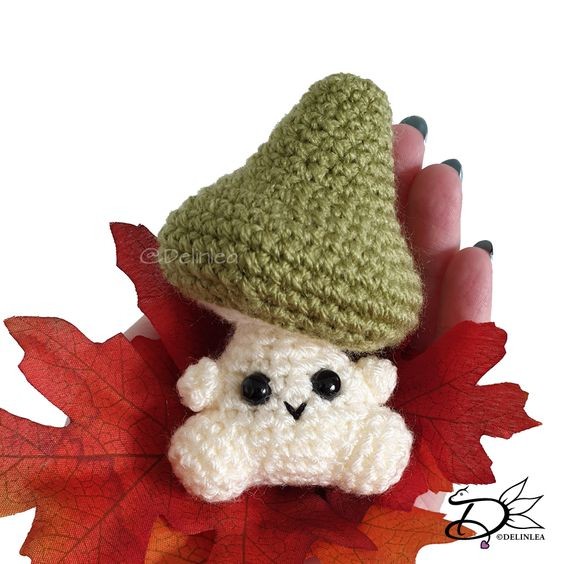
Creating your very own Crochet Mushroom Buddy Amigurumi can be a delightful and rewarding experience! This charming little project allows you to express your creativity and add a touch of whimsy to your space. From selecting the perfect yarn colors to bringing the mushroom buddy to life stitch by stitch, the process is both relaxing and enjoyable. Whether you are a seasoned crocheter or a beginner looking for a fun new hobby, this amigurumi is sure to bring a smile to your face and warmth to your heart. So grab your crochet hook, pick out your favorite yarns, and embark on a crafting journey filled with creativity and friendship!
Materials Needed
For this DIY you’ll need:
- ♥ Yarn in the colors: off white and a color of choice. (I used StyleCraft Special DK)
- ♥ Crochet Hook (I used a 2.5mm hook).
- ♥ Stuffing.
- ♥ Scissors.
- ♥ Sewing Pins.
- ♥ Yarn Needle.
- ♥ Piece of black yarn to sew on its mouth.
- ♥ Safety Eyes, 6mm.
Stitches Used
Stitches used (US Terms):
- Magic Ring.
- BL = Back Loops.
- CH = Chain.
- SLST = Slip Stitch.
- SC = Single Crochet.
- ST = Stitch.
- Inc = Increase.
- Dec = Decrease.
- (…) = Repeat the space in brackets the given number of times.
- […] = Total number of stitches.
Pattern
Work in continuous rounds, use a stitch marker to mark your first stitch of every row. This is for every part, unless stated otherwise.
Body
Use the color Off-White.
1: 6SC in Magic Ring. [6]
2: 2SC in each st around. [12]
3: (1SC, inc) 6 times. [18]
4: (2SC, inc) 6 times. [24]
5: 24SC. [24]
|
9: 24SC. [24]
10: (2SC, dec) 6 times. [18]
11: 18SC. [18]
12: (1SC, dec) 6 times. [12]
13: 12SC. [12]
14: 12SC. [12]
15: BL, (1SC, inc) 6 times. [18]
16: (2SC, inc) 6 times. [24]
17: (3SC, inc) 6 times. [30]
Fasten off and weave in tail. Insert the eyes between row 9 and 10, and stuff the body firmly.
Hood
Use any color of choice.
1: 6SC in Magic Ring. [6]
2: 2SC in each st around. [12]
3: 12SC. [12]
4: 12SC. [12]
5: (3SC, inc) 3 times. [15]
6: 15SC. [15]
7: (4SC, inc) 3 times. [18]
8: 18SC. [18]
9: (2SC, inc) 6 times. [24]
10: 24SC. [24]
11: (3SC, inc) 6 times. [30]
12: (4SC, inc) 6 times. [36]
13: (5SC, inc) 6 times. [42]
14: 42SC. [42]
15: 42SC. [42]
16: (5SC, dec) 6 times. [30]
17: (4SC, dec) 6 times. [24]
Fasten off and leave a long tail for sewing. Stuff the hood, making sure around the opening, not to use too much stuffing.
Legs (Make 2)
Use the color Off-White.
1: 6SC in Magic Ring. [6]
2: 2SC in each st around. [12]
3: 12SC. [12]
Fasten off and leave a long tail for sewing. Stuff both legs.
Arms (Make 2)
Use the color Off-White.
1: 6SC in Magic Ring. [6]
2: 6SC. [6]
Fasten off and leave a long tail for sewing.
Assembling
By using sewing pins, you can position all parts before sewing them on. This way you can easily move them around until you are happy with how it looks.
Sew the hood to the body. If you indeed kept a bit of space by the stuffed part, you are able to push the body a bit inward for a more natural look. Position the arms and legs and sew those on.
Stitch on a little mouth if you like. You can also add dots to its hood as a variation on this one. Just go wild with this pattern! Have fun!