How to Crochet a Beautiful Wavy Blanket for Your Home Decor

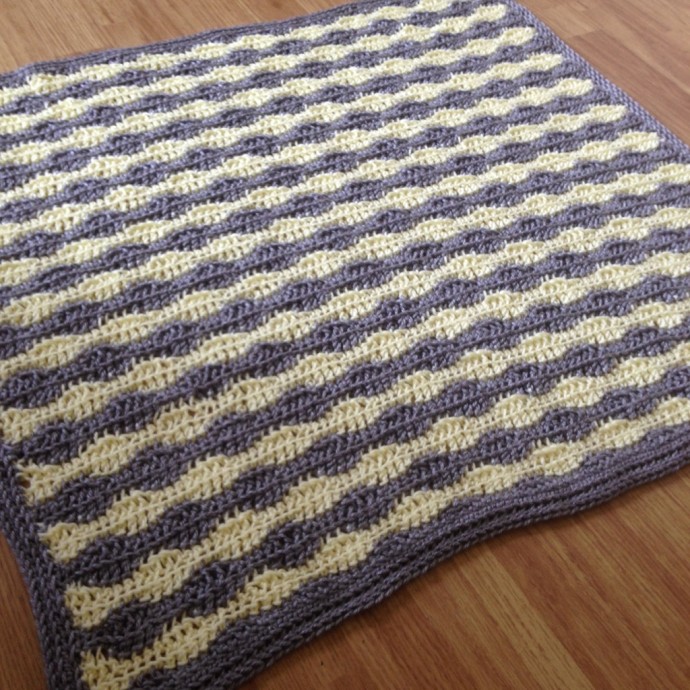
If you're looking to add a touch of elegance and charm to your home decor, why not try your hand at crocheting a wavy blanket? This beautiful and versatile design will surely catch the eye of anyone who enters the room. With its gentle waves and intricate stitches, this crochet project is perfect for both beginners and experienced crafters alike. This project is not only a joy to create but also a wonderful way to showcase your creativity and talent. With its undulating waves and intricate stitch work, this crochet masterpiece will become the centerpiece of any room.
Materials and Stuff
- Yarn in at least two colors (make sure each of your yarns is the same weight; I used sport weight for this particular blanket)
- A crochet hook that you like (I used my J hook for looser stitches)
Abbreviations and Stitches You Need to Know
- ch: chain
- sc: single crochet
- hdc: half double crochet
- dc: double crochet
- sl: slip stitch
- fsc: foundation single crochet (optional)
Pattern
Begin by creating a foundation with your desired number of stitches to obtain the width you want (before the border) using Color A. You can use either a traditional chain foundation or foundation single crochet if you're comfortable with that technique.
Row-by-Row Instructions
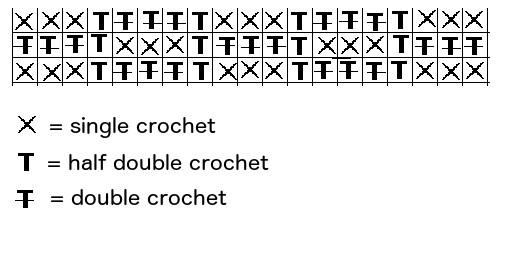
- Row 1: In the second chain from the hook, *3 sc, hdc, 3 dc, hdc, repeat from * across until you run out of stitches. (It's okay to adjust based on your last stitch, turn)
- Row 2: Switch to Color B (this may sound tricky, but it's quite simple. A chart is provided below if you prefer that format). Chain for the appropriate height of your first actual stitch, then dc in each sc from the previous row, hdc in each hdc, and sc in each dc across. You'll finish this row with 3 dc if you started with 3 sc; ch 3 and turn.
- Row 3: Dc in each dc, hdc in each hdc, and sc in each sc of the previous row, then turn.
- Row 4: Switch back to Color A and follow the same rules from Row 2.
Continue this process until the blanket reaches your desired length.
This isn't the most visually stunning chart, but hopefully, it illustrates the pattern that can be a bit challenging to describe in words.
For my border, I completed three rounds of sc with two chains in each corner, followed by a round of slip stitch for finishing. However, feel free to choose any border style you prefer. Make sure to weave in any ends, and you've got yourself a lovely blanket!
PROTIP: I didn’t break off my colors during my color changes. Instead, I loosely carried the unused yarn because I dislike weaving in ends. I then caught the floating bits when doing my border and hid them in the stitches on the back of the blanket.