How to Make a Crochet Project Bag

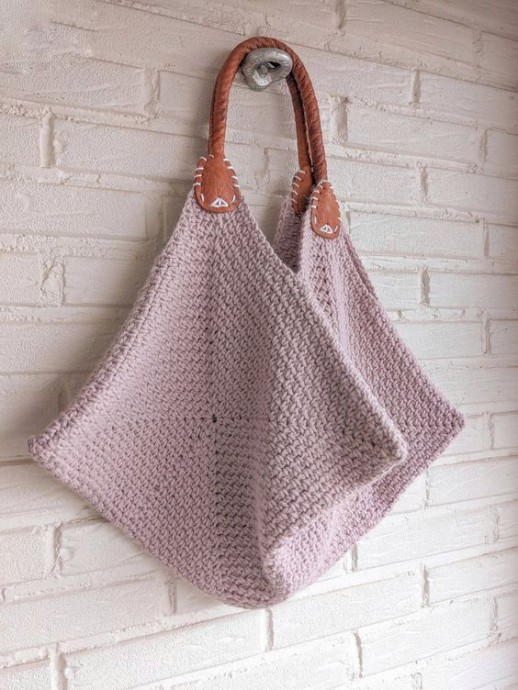
Are you a crochet lover who is tired of tangled yarn and misplaced hooks? Look no further! The Crochet Project Bag is here to revolutionize your crafting experience. This innovative bag is specifically designed to cater to the needs of crochet enthusiasts, providing a stylish and practical solution to keep all your crochet essentials organized. Crafted with meticulous attention to detail, the Crochet Project Bag boasts a spacious interior that can accommodate multiple skeins of yarn, crochet hooks, and other necessary accessories.
Materials
- 1 ball of Lion Brand Pound of Love Yarn in the color Quartz (Weight 4/ 16oz, 1,020yds), you will need a total of 560 yards or you can use another worsted weight yarn.
- 6.0 mm (J) Crochet Hook.
- 2 Leather Purse Handles
- Stitch Markers.
- Darning Needle.
- Scissors.
Gauge
One moss stitch square is approximately: 12 1/2” x 12 1/2″ inch.
Bag size: 12 1/2” wide x 12 1/2″ long.
Strap size: 16 1/2″ inches long.
Abbreviations
ch – chain: Yarn over, pull through loop on hook.
sc – single crochet: Insert hook into stitch, yarn over and pull through, yarn over and pull through last two loops on hook.
ss – slip stitch: Insert hook into stitch, yarn over, pull through stitch and loop on hook.
Pattern Notes
- Pattern written in U.S Terms.
- Bag is entirely made up of 4 moss stitch squares. You will first crochet 4 moss stitch squares, and then seam each square together to form the bag. Once you have the base of the bag done, you will then seam on the straps.
- The Moss Stitch Square is made by turning after each completed round (You will bring your working yarn over the stitch and then work the square per the instructions). Each round is joined together by a slip stitch. Click HERE for a step-by-step photo + video tutorial.
Moss Stitch Granny Square Pattern
With Lion Brand Pound of Love Yarn, make 4 Moss Stitch Granny Squares.
Round 1: Chain 2, * Work 1 single crochet in the 2nd chain from the hook, chain 2, make another single crochet in the same chain, and chain 1. Repeat from * 3 more times for a total of 4 corners. Slip stitch to first single crochet of the round to join the work. Turn your work.
Round 2: *Work 1 single crochet in next side space, and chain 1. Then skip the next single crochet and work (1 single crochet, chain 2, 1 single crochet, chain 1) in the corner space. Repeat from * 3 more times for a total of 4 corners. Then slip stitch to first single crochet to join the work. Turn your work.
Round 3: Work 1 single crochet and 1 chain in each chain space, and work (1 single crochet, chain 2, 1 single crochet, chain 1) in each corner space. Then slip stitch to first single crochet to join the work. Turn your work.
Round 4 – Round 22: Repeat round 3.
Finish off and weave in all ends before seaming your 4 squares together.
Crochet Project Bag Construction
Once you have made all 4 squares and have worked in your ends, it’s time to put your project bag together.
Step 1: Grab the first two squares and lay them together side by side, then grab the other two squares and place them on the bottom of the first two squares.
Note – you’re creating one big square (photo down below for reference).
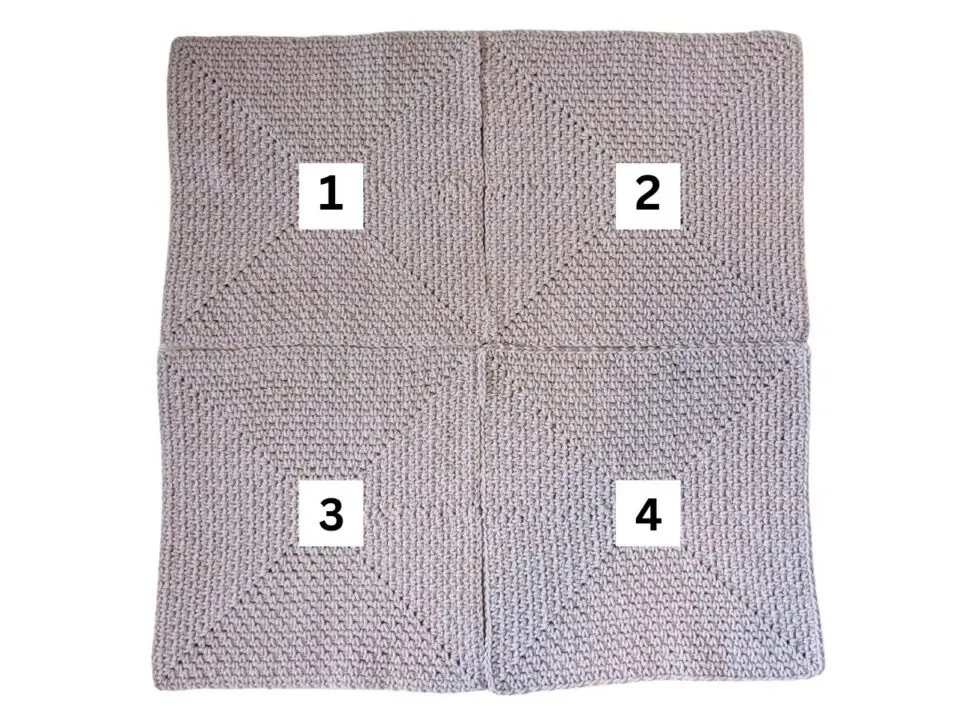
Step 2: Once you have all 4 squares laid out in the correct order, grab your darning needle and the yarn you used to make the squares.
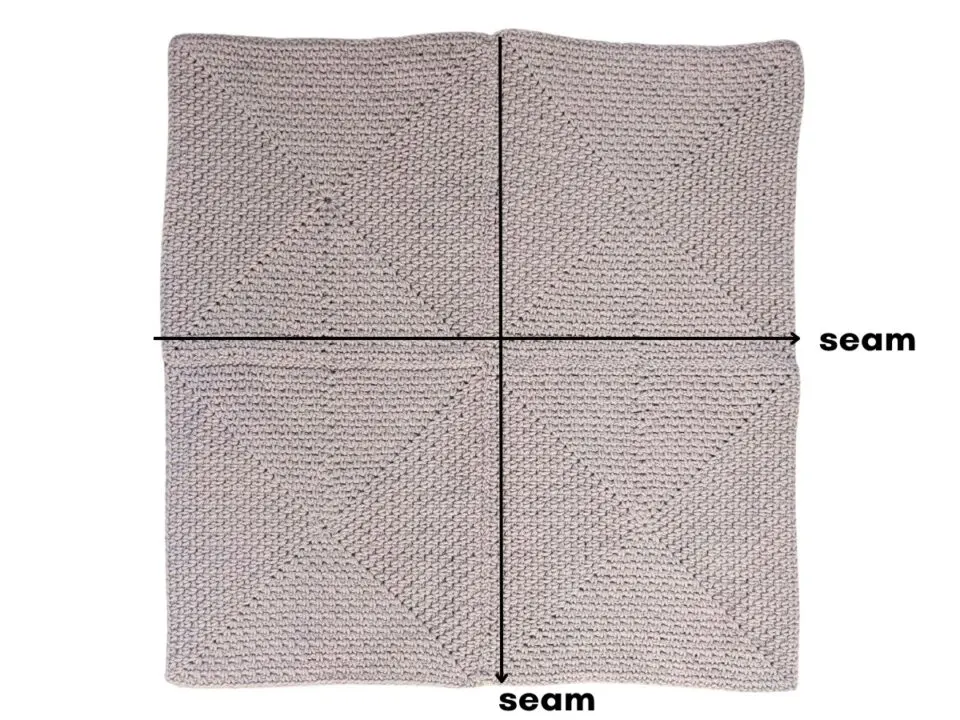
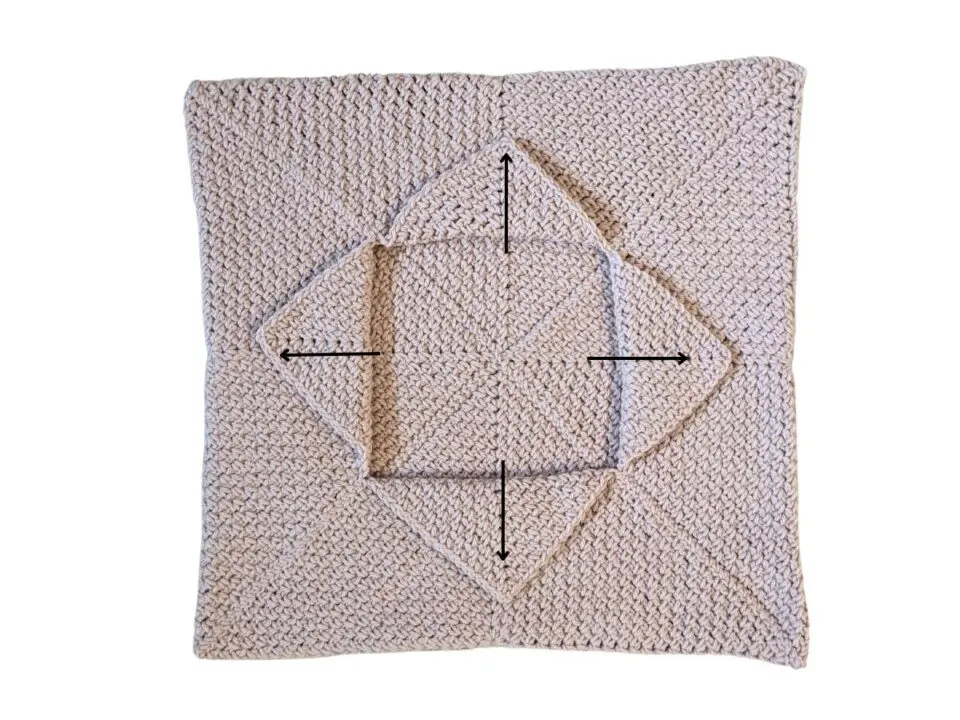
Cut a strand of yarn twice the size of your square and start whipstitching the squares together. So place your darning needle in the middle on the bottom and work your way to the top. Then place your darning needle in the middle on the right side and work your way to the left side.
Once you have seamed your 4 squares together, remove the darning needle, and work in any ends.
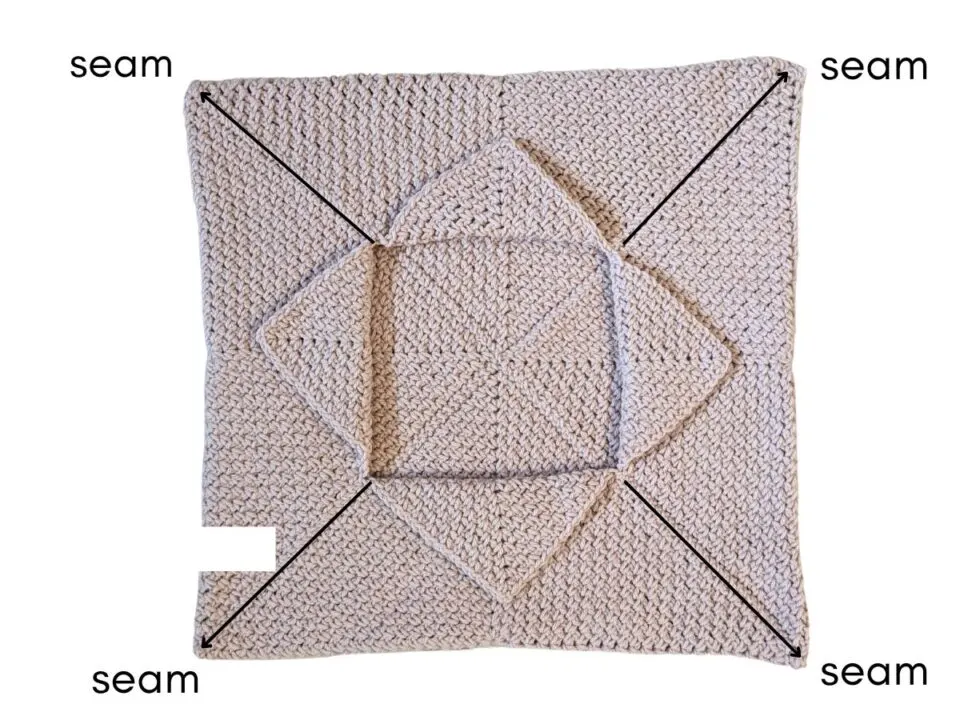
Step 3: Now that your squares are seamed together, it’s time to fold in the corners of the square.
Start by grabbing the top left corner and fold it in, then repeat this process for the last three corners.
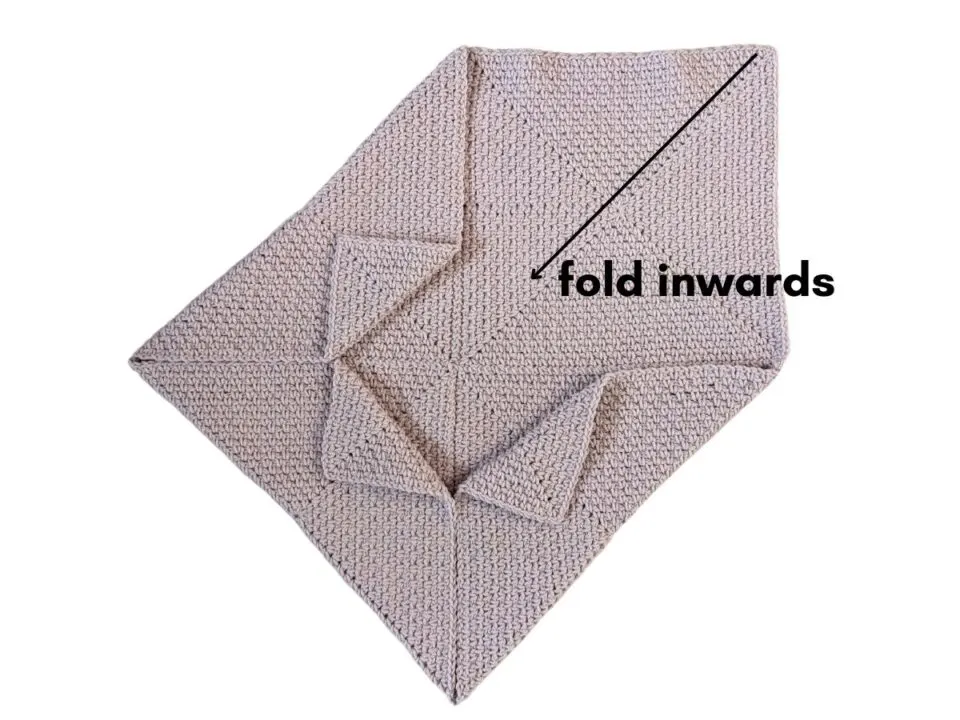
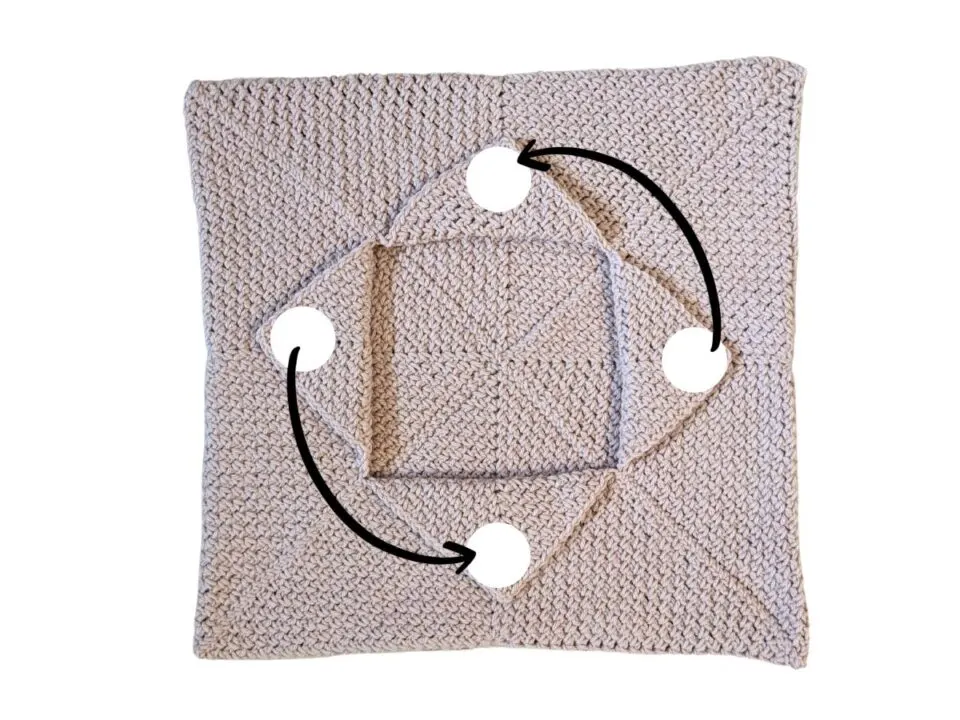
Step 4: Once you have folded the corners, grab one corner again, and fold it 5 1/2″ inches outwards. Finally, place a stitch marker at the point in the middle where the folding ends.
Continue to repeat this process for the other three corners.
Step 5: Once you have folded each corner outwards, grab your darning needle with yarn, and whip stitch each side together.
At this point, your bag should be seamed together and you’re ready for the final step.
Step 6: Lastly, grab your bag handles and sew them onto the front corner of each point of the square.
Note – the photo down below indicates where to place your handles.
And that’s it, you’re finished!