How to Make a Crochet Tote Bag

Crochet tote bags are not only stylish but also practical for carrying all your essentials in a fun and eco-friendly way! Whether you're heading to the beach, farmer's market, or simply running errands, a crochet tote bag adds a touch of handmade charm to your outfit. These versatile bags come in a variety of colors and patterns, making them a perfect accessory to match any outfit or mood. Plus, the durability of a crochet tote bag ensures that you can use it for years to come while reducing your environmental footprint. So go ahead, ditch the plastic bags and carry your belongings in style with a delightful crochet tote bag!
Materials Needed for Easy Crochet Tote Bag
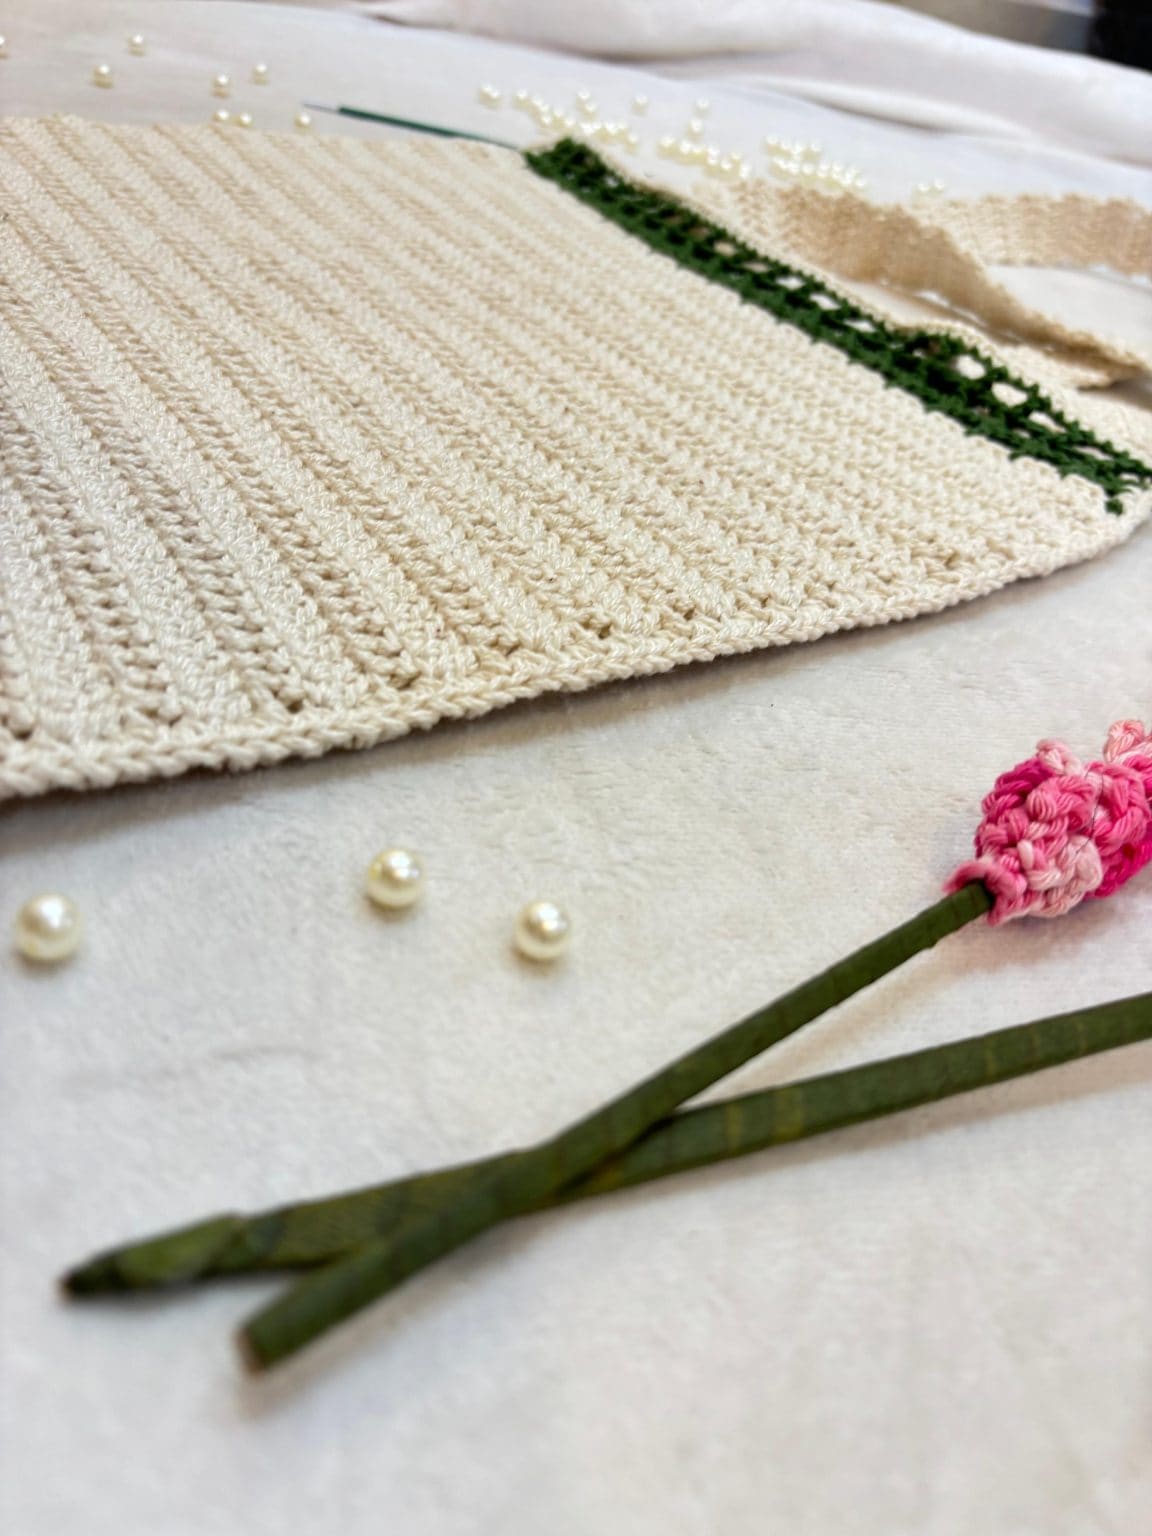
Cotton yarn (off-white & Green)
3mm Crochet Hook
Scissors
Tapestry needle
Stitch Markers
Abbreviations Used
ch – chain
sc – Single Crochet
dc – Double Crochet
inc – Increase
sl st – Slip Stitch
st /s – Stitch / es
Crochet Tote Bag Written Directions
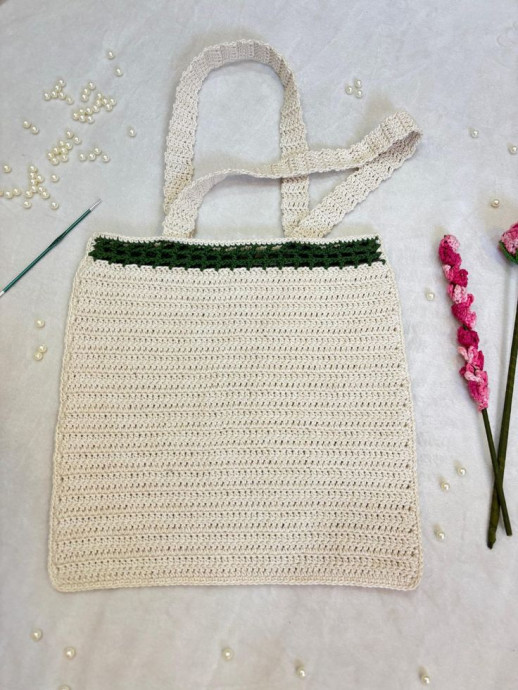
Body of the Bag (Use White Yarn):
Make a sl knot, ch 62
Row 1 - Starting from the third ch from the hook, make 1 dc in each chain space (60 dc) ch 2 turn
Row 2-32 - Make 1 dc in each st, ch 2 turn (60 dc)
Fasten off and cut the yarn
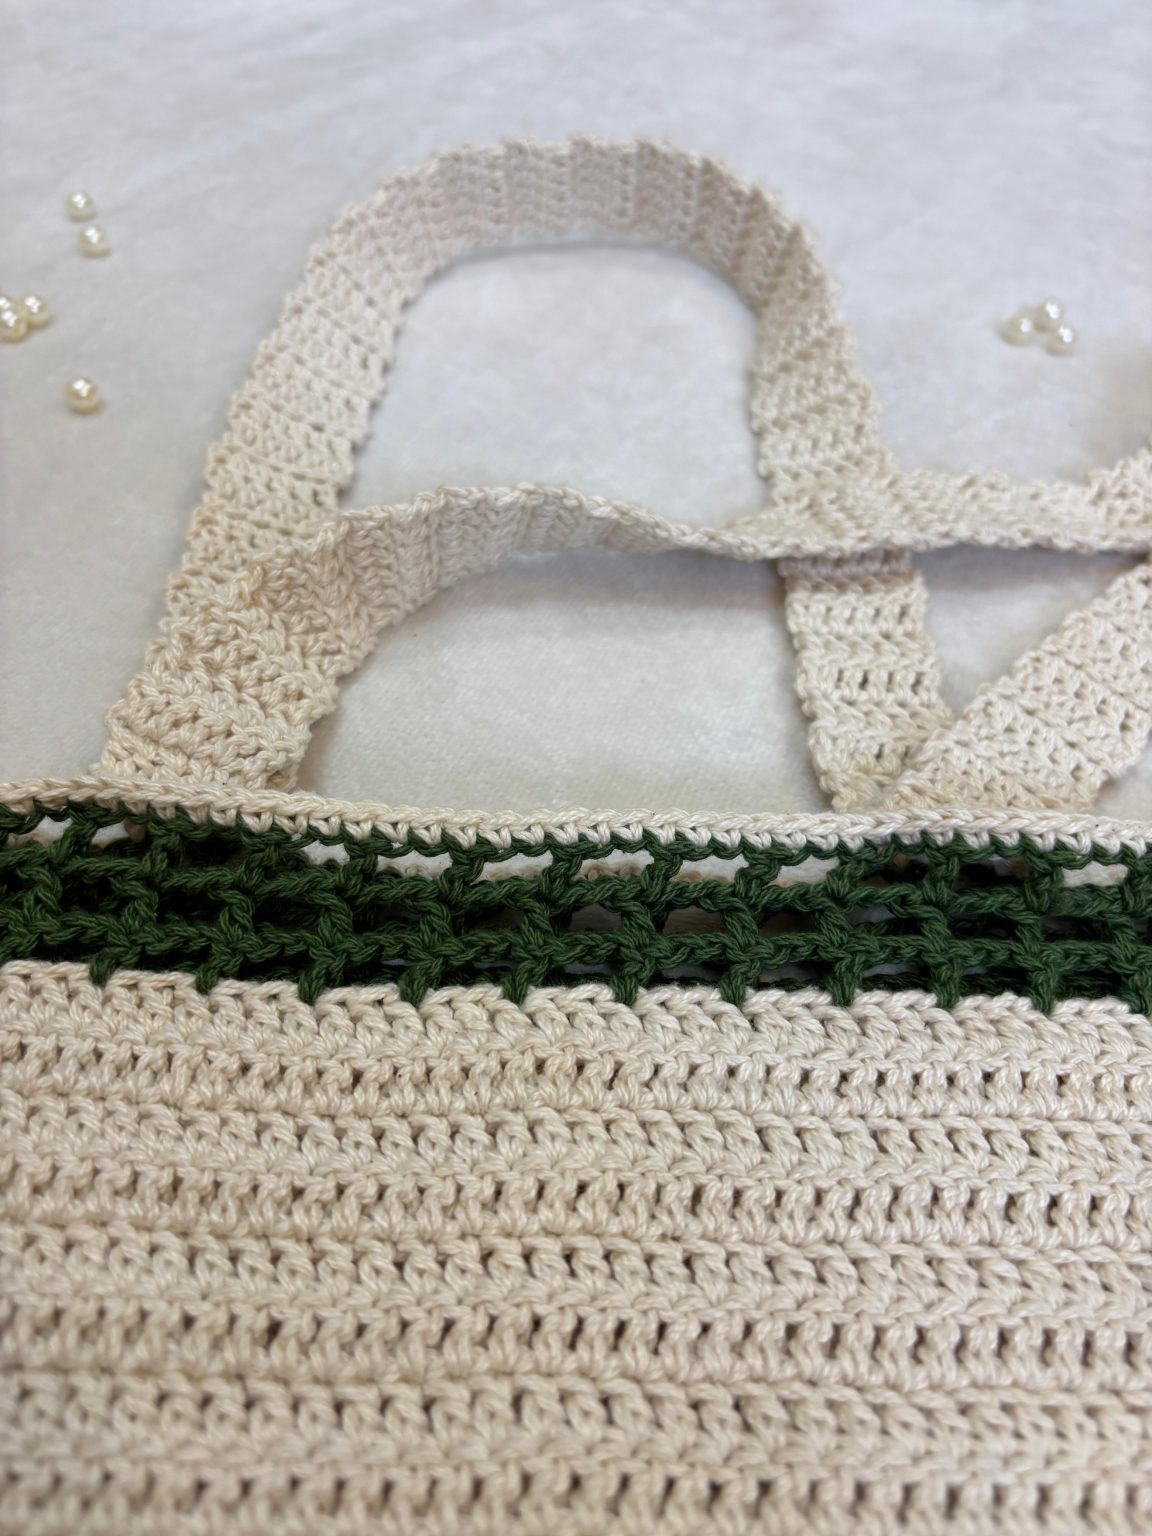
Mesh Border (Green Yarn):
Make a sl knot and insert the slip knot into the first st of the row
Row 1 – ch 3, skip two st/s, make 1 dc into the 3rd st, ch 2, skip 2 st/s, make 1 dc into the 3rd st, repeat this pattern until the end of the row, ch 3 turn
Row 2-3 - Repeat row 1 (when you reach the end of the row make 1 dc into the 2nd ch space to end the row)
Fasten off and cut the yarn
Repeat the entire pattern from the start one more time (body of the bag and the mesh border).
By now you should have two similar pieces which will be the front and back panels of the bag.
The Handles (Use White Yarn):
Make a sl knot, ch 7
Row 1 – Starting from the 3rd ch from the hook, make 1 dc in every ch space (5 dc), ch 2 turn
Row 2-55 – Make 1 dc in every st (5 dc), ch 2 turn
Fasten off and cut the yarn
Attaching the Handles:
Count 15 st/s, insert your st marker into the 16th st, now count 5 st/s from the st where you inserted your st marker and insert another st marker into the 5th st.
Now count 20 st/s and insert your st marker into the 21st st, then count 5 st/s from the st where you inserted your stitch marker and add another st marker into the 5th st.
You should have 15 st/s remaining.
Now make 1 sc all through the row till you reach the st marker, place the handle on the back side and make 1 sc together by passing your hook through all four loops.
Repeat the same pattern to attach the handle to the other part of the body of the bag.
Fasten off and cut the yarn.
Joining the Sides of the Bag:
Place both the parts of the bag one on top of the other.
Make a sl knot, insert your sl knot into the first st/s of both the parts and ch 1 to secure the yarn.
Make 1 inc st in every row space to attach the parts (make sure to pass your hook through both parts of the bag).
Continue to do this until you reach the corner.
Now make 1 sc to attach the base of the bag (make sure you pass your hook through both parts of the bag).
Continue to do this until you reach the next corner.
Now repeat the same pattern for the other side by making an inc st throughout the other side.
Fasten off and cut the yarn.
Weave all the ends.