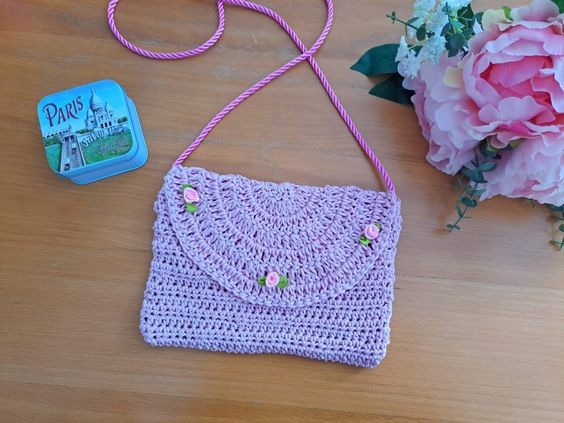
Create Your Own Elegant Envelope Bag with Crochet

Project Overview
Create your own elegant envelope bag with delicate crochet work. This project allows you to showcase your skills in a stylish and practical way. By using a dainty yarn and intricate stitches, you can achieve a unique and sophisticated look for your bag. The envelope design adds a touch of charm and versatility, making it perfect for both casual outings and special occasions.
Whether you're a seasoned crocheter or just starting out, this project is a great way to hone your craft and create a beautiful accessory that you can be proud of. Consider lining the inside of the bag for added durability and a polished finish. With a little creativity and attention to detail, you can turn a simple crochet project into a fashionable statement piece that will turn heads wherever you go. So grab your crochet hook and yarn, and get ready to make a stunning dainty envelope bag that reflects your unique style and creativity.
Project Details
Level: Easy
Notes
I will be using US terms (British terms in brackets).
Gauge
4” (10 cm): 16 stitches
4” (10 cm): 12 rows
Size of Finished Bag
6” (15 cm) x 8” (20.5 cm)
Materials Required
- 2 skeins of Drops Muskat in shade Desert Rose
- A 4 mm crochet hook
- 45”/114 cm of rope for the strap (or you can create your own by following my guide in this pattern)
- A tapestry needle
- A pair of scissors
- 3 little ribbon flower buds (1/4”)
- Darning thread and needle
- Sewing pins (optional)
Abbreviations
- Ch: Chain
- Sk: Skip
- Sp: Space
- Sl st: Slip stitch
- HDC: Half Double Crochet (UK Half Treble Crochet)
- DC: Double Crochet (UK Treble Crochet)
- EOR: End of row/end of round
General Notes Concerning This Pattern
For this project, we will be crocheting 2 different pieces to create the bag.
First, we will be crocheting a long rectangle that will be the front and back panels (once folded and sewn); then we will be making the half-circle front flap.
Once all these items have been made, they will be assembled and sewn as explained below. Then the simple flower buds will be stitched to this project (explained in pattern step by step).
Pattern Begins Here
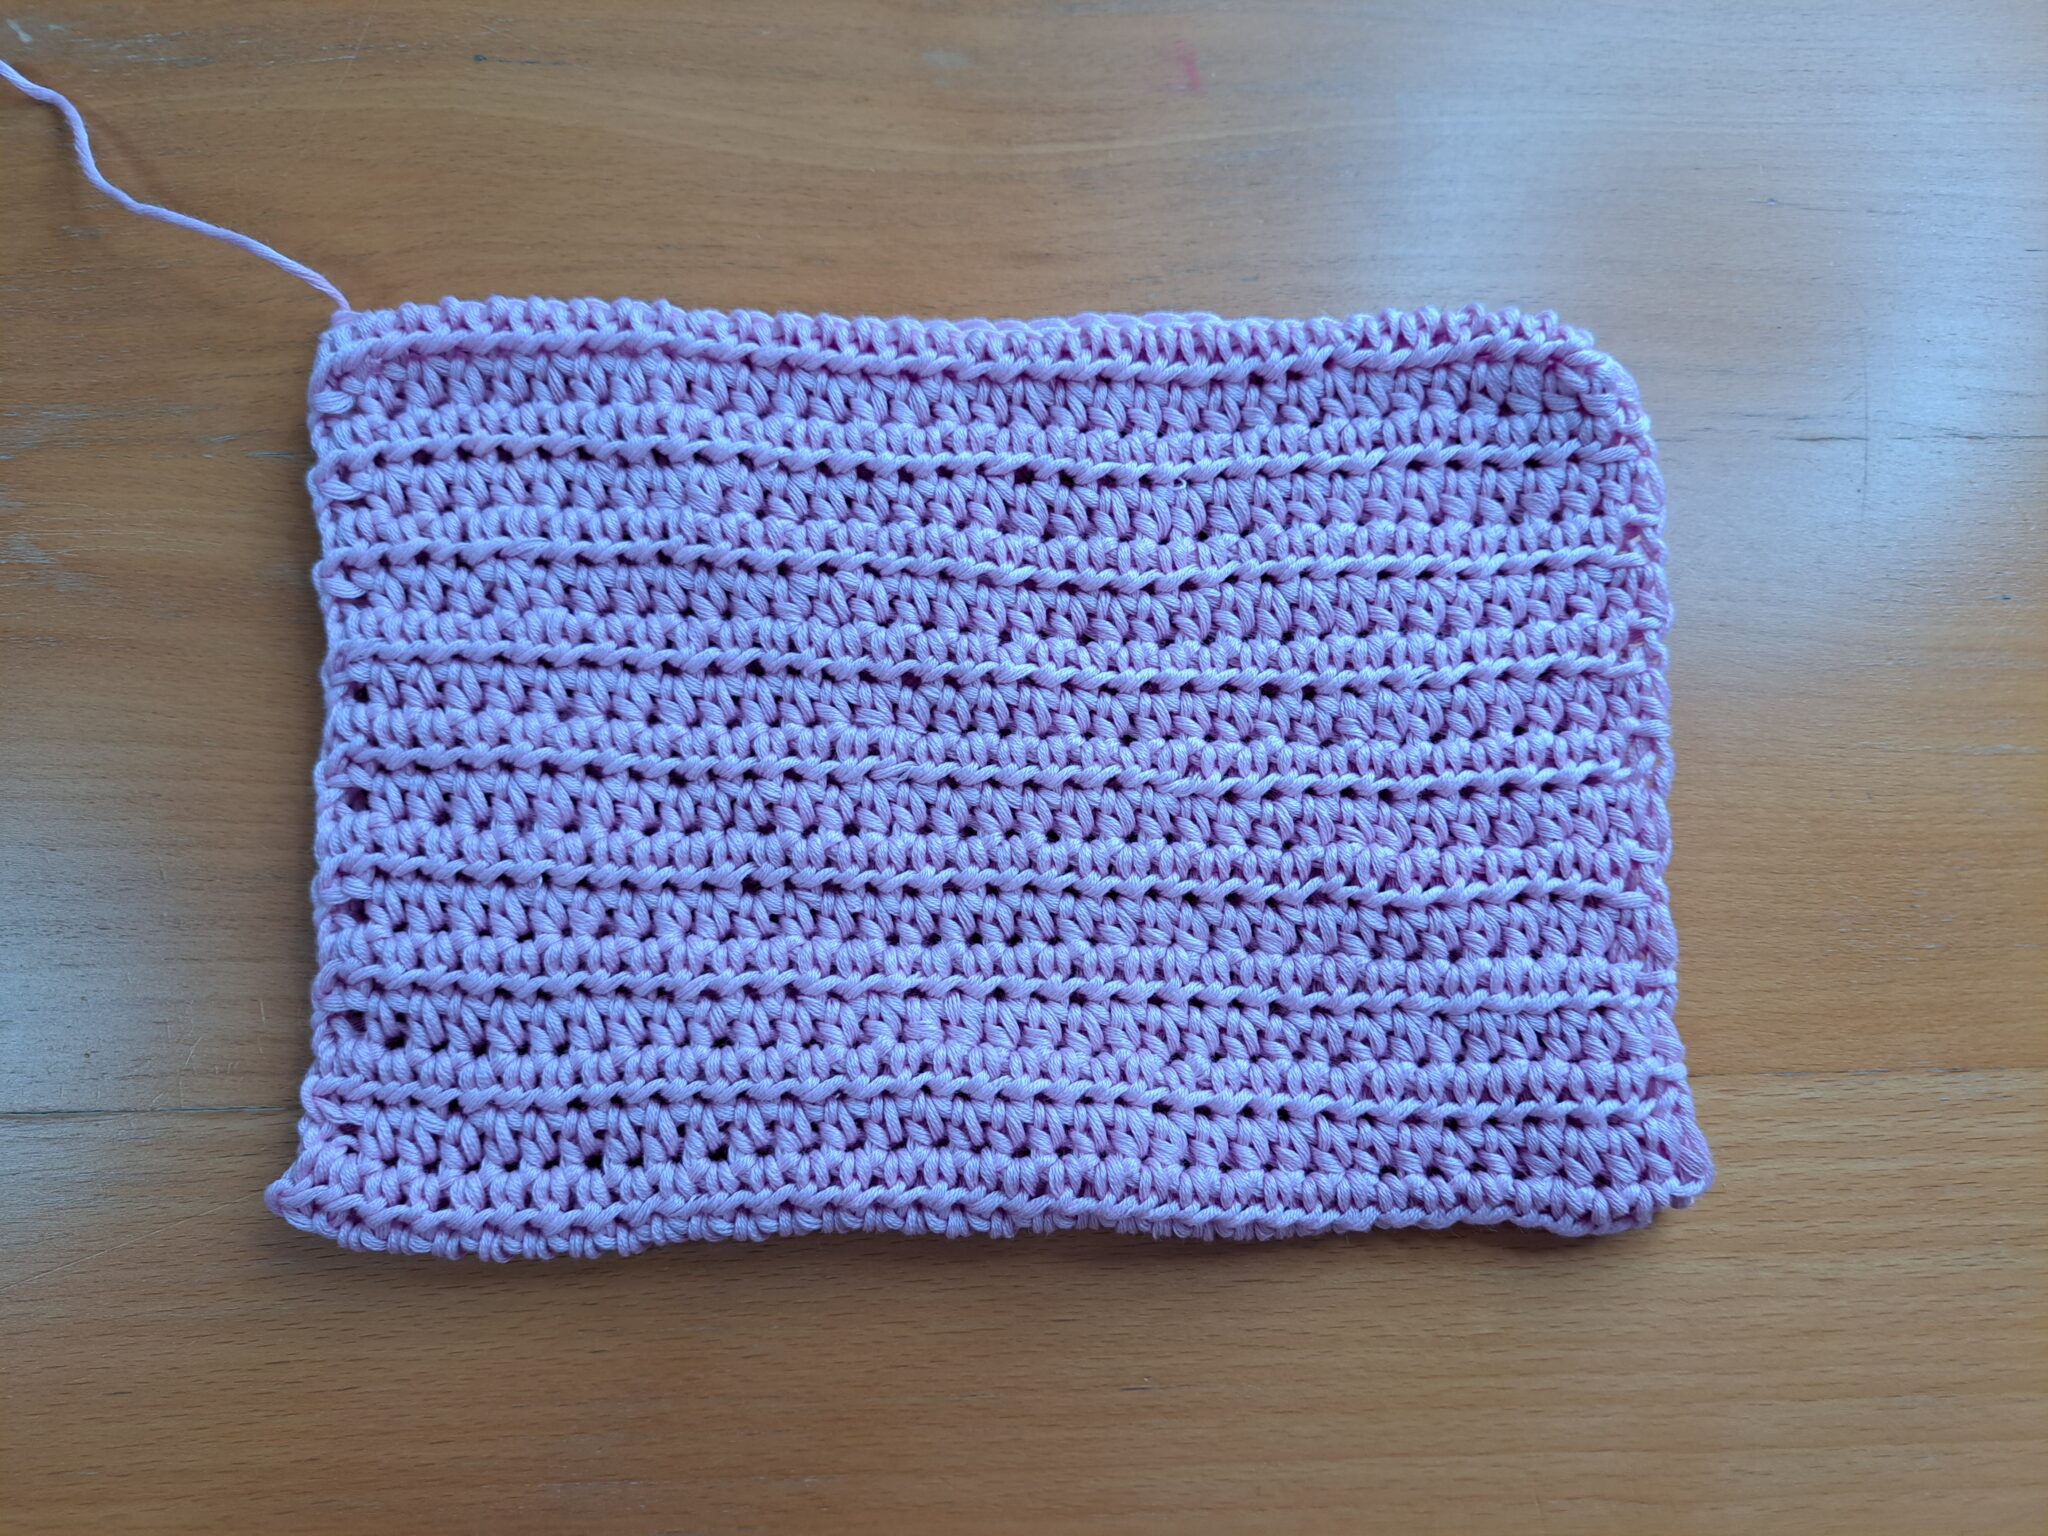
Create the Rectangle for Front and Back Panels
Make a slip knot, ch 35.
1: HDC in 3rd ch from hook (the first ch 2 counts as a HDC), HDC into each ch until end of row (EOR).
2: Ch 2 (=HDC), turn your work, HDC into 2nd HDC from the previous row, and into each HDC until EOR (including ch 2 from the previous row).
3-35: Repeat row 2.
Fasten off, leaving a long tail for sewing the seam.
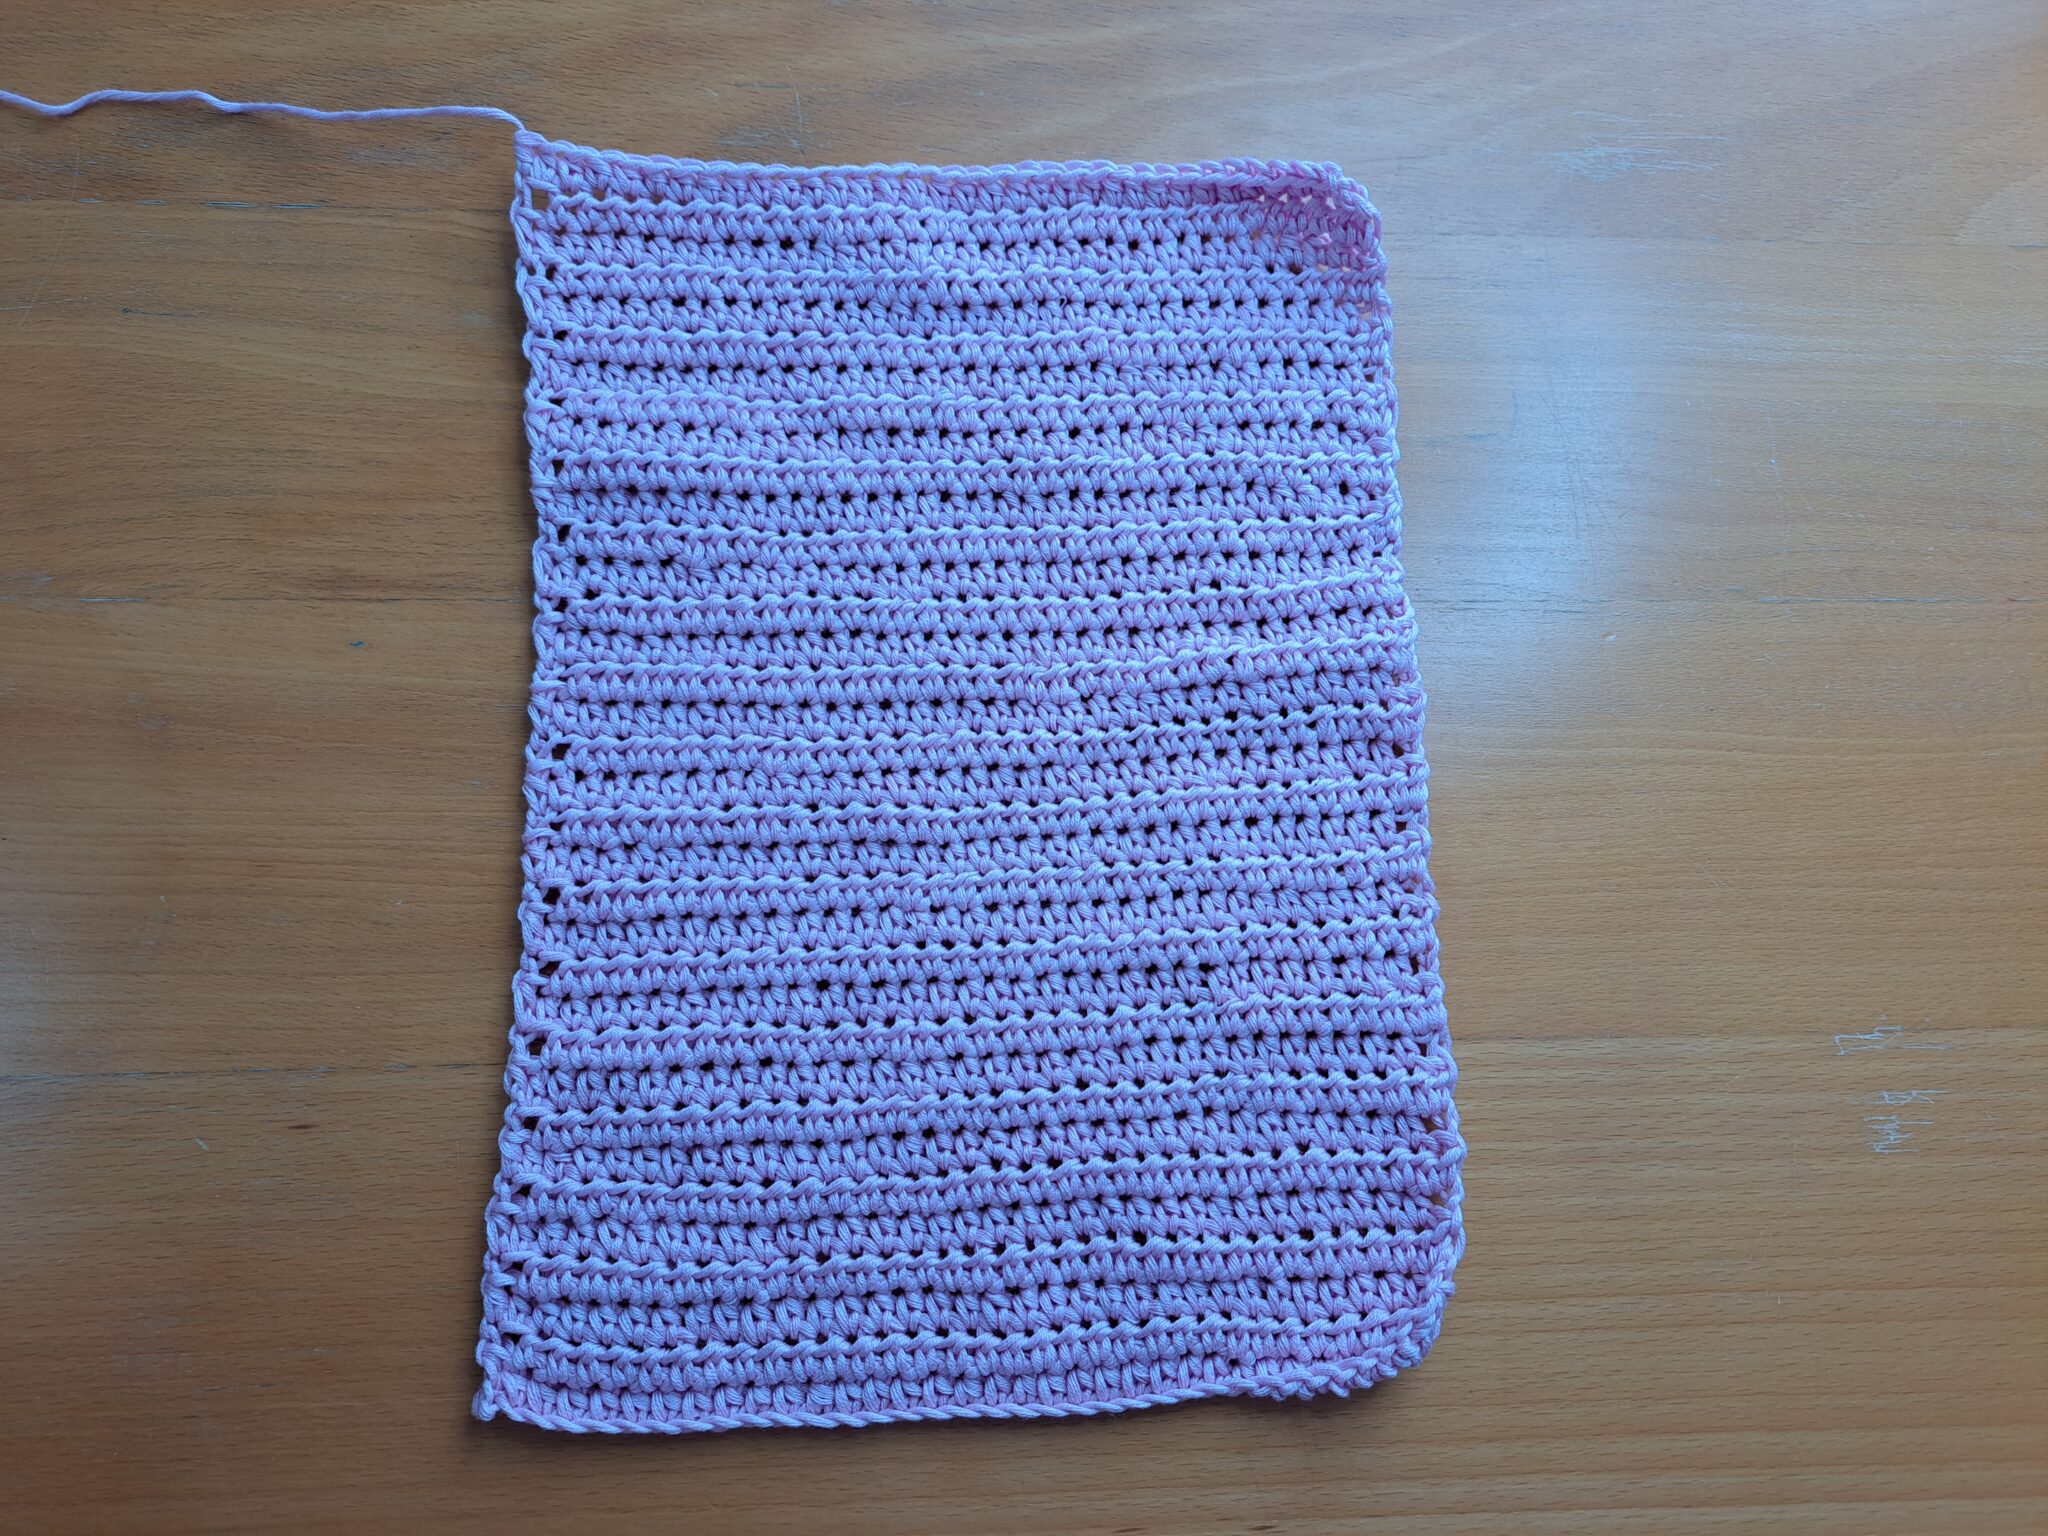
The front and back panels
Create the Flap
To begin, make a slip knot.
Ch 4, sl st through the first ch to form a ring.
1: Ch 3 (=DC), 6 DC into the ring (=7 DC in total).
2: Ch 3 (=DC), turn your work, place a DC into the 1st DC from the previous row (=2 DC in the same stitch), 2 DC into each DC from the previous row.
3: Ch 3 (=DC), turn your work, place a DC into the 1st DC from the previous row (=2 DC in the same stitch), [DC into the next DC, 2 DC into the next DC] until EOR.
4: Ch 3 (=DC), turn your work, place a DC into the 1st DC from the previous row (=2 DC in the same stitch), [DC into the next 3 DC, 2 DC into the next DC] until EOR.
5: Ch 3 (=DC), turn your work, place a DC into the 1st DC from the previous row (=2 DC in the same stitch), [DC into the next 4 DC, 2 DC into the next DC] until EOR.
6: Ch 3 (=DC), turn your work, place a DC into the 1st DC from the previous row (=2 DC in the same stitch), [DC into the next 5 DC, 2 DC into the next DC] until EOR.
Fasten off, leaving a long tail for sewing.
Strap (If You Are Not Using Rope)
Ch 202
HDC into the 3rd ch from the hook and into each ch until EOR, fasten off. Leave a long tail for sewing into the project.
Sewing the Project Together
Place your rectangle on a flat surface, and fold one side over to create the front and back panels as seen in the photograph below:
Fold project over
You will now be sewing the two sides of the project to create the bag shape.
Firstly, using the long tail and tapestry needle, start sewing one side up using the mattress stitch. Once you have reached the top of the project, tie a knot and fasten off, sewing in all loose ends.
Next, repeat the same thing on the other side (attach a loose piece of yarn for seaming as there is no long tail on that side of the project).
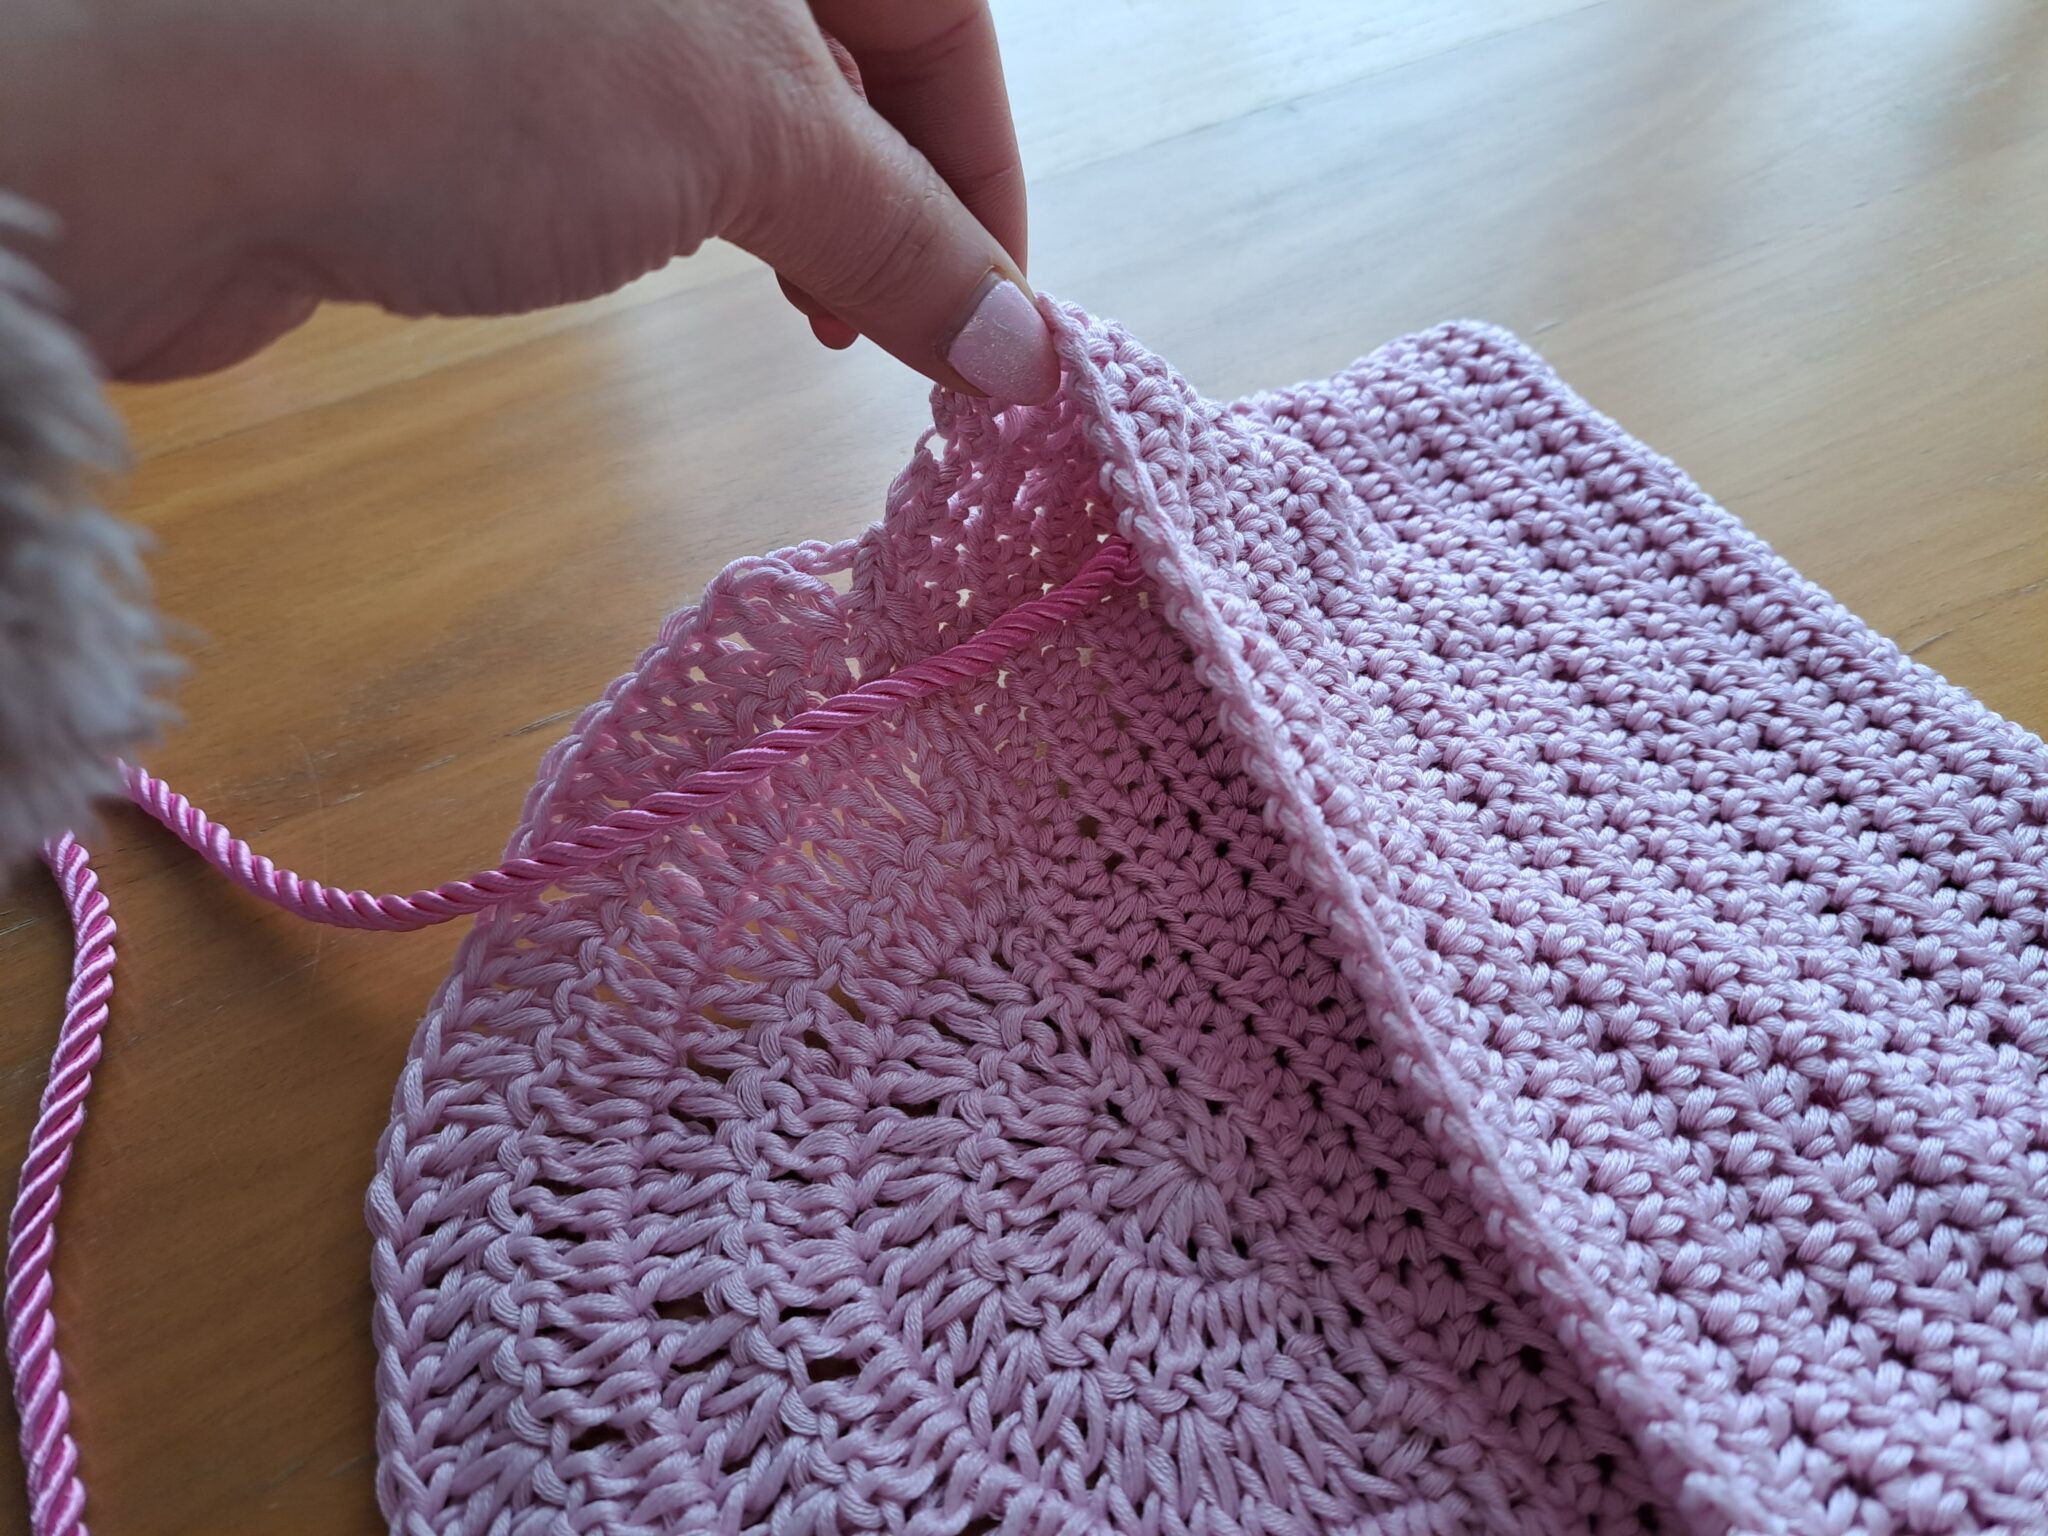
Sew on the Flap to the Back Panel
Secure your flap onto the back panel with sewing pins (optional). Sew the flap onto the back panel, fasten off, and tidy up loose ends.
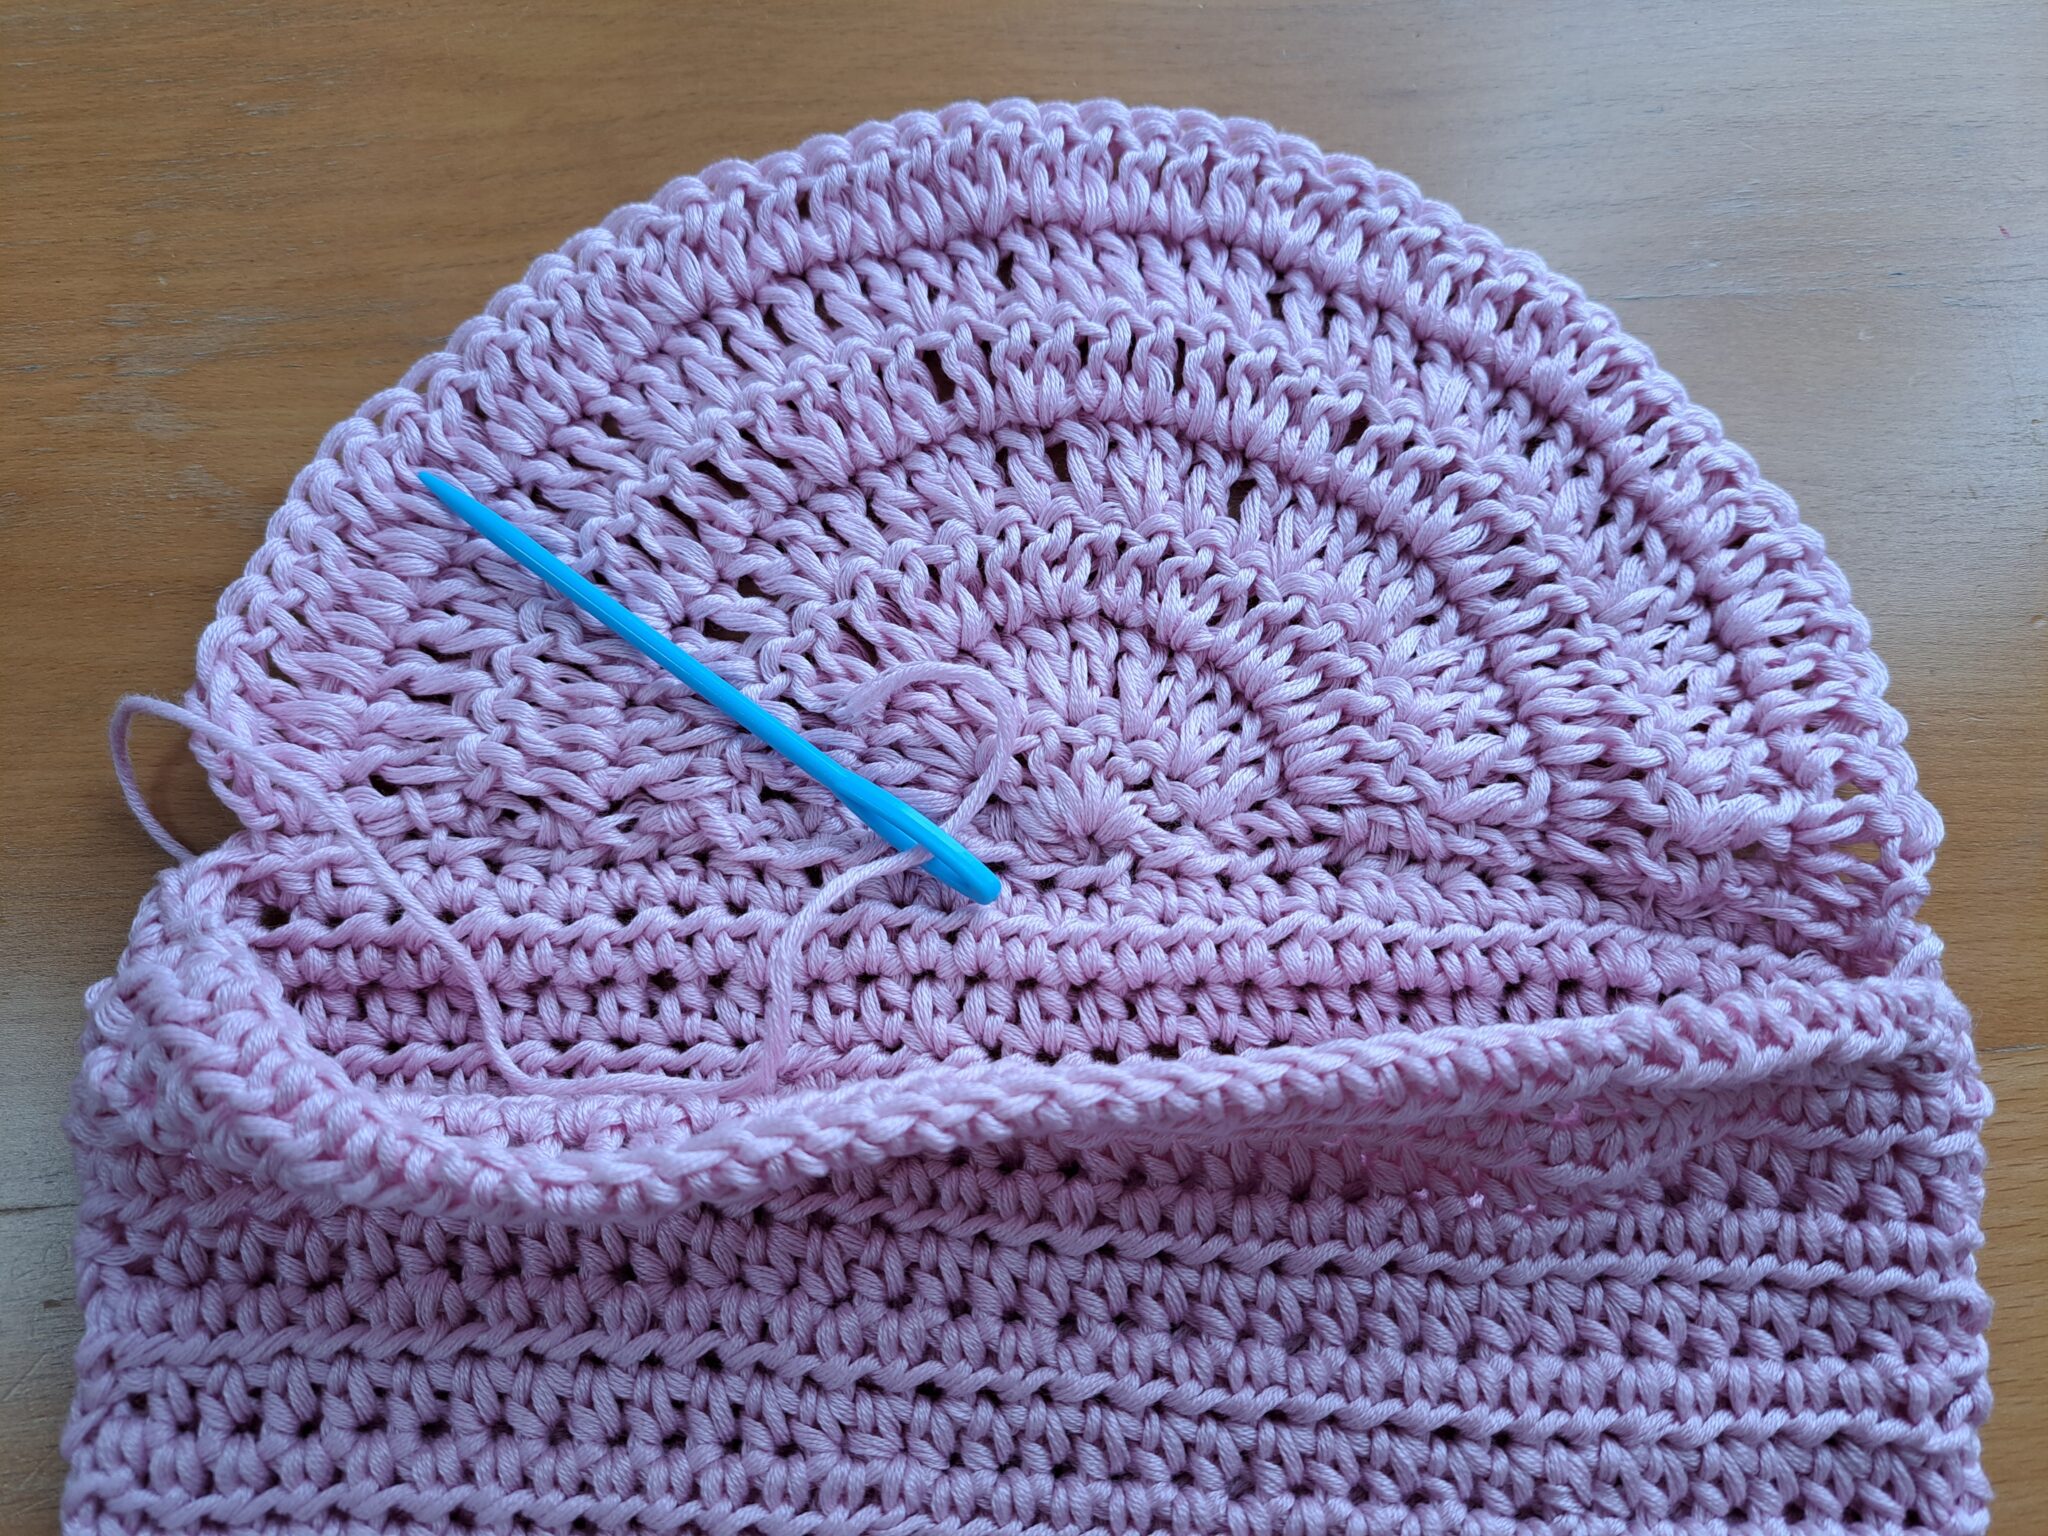
Sew flap onto the project
Now turn your project inside out as we will now be sewing the strap onto the inside of the project (and you will want the right side facing to do this).
Place the strap into the bag, inside each side of the project, making sure you have 4 cm (=1.5 inches) of strap inside the bag.
Sew into the project with a darning needle and thread (or yarn if you have crocheted your own strap), making sure you do not twist the strap when sewing it onto both sides of the project.
Sew straps onto the project
Make sure you sew the strap very securely onto the project.
Fasten Off and Tidy Up All Loose Ends
Sew Your Flowers onto the Project
Now you will be sewing your flowers onto the front panel of the project with the darning thread and needle.
Place your three flowers as seen in the photograph below, making sure you are happy with their placements.
With darning thread and needle, secure each flower one by one onto the flap of the bag.
Fasten off and tidy up all loose ends.
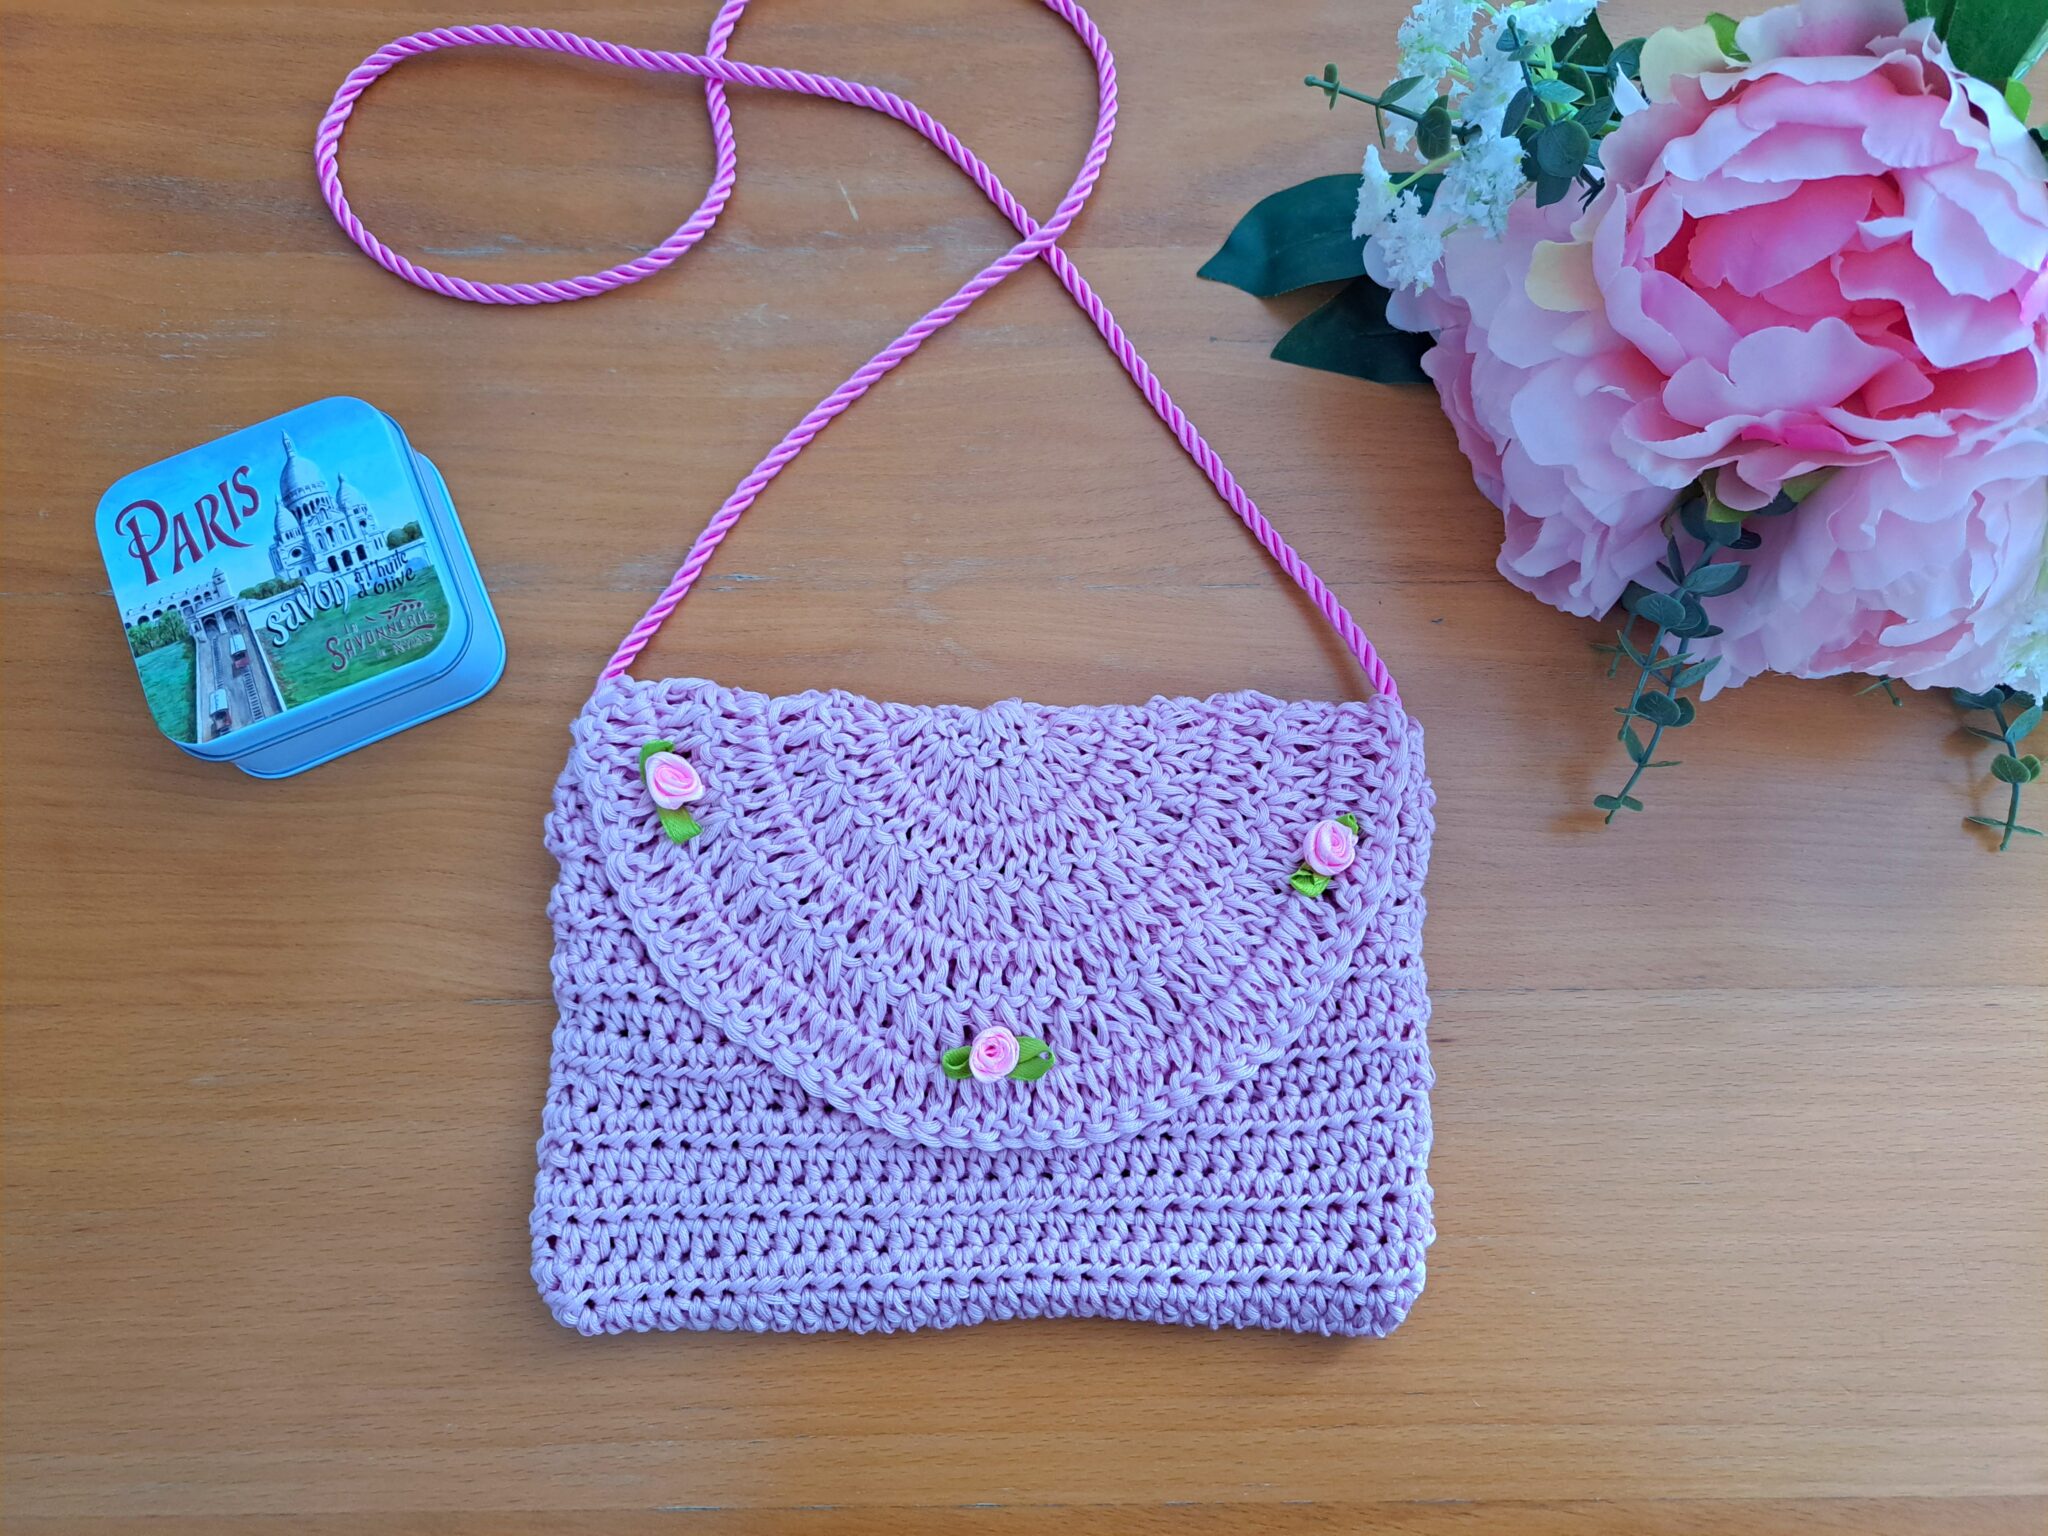
Sew flowers onto the project