Topics
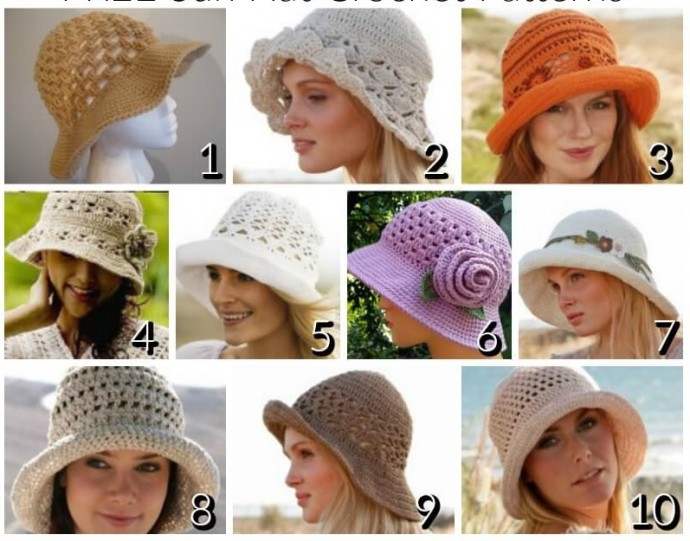
Inspiration. Crochet Summer Hats.
Inspiration for creating beautiful crochet summer hats is abundant, perfect for adding style and flair during the sunny season. Why Crochet Summer Hats? Crochet summer hats are not only fashionable but also functional, providing shade and protecting your face from harmful UV rays. They can be made in various styles, colors, and sizes to match any outfit. Popular Crochet Hat Styles Wide-Brimmed Hats Bucket Hats Panama Hats Sun Hats with Ribbons Visors Materials...
Have a Great Day!
Good day to all of you! Have a nice day and mood! Take care of yourselves! Do you like the inspiration posts I made? I want to remind you that if you like any picture from such kind of posts, you can always ask me to find the pattern; usually, I manage to do this.
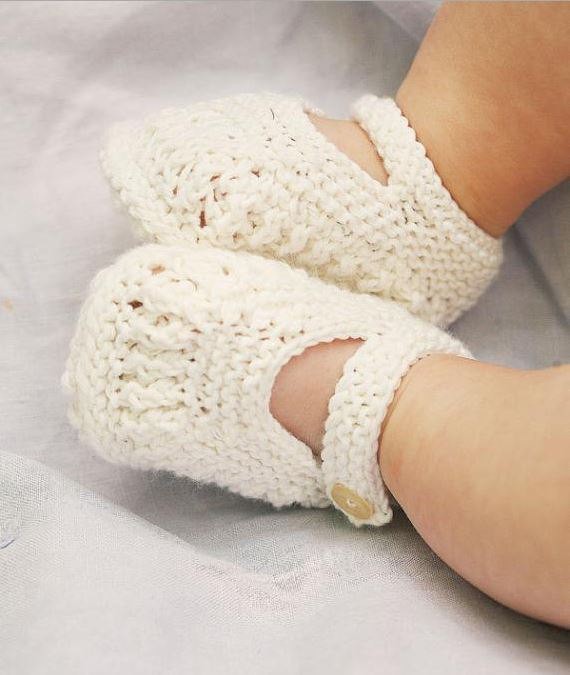
Summer Bootie Sandals
You'll Need: 100% cotton yarn; Knitting needles 2.75; 2 buttons. Stitches Control: 30 sts x 38 rows = 10 x 10 cm. Size: 0-3, 3-6, and 6-9 months, sole length - 8, 9, and 10 cm. Instructions: Let's start with the left bootie. For this, cast on 50 (58, 66) sts and knit 3 rows of knit sts (garter stitch). 1st row: 1 knit st, * 1 purl, 1 yarn over, 1 knit st*; repeat from * to * to last st, 1 knit st = 74 (86, 98) sts; 2nd row: 1 knit st, * 1 purl, 1 y...
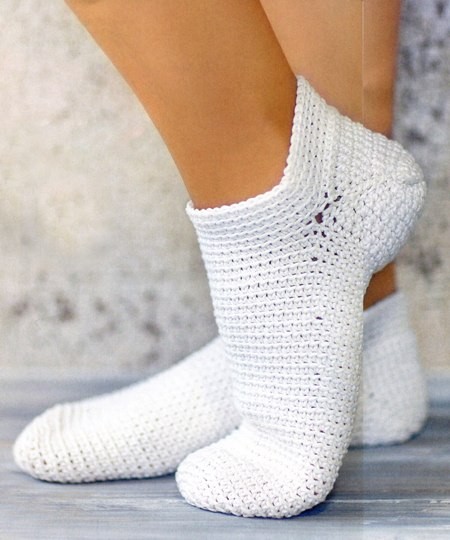
White Short Crochet Socks
You'll Need: 2 skeins of 100% mercerized cotton yarn (107m/50g); Crochet hook size 3. Instructions Start by making the toe. Wind the yarn around your finger in a ring and make 8 single crochets, then tighten your ring. Crochet in a spiral with the main pattern by catching stitches through back loops and making increases following these steps: 1st row: 2 single crochets in every stitch = 16 stitches; 2nd row: *3 single crochets, 3 single crochets in the next stitch*; repeat from * to ...
Photo Frame Decoration
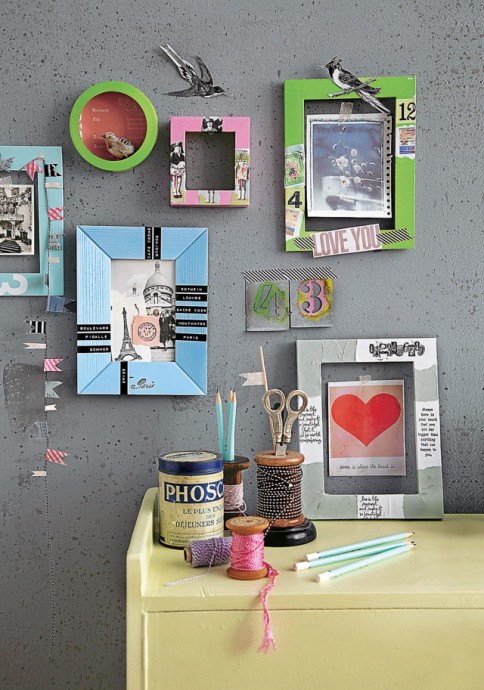
You'll Need: Wooden frames; Acrylic paint in sprinkler; Photos, colorful cuts from magazines; Rolling stamp. Instructions Disassemble the frame by separating the back wall. Stick a photo or colored paper with a pattern on it. Cover the frame with acrylic paint from a sprinkler. Allow to dry completely. Make clippings from photos and pictures. Collect collages from various images, individual letters, and numbers and stick them on the frame. The frame can also be decorated with a rolling sta...
Sectional Knit Plaid
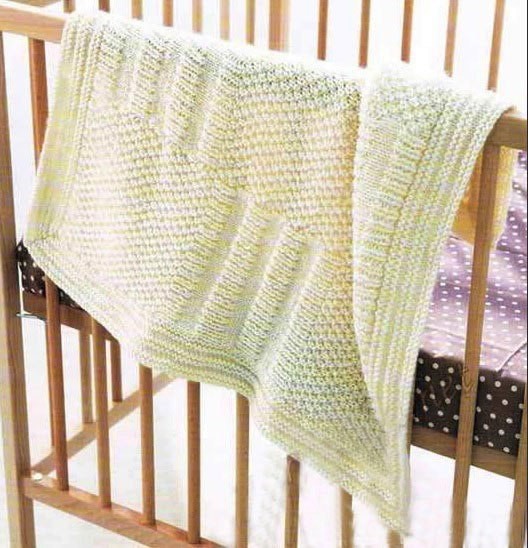
You'll Need 400g of yarn (50% wool, 50% acryl; 55m/50g); Knitting needles 4 and 4.5. Size 60 x 67 cm. Used Patterns Garter stitch: all knit sts; Stockinette stitch: in right-side rows - knit sts, in wrong-side rows - purls; 1 x 1 rib; "Grain" pattern: due to the scheme. Stitches Control On "grain" pattern with knitting needles 4.5: 18 sts x 23 rows = 10 x 10 cm. Instructions The center of the plaid is made as one-piece work. Cast on 105 ...
Relief One-Side Net Knit Stitch
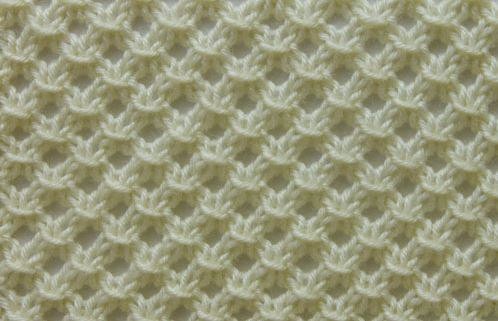
Understanding the Stitch Quantity The quantity of stitches is multiplied by 3 plus 2 selvedge stitches. Row Instructions 1st Row * Cross 3 knit stitches with broaching to the left: knit 3 stitches, then throw the 1st stitch to the 2nd and 3rd stitches, resulting in 2 stitches out of 3, followed by a yarn over*; repeat from * to *; 2nd Row Purl. 3rd Row 1 knit stitch, *1 yarn over, cross 3 stitches with broaching to the left*; repeat from * to *, then knit 2 stitches. 4th Row Purl.
Relief Crochet Doily
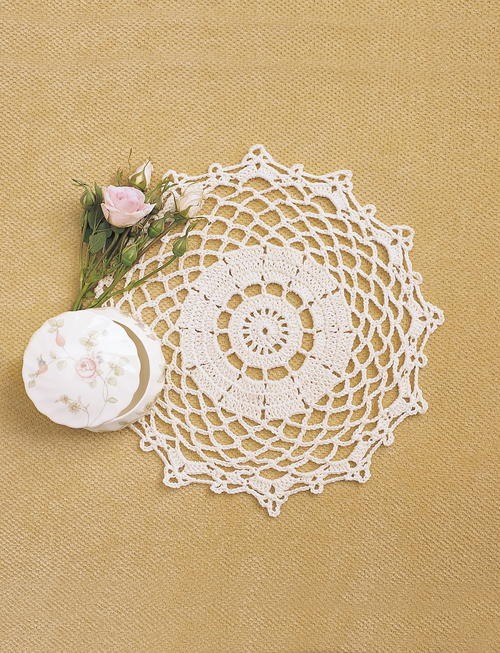
You'll Need: 1 ball of Bernat Handicrafter Crochet Cotton (14 oz / 400 g) (1 doily = 66 yds [62 m]); Crochet hook 1.75 mm. Size: 23.5 cm in diameter. Gauge: Center motif (to 3rd rnd) = 4.5 cm in diameter. Instructions Ch 6. Join with sl st to form ring. 1st rnd: Ch 3 (counts as 1 dc). 15 dc in ring. Ss in top of ch-3. 16 dc. 2nd rnd: Ch 4 (counts as 1 dc and ch-1). Miss next dc. (1 dc in next dc. Ch 1) 15 times. Ch 1. Sl st in 3rd ch of ch-4. 3rd rnd: Ss in ch-1 sp. Ch 3. 2 dc in ...
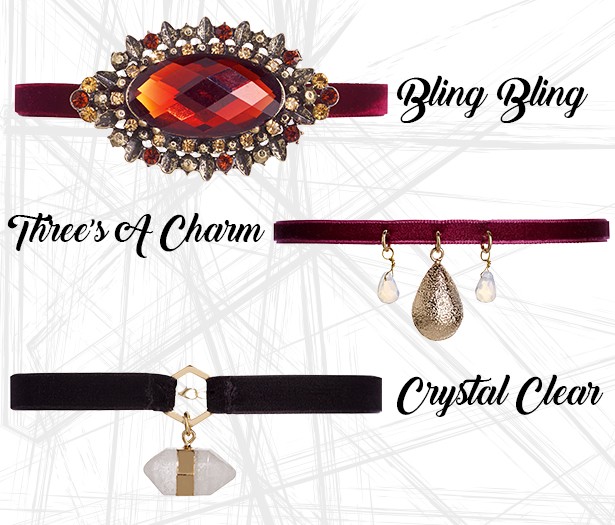
Velvet Hand-Made Chocker
You'll Need: Velvet ribbon (30 cm); Pendant; Ringlets for imitation jewelry; Chain fastener for imitation jewelry; Pliers. Instructions Measure neck circumference. Cut the velvet ribbon to the desired length and cut it into two equal parts. Using pins, fasten the ribbons to the ringlet and sew them. Use a pair of pliers to attach the pendant to a separate ringlet, and then fasten it to the main ring of the choker. Insert the ends of the ribbon into the fastener holders and clamp with pli...
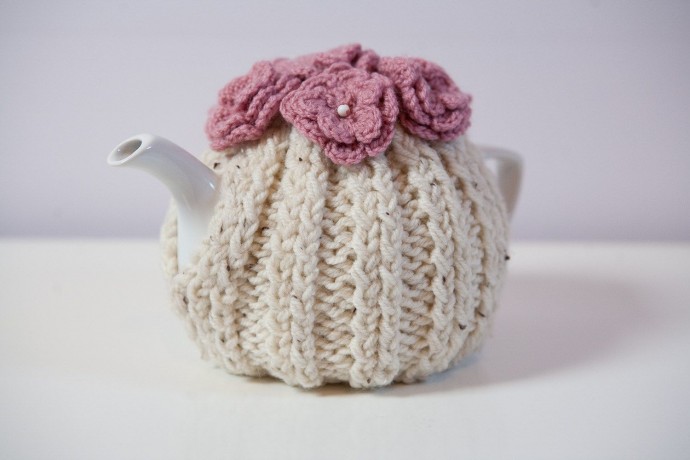
Inspiration. Teapot Decoration.
Inspiration is the essence of creativity, and when it comes to teapot decoration , the possibilities are truly endless. Creative Teapot Decoration Ideas Here are some imaginative ways to elevate your teapot's aesthetic: Painted Patterns: Use non-toxic paint to create unique designs. Decoupage: Apply beautiful paper cut-outs for a vintage look. Floral Arrangements: Enhance your teapot with fresh or dried flowers. Fabric Wraps: Use colorful fabrics to wrap around your teapo...
Are you ready for the summer?
Hello, my dear friends! I want to wish you a nice and calm day! Try to be positive and take care of yourselves! Summer Clothing Preparation Have you prepared clothes for summer? Knitting and Crocheting Ideas What do you knit or crochet? Here are some popular options: Tops and blouses Skirts Dresses Maybe you have some unique projects in mind as well!
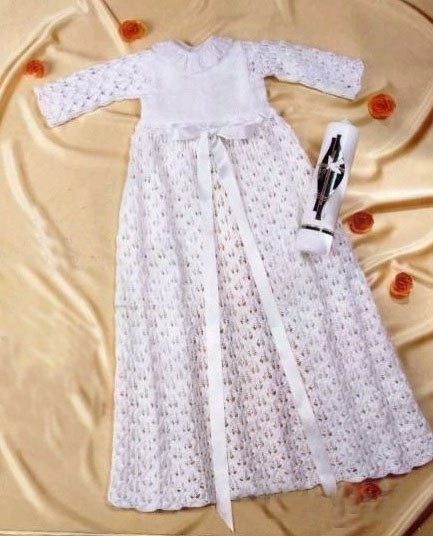
Snow-White Baby Girl Dress
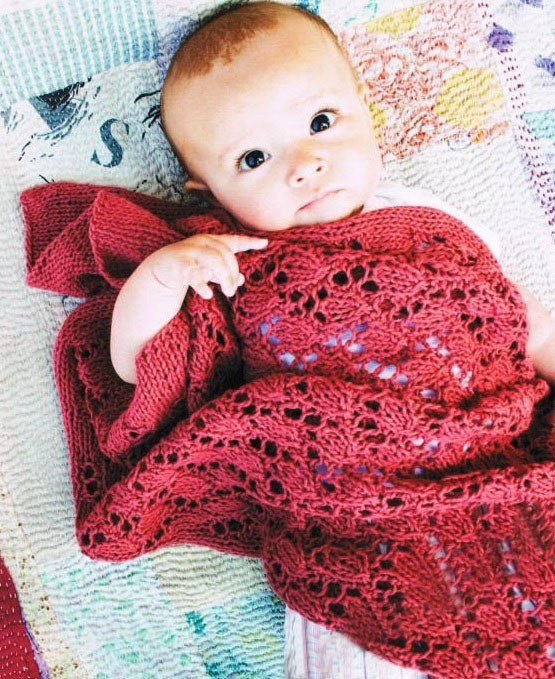
Materials Needed You'll need: 650 (700) g of 100% cotton yarn (125m/50g); Circle knitting needles 2.5; Crochet hook 3; 1 button; Satin lace 25 mm. Size Size: 62-68 (74-80). Used Patterns Stockinette Stitch In right-side rows - knit stitches, in wrong-side rows - purls; Relief Pattern Due to the scheme. Start with stitches before pattern repeat, pattern repeat, finish with stitches after pattern repeat. Repeat 1st-10th rows. Stitch Control Relief patt...
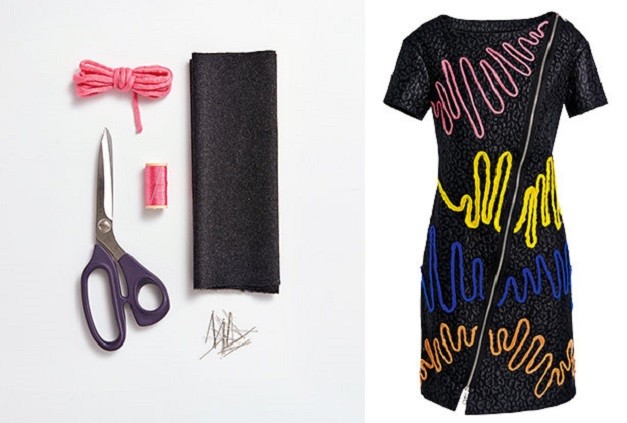
How to Decorate Your Clothes with Yarn
You'll Need: Detail of unfinished cloth (dress, skirt, etc); Thick yarn; Pins; Threads the same color as yarn; Scissors. Instructions Use the pins to fix the yarn, creating curved fancy lines. Manually fasten the yarn with several stitches here and there to securely fasten it. Set the zigzag stitch and stitch the yarn. You can decorate the finished product, but it will be much easier to do this at the sewing stage.
Summer Light Relief Plaid
You'll Need: 200g of yarn (50% cotton, 50% linen yarn; 200m/100g); Knitting needles 4. Size 65 x 72 cm. Stitches Control Main pattern with knitting needles 4: 14 sts x 23 rows = 10 x 10 cm. Instructions Cast on 91 sts with knitting needles 4. Knit 11 rows with stockinette stitch and then follow the scheme below: 12th row (wrong-side): 8 purls, 3 knit sts, * 3 purls, 3 knit sts*; repeat from * to * 12 times, 8 purls; 13th row: 8 knit sts, 1 purl, 1 yarn over, purl2tog, * 3 knit...
Helping our users. Crochet Garden Shawl.
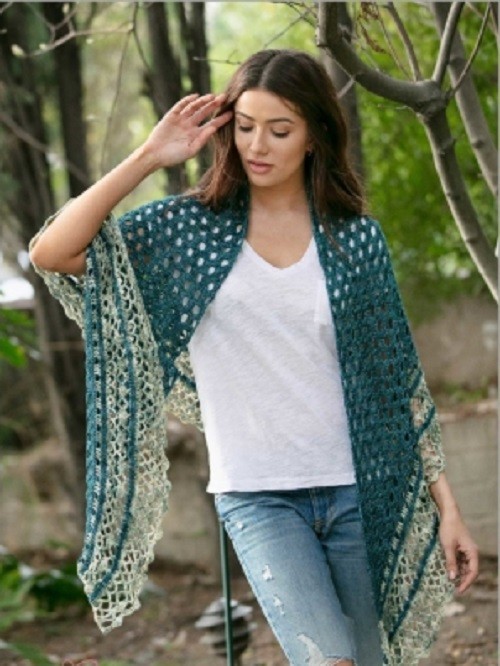
You'll Need: Hazel Knits Artisan (90% merino, 10% nylon; 400 yards [366 meters]/120 grams): Atmosphere (MC), 2 skeins; Miss Babs Yummy 2ply (100% merino; 400 yards [366 meters]/115 grams): Perilous Voyage (CC), 1 skein; Crochet hook 4.5 mm; Tapestry needle. Instructions Increase Section Using MC, ch 5. Row 1 (RS): 3 dc in 4th ch from hook, dc in last ch. Row 2: Ch 4, 3 dc in first dc, ch 2, dc in last dc, dc in tch. Row 3: Ch 1, sc in first dc, shell in ch2-sp, sk 1 dc, sc in next d...

