Sign in Create account
Search

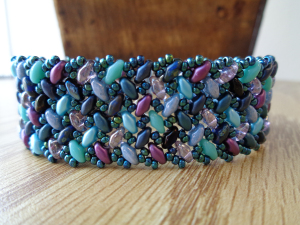
Enhance Your Herringbone Stitch with 11/0 and SuperDuo Beads
Susan
Susan
Feb 13, 2020 02:48 AM
How to Create a Stunning Herringbone Stitch Design with 11/0 and SuperDuo Beads

Pick up two 11/0’s and one SuperDuo, instead. This fills in the gaps and hides the thread. It emphasizes the v-shaped motif of herringbone stitch.

Photo 1: You can see that I’ve picked up two 11/0’s and one SuperDuo.

Photo 2: I go down through the two 11/0’s in the row below.

Photo 3: I go up through the top hole of the next SuperDuo in the row below.

Photo 4: And repeat across the row.

Go up and around through an 11/0 and then add two more 11/0’s.

Photo 5: I’m coming out of the SuperDuo that I passed through after adding my two 11/0’s and SuperDuo.

Photo 6: Go straight up into the beads above and go through the first 11/0 on top of my SuperDuo. This leaves a tiny bit of thread visible, so try to match your colors.

Photo 7: Pull your thread tight and then pick up two 11/0’s.

Photo 8: Go straight up through that top SuperDuo and you’re ready for the next row!

Like!6
1162
No comments