CrochetMenScarvesHatsGlovesSweatersCardigansSocksOther clothingWomenScarvesHatsGlovesShawls and cover upSweatersCardigansSocksSlippersBagsOther clothingChildrenScarvesHatsGlovesSweatersCardigansSocksSlippersOther clothingHomeBlankets and plaidsRugsHome decorationsPetsSchemesKnittingOther hand-madeChat
How to Crochet Flowers and Borders for Your Blanket


Introduction
The quantity of stitches is multiplied by 5 + 4.
Starting the Blanket
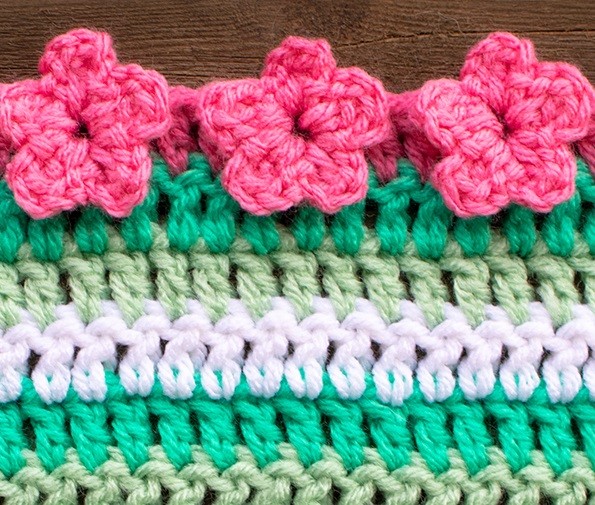
Start with CH 3 (counts as 1 DC). Make 1 DC in each of the next 3 stitches. Then, make 2 DC in the next stitch.
Creating the Flower
Using the 2 DC as a "stitch ring," repeat the following steps:
- CH 2
- 1 DC in the ring
- CH 2
- SLST in the ring
Do this twice on the 1st DC. Rotate the work and repeat the steps above twice on the 2nd DC.
Continuing the Flower Pattern
Facing the work in the normal position, proceed with:
- CH 2
- 1 DC in the ring
- CH 2
- SLST in the ring
Finish by making a CH 1 (tightly) and then 1 DC in each of the next 4 stitches.
Repeating the Flower Across the Row
Repeat the flower pattern across the row.
Adding a Border Around the Blanket
If using a border around the blanket, place 2 DC in each corner and make a flower in each corner as well.
Finally, fasten off and weave the ends for a finished look.
No comments
Write a comment
