How to Crochet an Adorable Pig in a Blanket

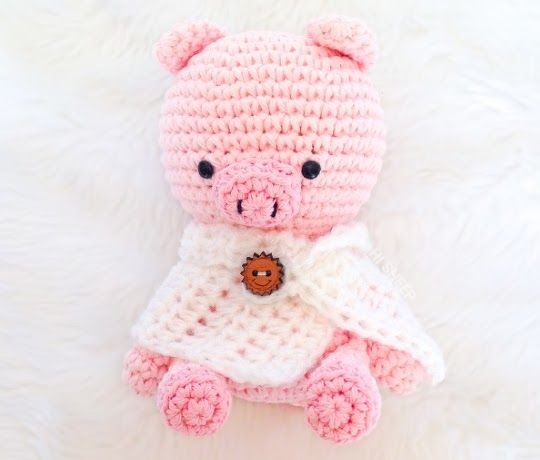
Introducing the adorable creation known as the Crochet Pig in a Blanket! This charming little crochet project brings together the art of crocheting and the cuteness of a piglet, all wrapped up snugly in a cozy blanket. With its soft and cuddly texture, this handmade pig in a blanket is sure to capture the hearts of both children and adults alike.
This crochet pig in a blanket is not only a charming addition to any nursery or playroom, but it also serves as a wonderful gift for baby showers or birthdays. Its handmade nature adds a personal touch, making it a truly unique and special present. Whether you're a crochet enthusiast or simply looking for a one-of-a-kind gift, the Crochet Pig in a Blanket is a delightful project that will bring joy and warmth to anyone who lays eyes on it.
Materials Needed
For this project, I used a 3 mm hook for the pig and a 4 mm hook for the poncho, stuffing, tapestry needle, 6 mm safety eyes, a little bit of black embroidery floss, and DK yarn in:
- Main Pink - 30 gr
- Accent Pink - 5 gr
- White - 10 gr
Abbreviations
(U.S.):
- R: Round
- mr: magic ring
- ch: chain
- sc: single crochet
- sl st: slip stitch
- hdc: half double crochet
- inc: increase
- dec: decrease
- **: repeat to the end of round
- (...) x...: repeat the inside of parentheses according to the indicated number, example: (...) x2
[...] total stitches at the end of round
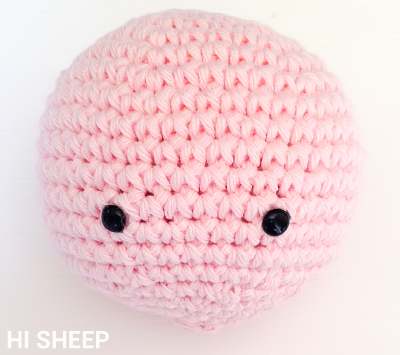
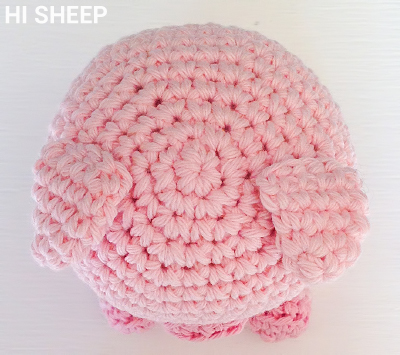
Head
With main pink.
- R1: 6 sc in mr
- R2: *sc inc* [12]
- R3: *1 sc, sc inc* [18]
- R4: *2 sc, sc inc* [24]
- R5: *3 sc, sc inc* [30]
- R6: *4 sc, sc inc* [36]
- R7: *5 sc, sc inc* [42]
- R8-14: 42 sc [42]
- R15: *5 sc, sc dec* [36]
- R16: *4 sc, sc dec* [30]
Place eyes between R12-13, leaving 5 stitches between each.
- R17: *3 sc, sc dec* [24]
- R18: *2 sc, sc dec* [18]
- R19: *1 sc, sc dec* [12]
- R20: *sc dec* [6]
Close.
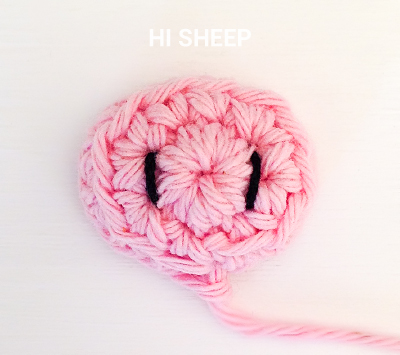
Snout
With accent pink.
- R1: 8 sc in mr
- R2: 1 sc, (sc inc)x2, 2 sc, (sc inc)x2, 1 sc [12]
- R3: back loop only 12 sc [12]
Break yarn leaving enough for sewing.
With black embroidery floss, make two vertical lines opposite each other.
Sew the snout between R12-16 of the head.
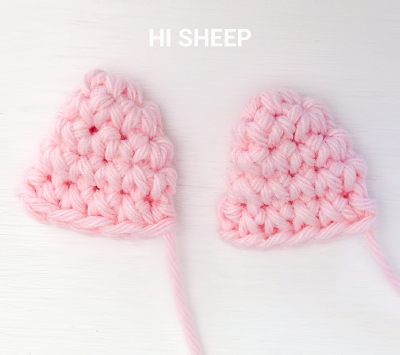
Ears
Make two.
With main pink.
- R1: 6 sc in mr
- R2: *2 sc, sc inc* [8]
- R3: *3 sc, sc inc* [10]
- R4: 10 sc [10]
- 1 ch, turn, flatten the piece and close it up working 5 sc
Break yarn leaving enough for sewing. Sew ear between R3-7 of the head.

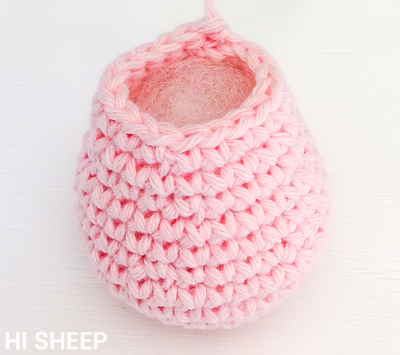
Body
With main pink.
- R1: 6 sc in mr
- R2: *sc inc* [12]
- R3: *1 sc, sc inc* [18]
- R4: *2 sc, sc inc* [24]
- R5: *3 sc, sc inc* [30]
- R6-7: 30 sc [30]
- R8: *4 sc, sc dec* [25]
- R9-10: 25 sc [25]
- R11: *3 sc, sc dec* [20]
- R12: 20 sc [20]
- R13: *8 sc, sc dec* [18]
Break yarn leaving enough for sewing.
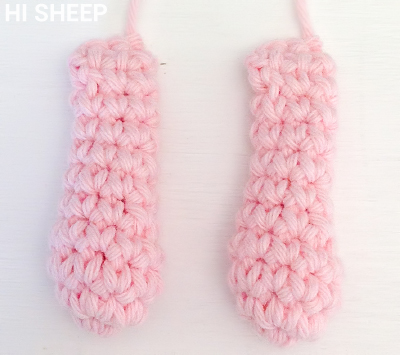
Arms
Stuff lightly at the beginning. Make two.
With main pink.
- R1: 5 sc in mr
- R2: *sc inc* [10]
- R3-4: 10 sc [10]
- R5: *3 sc, sc dec* [8]
- R6-7: 8 sc [8]
- R8: sc dec, 6 sc [7]
- R9: 7 sc [7]
- R10: 5 sc, sc dec [6]
1 ch, turn, flatten the piece and close it up working 3 sc.
Break yarn leaving enough for sewing.
Sew arms at the sides of the body between R12-13.
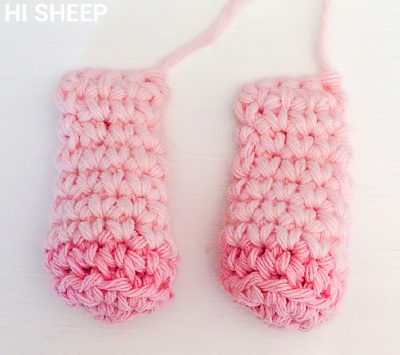
Legs
Stuff lightly only at the beginning. Make two.
Starting with accent pink.
- R1: 6 sc in mr
- R2: *sc inc* [12]
- R3: back loop only 12 sc [12]
Change to main pink.
- R4: 12 sc [12]
- R5: *4 sc, sc dec* [10]
- R6-7: 10 sc [10]
- R8: *3 sc, sc dec* [8]
- R9: 8 sc [8]
- 1 ch, turn, flatten the piece and close it up working 4 sc
Break yarn leaving enough for sewing.
Sew legs at the sides of the body between R4-8.
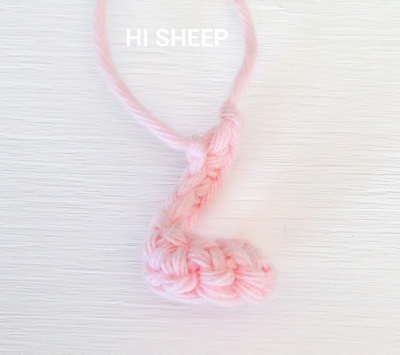
Tail
With main pink.
- 9 ch
- R1: (1 sc, sc inc) x4 [12]
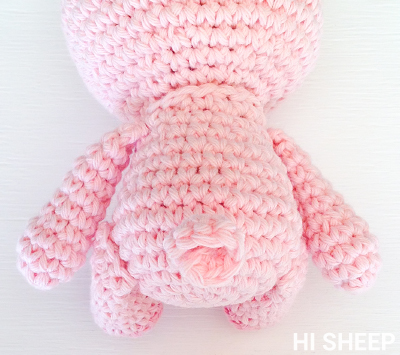
Break yarn leaving enough for sewing. Give it a little curl if it doesn't naturally do that. Sew tail to the back side of the body between R5-6.
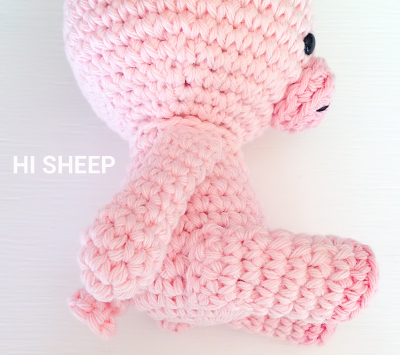
Sew the head to the body.
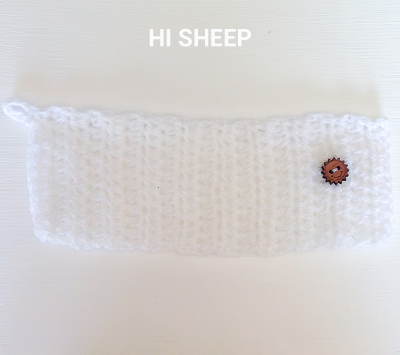
Poncho
With 4 mm hook so that tension is lighter.
With white.
- 12 ch
- R1: 11 hdc [11]
- R2-19: 2 ch, turn, 11 hdc [11]
To make the buttonhole: ch 5 (adjust if necessary for the size of your button), 1 sl st in the same stitch as the chain.
Secure and hide loose ends.
Sew a button; you can try the poncho on your piggy and see where you'd like it.