Crochet Rosy Poncho Top Pattern and Instructions
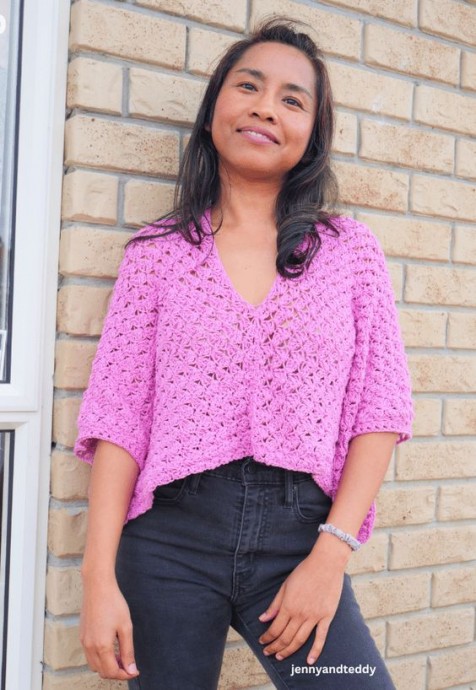
Create a Stylish Rosy Poncho Top
Create a stylish top with a rosy poncho design using crochet techniques. This unique piece will add a touch of elegance to your wardrobe, perfect for both casual outings and special occasions. The rosy color adds a feminine and romantic touch to the overall look, making it a versatile piece that can be dressed up or down depending on the occasion.
The poncho style top is not only fashionable but also comfortable to wear, thanks to the soft and breathable crochet material. The intricate crochet work adds a handmade touch to the top, making it a standout piece in your collection. Whether you pair it with jeans for a casual day out or with a skirt for a more formal event, this rosy poncho style top is sure to turn heads and make you feel confident and stylish.Material & Supplies
- In this free crochet sweater pattern, I used DK weight yarn/3 light from Scheepjes Softfun color 2480 pink, around 840 meters = 6 skeins for sizes example, small to medium from bust size 30-34 inches.
- 1 skein of Scheepjes Softfun is 50 grams = 140 meters, 60% cotton with 40% Acrylic.
- 4.0 mm crochet hook.
- Sewing yarn needle.
Skills and Abbreviations
You will need to know how to make (American crochet term):
- sc, which means single crochet.
- dc, which means double crochet.
- hdc, which means half double crochet.
- ch, which means Chain.
- slip knot.
- sk, which means skip stitch.
- See the crochet blanket stitch video tutorial.
Finished Size for This Rosy Top Approximately:
This example is made to fit a size small to medium (30-34 inch bust size).
For me, the model wearing this piece, I am 4’9 feet tall, bust of 32 inches, a waistline of 26 inches, and hips of 35 inches.
Pattern Note:
- This top can be made in any size; just measure your bust.
- The left and right panels are made with the same stitch.
Rosy Poncho Top Free Crochet Pattern Instructions
The Poncho Top Body Makes 2 Pieces
The Left & Right Panel Makes 2 Pieces
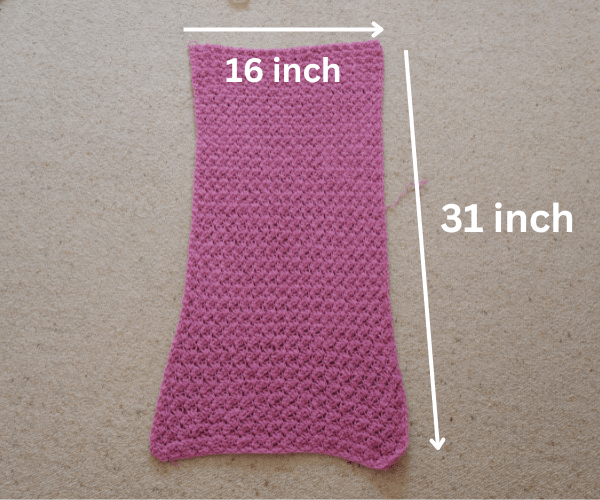
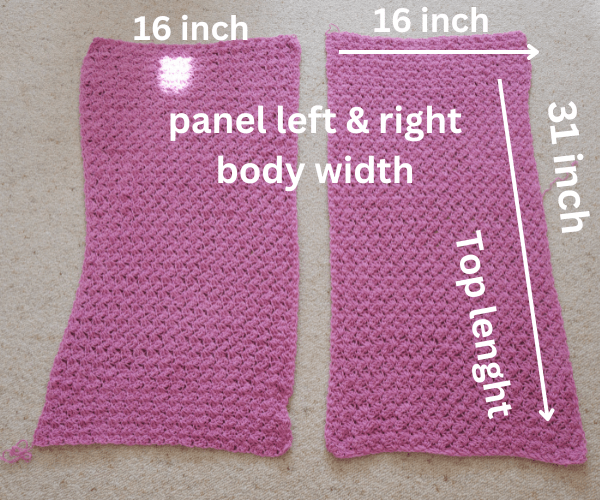
The Measurement of One Rectangle
- 31 inches long for a crop size length. For a full-length top, add more rows.
- 16 inches wide, fit bust size 30-34 inches.
First, let’s measure your bust size, then divide by 2. For example, my bust size is 32/2.
So I will get 16 inches for my size. See the video tutorial for how to make them into your size.
Start with the Left and Right Panels
Pick up a crochet hook size 4.0 mm and start off by making a slip knot. Then make 57 chains for sizes small and medium fit from bust sizes 30-34.
(For the other sizes, start the foundation chain in multiples of 3 that match your bust size calculation.)
Row 1: Make 2 dc in the 3rd chain from hook and *sk 2 ch, sc in next ch, and make 2 dc in same ch stitch* Repeat from * to * end of row. Sc in the last ch of the row. Ch 2, turn.
Row 2: 2 dc in the first sc of the previous row, *sk next 2 dc, make sc and 2 dc in next sc* Repeat from * to * until the end of the row. Make sc in turning ch 2 at the end of the row, ch 2, turn.
Row 3 and beyond: Repeat row 2 until we get 31 inches.
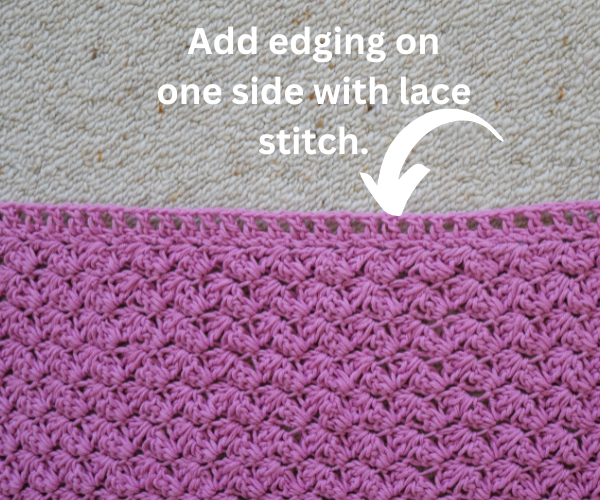
Add Lace Edging
Add edging at only one side of the rectangle.
Row 1: Sc in each space until the end of the row. Chain 2 and turn.
Row 2: Dc in the same stitch, *ch 1, then dc in next st* repeat this * to * until the end of the row and fasten off and repeat the same for the remaining panel.
Assemble the Poncho Top
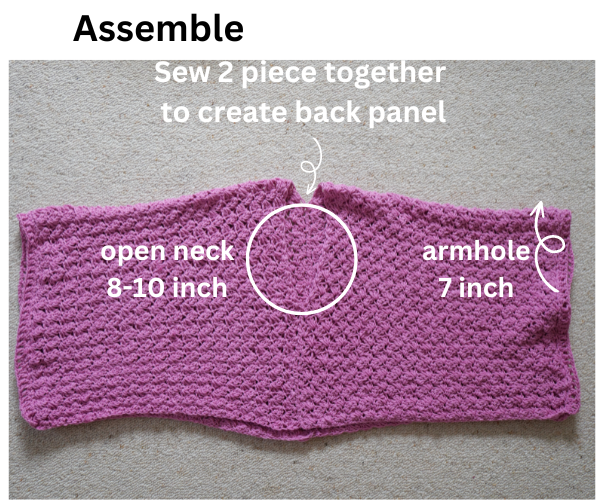
Fold the rectangles in half and join the back part of the rectangle to create the back panel for the top.
After we finish creating the back panel, we will move on to create the armhole.
The armhole can vary depending on how big you want it to be. In the example piece, I made an armhole for 7 inches.
After we finish creating the armhole, we will sew up the front to close the open body.
And that is all we did.
Assemble
All done!
