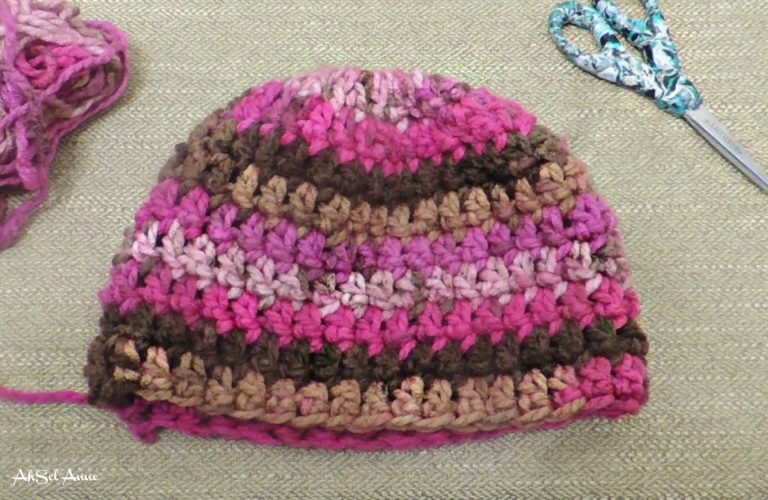
Crochet Messy Bun Hat


If you're looking for the perfect blend of style and functionality, a Crochet Messy Bun Hat is an absolute must-have in your accessory collection! This trendy hat allows you to rock your favorite messy bun or ponytail while keeping your head warm and cozy during the colder months. Whether you're running errands or enjoying a day out with friends, this hat is a fun and fashionable solution to keep your hair up and your head covered. So go ahead, embrace your unique style with a Crochet Messy Bun Hat that's as practical as it is cute!
Materials
- Yarn Suggestion: Loops and Thread Charisma (Color Chocolate Cupcake)
- Hook: 9mm crochet hook
- Measuring Tape
- Yarn Needle
- Stitch Markers (optional)
- Scissors
Legend
- ch - chain
- bl - back loop
- dc - double crochet
- hdc - half double crochet stitch
- rnd - round
- sl st - slip stitch
Note
The messy bun hat was created for pre-teens/adults using bulky yarn. Thus, these instructions have been written for that size and using this type of yarn. [Head size 21-22 inches].
This project can be customized to fit different sizes.
To Adjust Size
Measure the circumference of your head. Start in the middle of your forehead, wrapping the measuring tape around your head about 1/8 inch above your ears to determine the measurement of your head. Therefore, when you create your project, you will want it to be an inch or two smaller, depending on the yarn stretch.
The hat will be approximately 2 inches smaller than your head size in order for the hat to fit snugly on your head.
Written Pattern - Messy Bun Crochet Hat
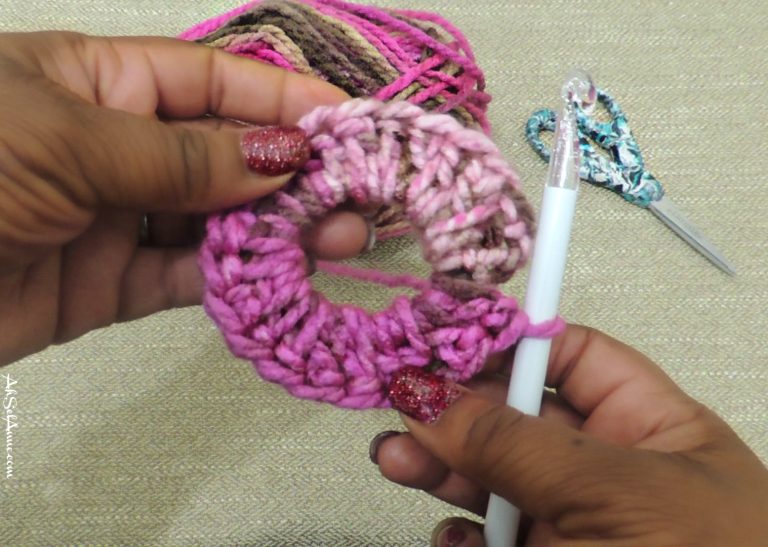
Create a slip knot around the crochet hook to begin the process.
Insert the crochet hook into the elastic band, grabbing the yarn and pulling it through the loop. Ch 3.
Rounds Instructions
1) Round 1: Place 24 dc stitches into the elastic band, sl st to join, ch 3.
NOTE: if you want to make a smaller hat, repeat Round 1 until you reach the desired height for your hat.

2) Round 2: [Increase Round] into the same space as the ch 3, create a dc stitch. Place a dc in the next stitch (the ch 3 counts as 1 dc stitch), place 1 dc into the next stitch, 2 dc into the next stitch, 1 dc in the next stitch followed by 2 dc in the next. Repeat around, sl st to join, chain 3 (you should have 36 stitches).
3) Round 3: Place 1 dc stitch into each stitch around, sl st to join round, ch 3 (Remember the ch 3 will count as your first dc stitch).
4) Round 4: 1 dc stitch into each stitch around, sl st to join round, ch 3.
5) Round 5: Place 1 dc stitch into each stitch around, sl st to join round, ch 3.
6) Round 6: Place 1 dc stitch into each stitch around, sl st to join round, ch 3.
7) Round 7: Place 1 dc stitch into each stitch around, sl st to join round, ch 3.
8) Round 8: Place 1 dc stitch into each stitch around, sl st to join round, ch 3.
9) Round 9: Place 1 dc stitch into each stitch around, sl st to join round, ch 2.
Creating the Brim
10) Round 10: hdc stitch into the bl of each stitch around, sl st to join, ch 2.
11) Round 11: hdc stitch into the bl of each stitch around, sl st to join, finish off, weave.
(If you want a larger brim, repeat round 10, then proceed to instruction in Round 11.)
- Funny Pictures
-
 Cute Cat Memes That Will Make Your Day Brighter
-
 Spot-on and Funny Memes About Introverts Struggles
-
 Top Wonderful Cat Memes on Their Way to Better Your Day
- Recipes
-
 Creamy Old Fashioned Rice Pudding
-
 Russian Tea Cakes (Snowball Cookies)
-
 Rigatoni with Sausage, Tomatoes, and Zucchini
- Lifehacks
-
 How to Crochet a Harlequin Stitch
-
 Removing The Toughest Stains
-
 Crochet Basics: Crumpled Griddle Stitch
- Crochet Ideas
-
 Crochet Christmas Tree
-
 Crochet Goblet of Fire
-
 Crochet Adorable Ammonite
- DIY
-
 DIY Snowman Wreath
-
 Mini Santa Sleigh Ornament
-
 Crochet Gingerbread House Blanket
- Knitting Ideas
-
 Knitted Easter Bunny
-
 Knitted Mobile Phone/Glasses Case
-
 Knitted Cabled Wallet