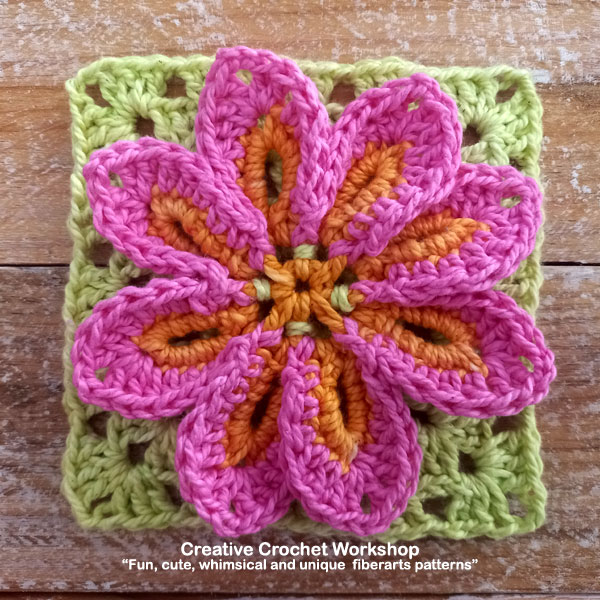
Crochet Hip Wild Flower Granny Square Pattern
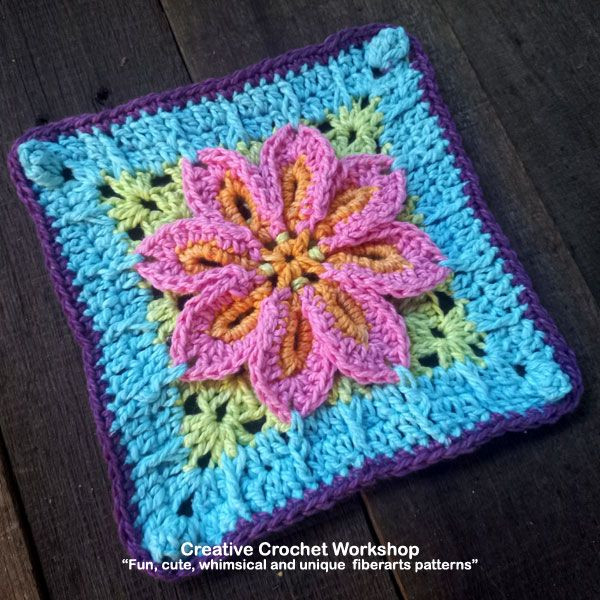
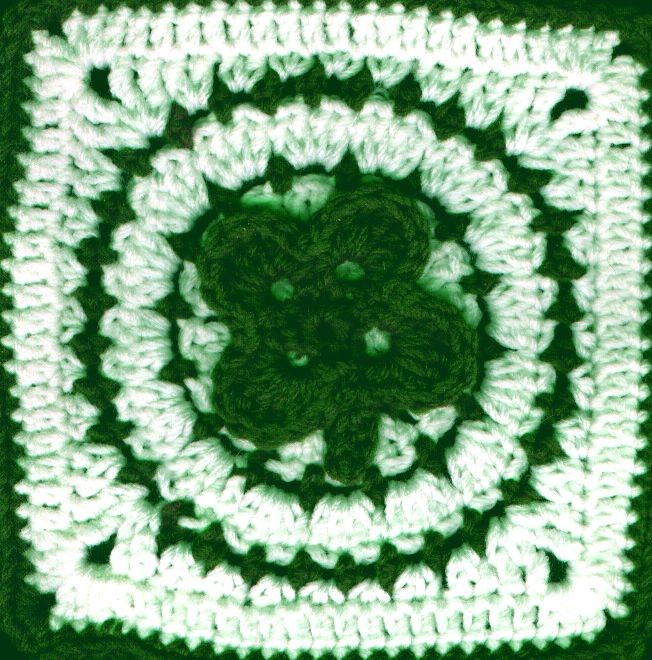
The Crochet Hip Wild Flower Granny Square is a charming and vibrant crochet pattern that is perfect for those looking to add a pop of color and creativity to their projects. With its playful design and intricate details, this granny square is sure to catch the eye and bring a touch of cheerful whimsy to any crocheted piece. Whether you're a seasoned crocheter or just starting out, this pattern is a fun and engaging project that will leave you feeling proud of your handmade creation. So grab your favorite yarn colors and crochet hook, and let your creativity bloom with this delightful pattern!
Supplies/Materials
- Yarn – Moya 100% Cotton Double Knit (cotton yarn) assortment of colors and grams.
- Weight – DK (11 wpi)
- Hook – 3.50 mm (E) – Clover
- Scissors
- Yarn needle
Abbreviations: US Terminology
- CH – chain
- SL ST – slip stitch
- SC – single crochet (UK – DC)
- HDC – half double crochet (UK – HTR)
- DC – double crochet (UK – TR)
- RS – right side
- WS – wrong side
Gauge
Not necessary for this project to be perfect. However, if you use a different yarn and/or hook, sizing will differ. Using the SAME hook and yarn will ensure your squares are consistent in size.
Pattern Notes
Stitch count is important! For completing the blanket – correct stitch count will ensure a successful joining of squares.
Size
Square – 6 x 6 inches (15 x 15 cm)
Colors
Approx – 62 – 65 yards (57 – 59 m) for complete square
- A – Butternut/Natural (5g)
- B – Watermelon/Geisha (6g)
- C – Kiwi/Sepia (7g)
- D – Turquoise/London Sky (7g)
- E – Sangria/Natural (2g)
Special Stitches
FPSC (Front Post Single Crochet)
Insert hook from the right side of the fabric into the gap to the hook-side of the next stitch to be worked. Insert hook from back to front around the post into the far-side gap. Yarn over and draw loop through both gaps. Yarn over and draw through remaining 2 loops on hook.
BPSC (Back Post Single Crochet)
Insert hook from the wrong side of the fabric into the gap to the hook-side of the next stitch to be worked. Insert hook from front to back around the post into the far-side gap. Yarn over and draw loop through both gaps. Yarn over and draw through remaining 2 loops on hook.
FPDC (Front Post Double Crochet)
Yarn over and insert your hook from front to back between the posts of the first and second stitch of the row/round below, and then from back to front again between the posts of the second and third stitches. The hook should now be positioned horizontally behind the stitch that you’re working around. Yarn over and draw the yarn around the post of the stitch. You now have 3 loops on the hook. Yarn over and draw the yarn through the 2 loops on the hook, twice. One front post double crochet (FPDC) is complete.
Popcorn
Work 5 double crochet (dc) stitches in the same stitch. Drop the loop from your hook. Insert your hook from front to back under the top 2 loops of the first double crochet of the group. Grab the dropped loop with your hook and pull it through the stitch. Chain 1 to lock your popcorn stitch.
Instructions
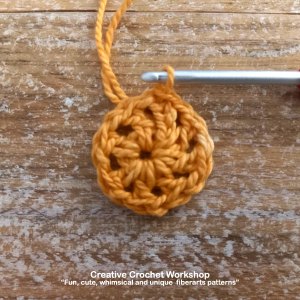
With A – CH 4; SLST into first to form a ring;
RND 1: CH 4 (counts as 1 DC; 1 CH); *work 1 DC; 1 CH into ring.* Repeat from * to * 6 more times. (8 x DC; 8 x 1 CH spaces)
RND 2: CH 1; work 1 SC into SAME ST; SL ST into next 1 CH space; CH 9; SL ST into SAME 1 CH space.* Work 1 SC into next DC; SL ST into next 1 CH space; CH 9; SL ST into SAME 1 CH space.* Repeat from * to * 6 more times. (8 SC; 8 x 9 CH loop)
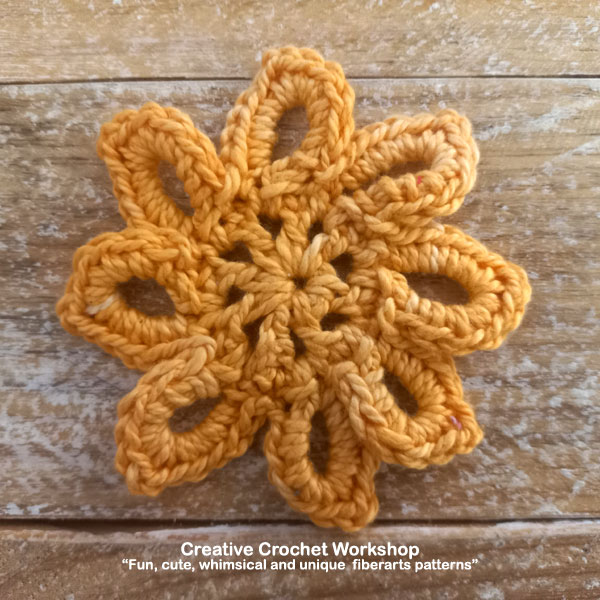
RND 3: CH 1; work [5 SC; CH 2; 5 SC] into next 9 CH loop; SL ST into next SC. *Work [5 SC; CH 2; 5 SC] into next 9 CH loop; SL ST into next SC.* Repeat from * to * 6 more times. (8 SL STS; 8 x 2 CH spaces; 10 SC into each loop = 80 SC)
Fasten off and weave in ends.
With B – join into any FIRST SC of a loop with a SL ST;
RND 4: CH 1; work 1 SC into SAME SC; work 1 HDC into each of next 2 SC; work 1 DC into each of next 2 SC; work [2 DC; CH 2; 2 DC] into 2 CH space; work 1 DC into each of next 2 SC; work 1 HDC into each of next 2 SC; work 1 SC into next SC; work 1 FPSC around next RND 1 DC.
*Work 1 SC into next SC; work 1 HDC into each of next 2 SC; work 1 DC into each of next 2 SC; work [2 DC; CH 2; 2 DC] into 2 CH space; work 1 DC into each of next 2 SC; work 1 HDC into each of next 2 SC; work 1 SC into next SC; work 1 FPSC around next RND 1 DC.* Repeat from * to * 6 more times. (120 STS)
Fasten off and weave in ends.
TIP: For this next part, fold your flower in half – right side still facing towards you.
With C – join with a BPSC into any RND DC;
RND 5: CH 3; *SKIP next DC; work 1 BPSC around next DC; CH 3.* Repeat from * to * 2 more times; SL ST into first BPSC. (4 x 3 CH space; 4 BPSC)
RND 6: SL ST into next 3 CH space; CH 3 (counts as 1 DC); work [2 DC; CH 2; 3 DC] into same space; CH 1. *Work [3 DC; CH 2; 3 DC] into next 3 CH space; CH 1.* Repeat from * to * 2 more times; SL ST into 3rd of 3 CH. (24 DC; 4 x 2 CH spaces; 4 x 1 CH spaces)
RND 7: SL ST into each of next 2 DC; SL ST into next 2 CH space; CH 3 (counts as 1 DC); work 2 DC; CH 2; 3 DC] into same space; CH 1; work 3 DC into next 1 CH space; CH 1. *Work [3 DC; CH 2; 3 DC] into next 2 CH space; CH 1; work 3 DC; into next 1 CH space; CH 1.* Repeat from * to * 2 more times.
(36 DC; 12 x CH spaces)
RND 8: SL ST into each of next 2 DC; SL ST into next 2 CH space; CH 3 (counts as 1 DC); work 2 DC; CH 2; 3 DC] into same space; CH 1; (work 3 DC into next 1 CH space; CH 1) x 2. *Work [3 DC; CH 2; 3 DC] into next 2 CH space; CH 1; (work 3 DC; into next 1 CH space; CH 1) x 2.* Repeat from * to * 2 more times. (48 DC; 16 x CH spaces)
RND 9: SL ST into each of next 2 DC; SL ST into next 2 CH space; CH 3 (counts as 1 DC); work 2 DC; CH 2; 3 DC] into same space; CH 1; (work 3 DC into next 1 CH space; CH 1) x 3. *Work [3 DC; CH 2; 3 DC] into next 2 CH space; CH 1; (work 3 DC; into next 1 CH space; CH 1) x 3.* Repeat from * to * 2 more times. (60 DC; 20 x CH spaces)
Fasten off and weave in ends.
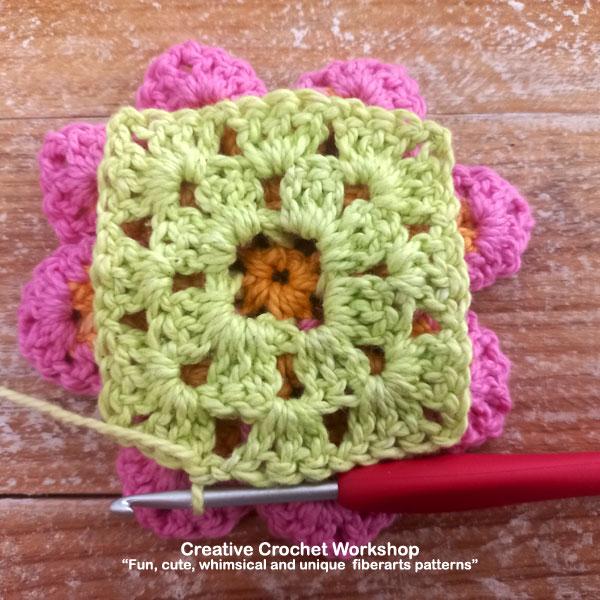
With D – join into any 2 CH corner space;
RND 10: CH 3 (counts as 1 DC); work [1 DC; CH 2; 2 DC] into same space; work 1 DC into next 3 DC; work 1 DC into next 1 CH space; work 1 DC into next DC; work 1 DC into next 2 CH space of petal and next DC; work 1 DC into next DC; work 1 DC into next 1 CH space; work 1 DC into next 3 DC; work 1 DC into next 1 CH space;
work 1 DC into next DC; work 1 DC into next 2 CH space of petal and next DC; work 1 DC into next DC; work 1 DC into next 1 CH Space; work 1 DC into next 3 DC.
* Work [2 DC; CH 2; 2 DC] into next corner space; work 1 DC into next 3 DC; work 1 DC into next 1 CH space; work 1 DC into next DC; work 1 DC into next 2 CH space of petal and next DC; work 1 DC into next DC; work 1 DC into next 1 CH Space; work 1 DC into next 3 DC; work 1 DC into next 1 CH space; work 1 DC into next DC; work 1 DC into next 2 CH space of petal and next DC; work 1 DC into next DC; work 1 DC into next 1 CH Space; work 1 DC into next 3 DC.* Repeat from * to * 2 more times; SL ST into 3rd of 3 CH. (23 DC on each side = 92 DC)
TIP: When working the FPDC, pull the loop up to match your current round. If you have a tight tension and your square is pulling inwards from the FPDC around the RND 9 DC; work a FPTR instead.
RND 11: CH 3 (counts as 1 DC); work 1 DC into next DC; CH 1; work Popcorn into next corner space; CH 1; *work 1 DC into next 3 DC; SKIP next DC; work FPDC around center DC of RND 9 3 DC group; work 1 DC into next 3 DC; work FPDC around next DC (note – this will be the DC worked into the petal).* Repeat from * to * once more; work 1 DC into next 3 DC; SKIP next DC; work FPDC around center DC of RND 9 3 DC group; work 1 DC into next 3 DC; CH 1.
#Work Popcorn into next corner space; CH 1; *work 1 DC into next 3 DC; SKIP next DC; work FPDC around center DC of RND 9 3 DC group; work 1 DC into next 3 DC; work FPDC around next DC (note – this will be the DC worked into the petal).* Repeat from * to * once more; work 1 DC into next 3 DC; SKIP next DC; work FPDC around center DC of RND 9 3 DC group; work 1 DC into next 3 DC; CH 1.
Repeat from # to ## two more times; SL ST into 3rd of 3 CH. Fasten off and weave in ends.
(4 corner Popcorns; 20 FPDC; 18 DC on each side = 72 [92 STS on each side])
With E – join into any FIRST DC of any side;
Note: Join with A if you are making the Hip Vintage Granny Throw
RND 12: *Work 1 SC into each ST until 1 CH space; work 1 SC into 1 CH space; work 1 FPSC around Popcorn; work 1 SC into 1 CH space.* Repeat from * to * 3 more times; SL ST into first SC worked. (23 SC on each side = 92 SC; 4 corner FPSC; 8 corner SC = 104 STS in total)
Fasten off and weave in ends.
