Muffin Cocoon Cardigan

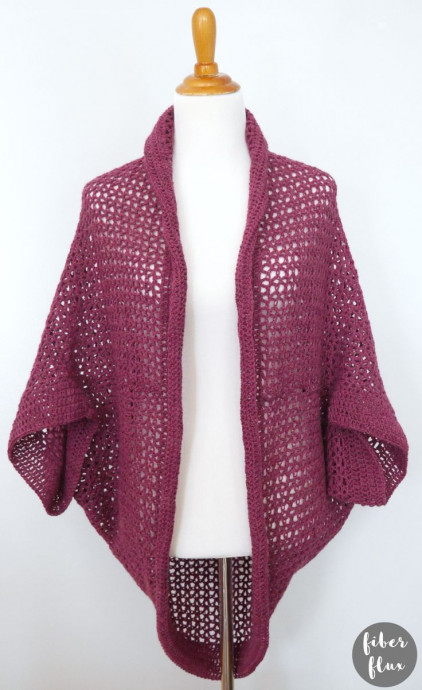
The Muffin Cocoon Cardigan
The Muffin Cocoon Cardigan is like a warm hug in the form of a stylish garment. With its cozy design and relaxed fit, it's the perfect piece to wrap yourself in on chilly days or when you just want to feel extra comfortable. The soft fabric and versatile style make it a wardrobe essential for those looking to stay cozy and chic at the same time. Whether you're lounging at home or running errands around town, the Muffin Cocoon Cardigan is sure to become your go-to favorite for effortless laid-back style.
Materials
- H (5.0 mm) crochet hook
- 1337 yards of light/#3 weight yarn (I used 7 balls of Highland Wool from Hobbii in the “Wild Berry” colorway)
- Yarn/tapestry needle
- Scissors
- Measuring Tape
Sizing
Cardigan is made by making a square, then seaming it together (see diagrams below).
Unblocked square is 32 inches by 32 inches.
After wet blocking, square is 40 inches by 40 inches.
Pattern Notes
- Cardigan has a loose, airy fit.
- This sweater is constructed by making a square, then seaming it (see photos below), then after seaming, adding a border around each sleeve and around the neck/front.
- You can change the width/circumference of the sweater by making the number of chains more/less when constructing the square (see chain multiples below).
- You can adjust the height of the square by working more/less rows of the V stitch pattern for the square part.
- You may want to block the square before seaming. I wet blocked my square and it both opened up the stitches for a more open look, and it grew the square from 32×32 to 40×40. This is optional and totally up to you, but I wanted to open mine up a bit.
Cranberry Muffin Cocoon Cardigan Pattern
The V Stitch Square
Multiple of 3+1
Chain 166 (adjust as needed for the size square you want. Just stay within the 3+1 multiple when making your chain).
Row 1: Work (dc, ch 1, dc) into the 4th chain from the hook. *Skip 2 chains, then work (dc, ch 1, dc) into the next chain. Repeat from * across until just 3 chains left. Skip 2 chains, then work a dc into the last chain.
Row 2: Chain 3 and turn. Work (dc, ch 1, dc) into each chain 1 space (center of each V) across the row. At the end of the row, work a dc into the turning chain space.
Repeat row 2 until the height is roughly the same as the width.
As mentioned above, you can block your square to open it up a bit before continuing to the next part.
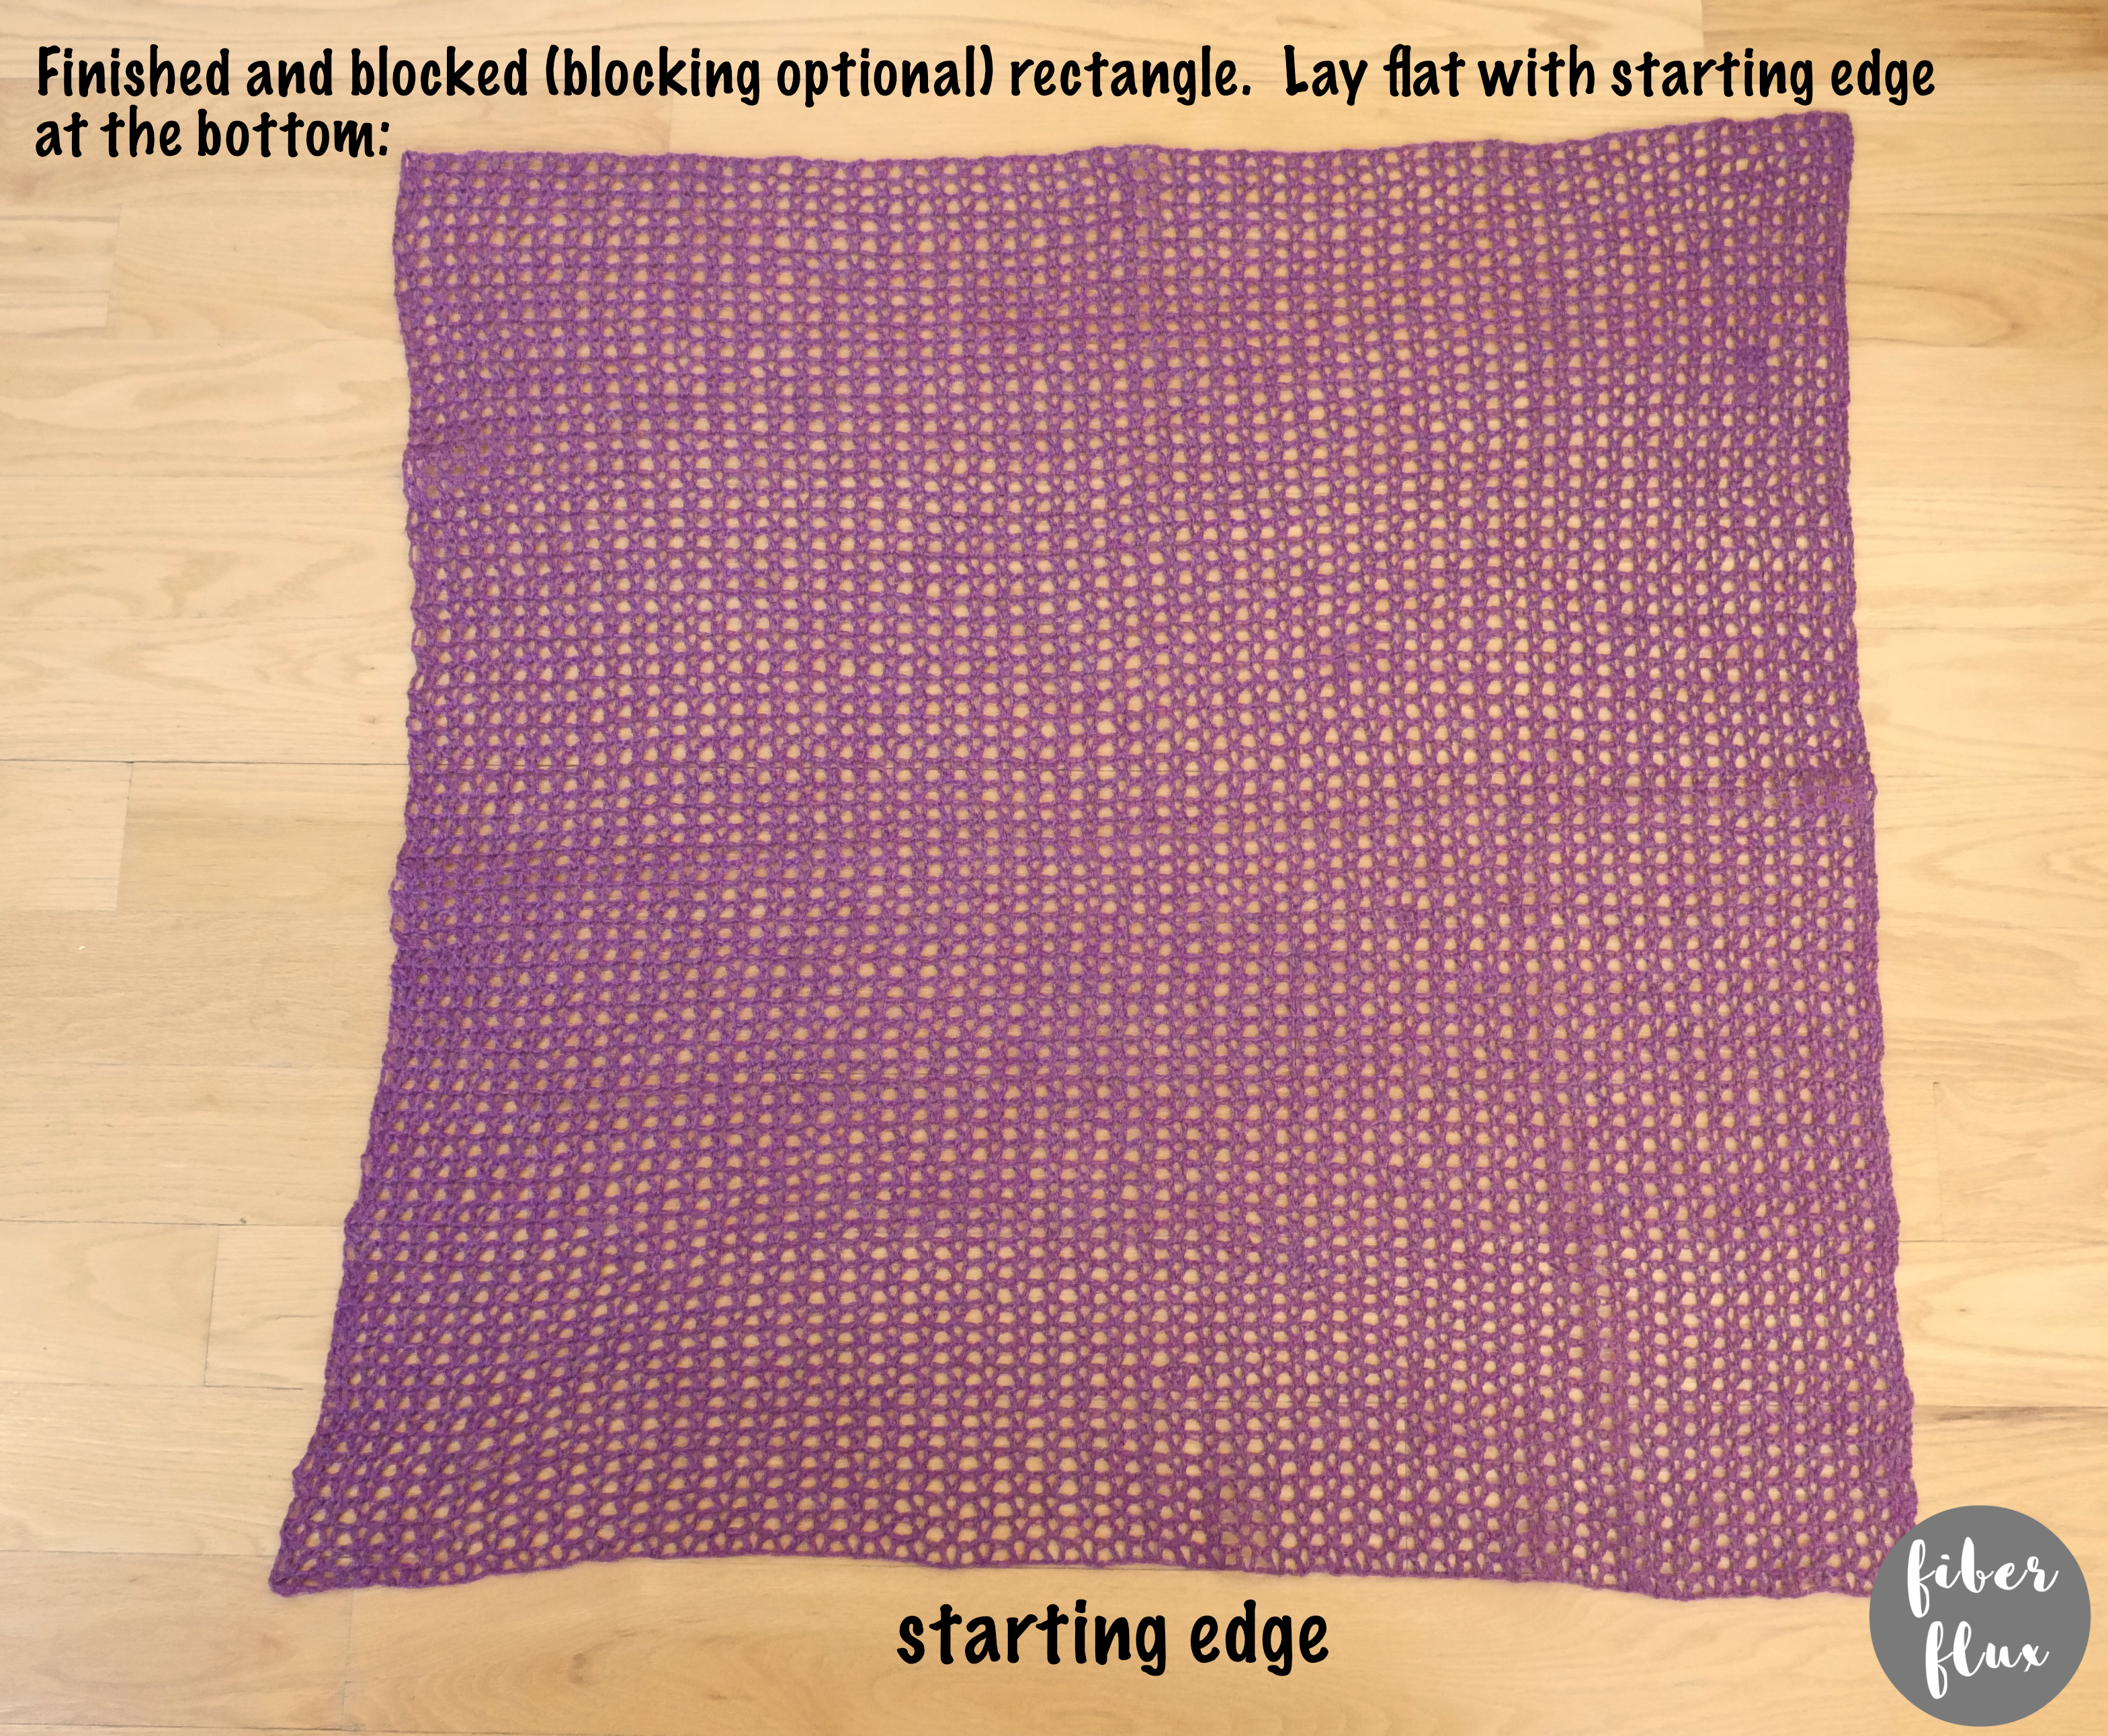
Seaming The Square
Begin by laying the square flat with the starting edge (where you did the starting chain at the beginning) at the bottom:
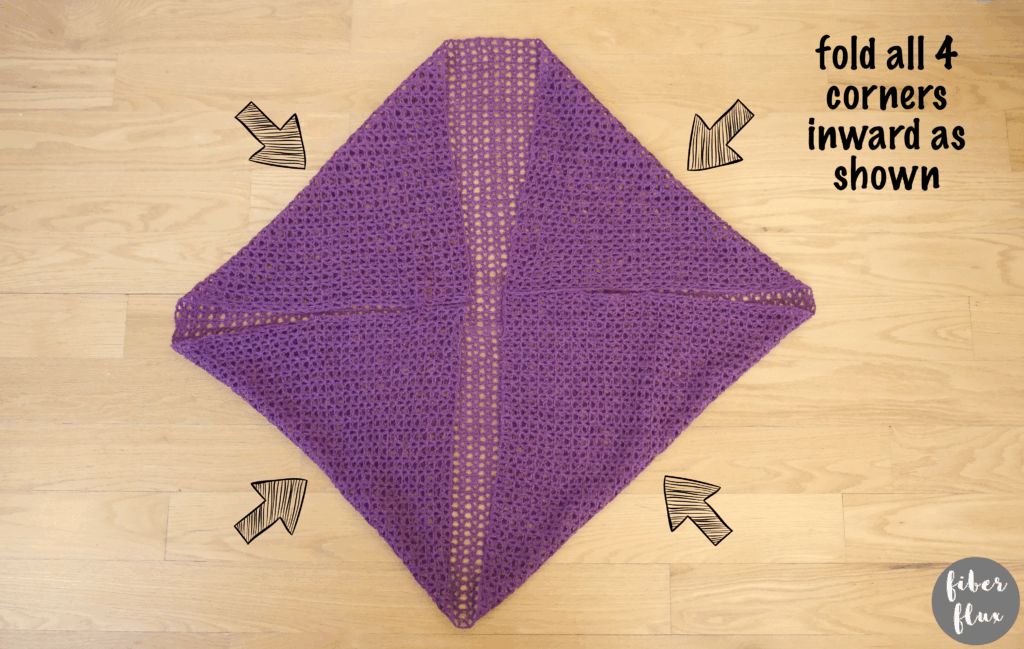
Next, fold all four corners inward as shown:
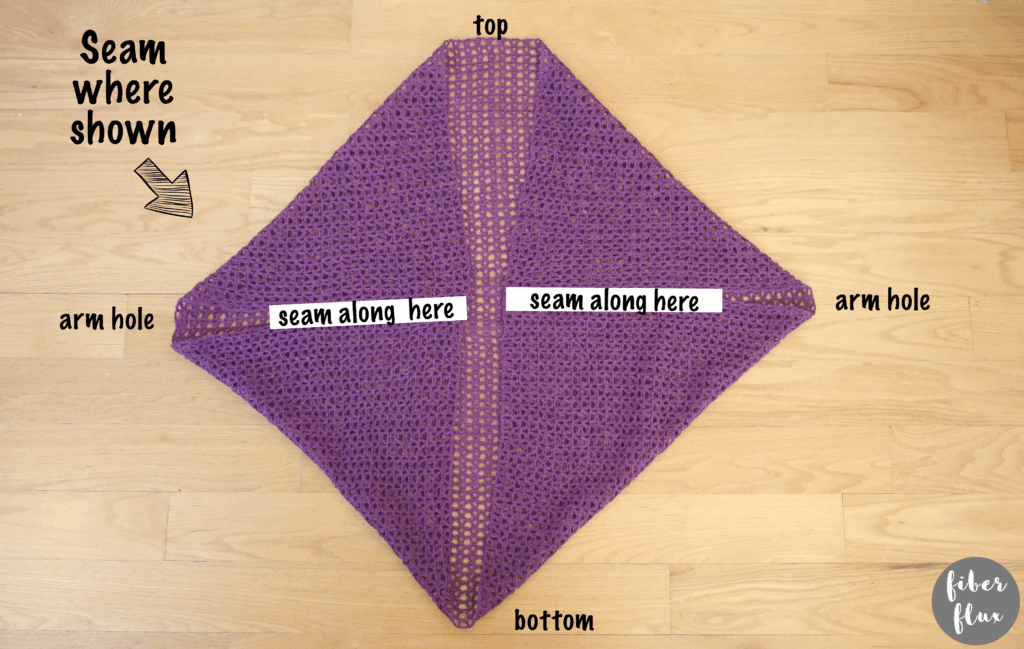
After that, seam as shown below with a matching piece of yarn using the whip stitch. Be sure to leave the opening for the arm holes!
Adding Neck/Collar Edging
Turn the cardigan right side out so that the seams you just made are now on the inside of the sweater.
Tie yarn in between any V. Important - because we seamed the rectangle up in the previous steps, the Vs in some of the areas around the edge may be facing upright, in some areas they may be facing down/upside down. That is ok and it is how it should look as you work around.
Round 1: Chain 3 (counts as a dc). *Work 2 dc into each ch 1 space (center of each V - can be right side up or upside down, doesn’t matter, as long as it is into the center of a V) and then work a dc in between each V. Repeat from * all the way around. Join to close the round with a slip stitch in the topmost chain of the ch 3 from the beginning of the round.
Rounds 2-5: Chain 3, then work a dc into each stitch around. Join with a slip stitch to close the round in the topmost chain of the ch 3 from the beginning of the round.
Adding Sleeve Edging
Tie yarn into any side space along the edge.
Round 1: Chain 3 (counts as a dc) then work a dc into the same space. *Work 2 dc into each side space all around. Repeat from * all the way around. Join to close the round with a slip stitch in the topmost chain of the ch 3 from the beginning of the round.
Rounds 2-5: Chain 3, then work a dc into each stitch around. Join with a slip stitch to close the round in the topmost chain of the ch 3 from the beginning of the round.
Finishing
Weave in all ends and your cardigan is ready to wear!
- Funny Pictures
-
 Hilarious Memes for Those Bored to Tears
-
 Weekly Treat of Funniest Parenting Memes for Good Laugh out Loud Right Now
-
 Really Funny Pics to End These Weekend Perfectly
- Recipes
-
 Crispy Baked Avocado Fries
-
 Scrambled Chickpea and Spinach Pitas
-
 Cinnamon Pancakes
- Lifehacks
-
 Crochet Basics: Aligned Cobble Stitch
-
 Brick Stitch Crochet Tutorial
-
 Crochet Basics: Wattle Stitch
- Crochet Ideas
-
 Crochet Snorlax Plushie Doll
-
 Crochet Beautiful Penguin Toy
-
 Crochet Tiny Snowman
- DIY
-
 DIY Santa Craft For Kids
-
 Paper Plate Angel Craft
-
 Upcycled Mason Jar Chicken Vase
- Knitting Ideas
-
 Knitted Bridger Cowl
-
 Knitted Keepsake Bag
-
 Knitted Cutie Cupcake Dolls