Crochet Gift Card Holder

If you're looking for a fun and creative way to present gift cards, a crochet gift card holder is the perfect solution! Not only is it a thoughtful and handmade touch, but it adds a personal and festive element to any gift. Crocheting a gift card holder allows you to customize the colors and design to match the recipient's style or the occasion. Whether you're giving a gift for a birthday, holiday, or special celebration, a crochet gift card holder is sure to bring a smile to their face. So grab your yarn, hooks, and get crafting for a charming and unique way to give gift cards!
Materials
I love this Yarn! in Hot Rose & Soft Pink, or other #4 worsted weight yarn in your color of choice.
Tools
- 4mm (G) Hook
- Tapestry needle
- Scissors
- Button
- Needle and thread
Instructions
Row 1. Chain 2,
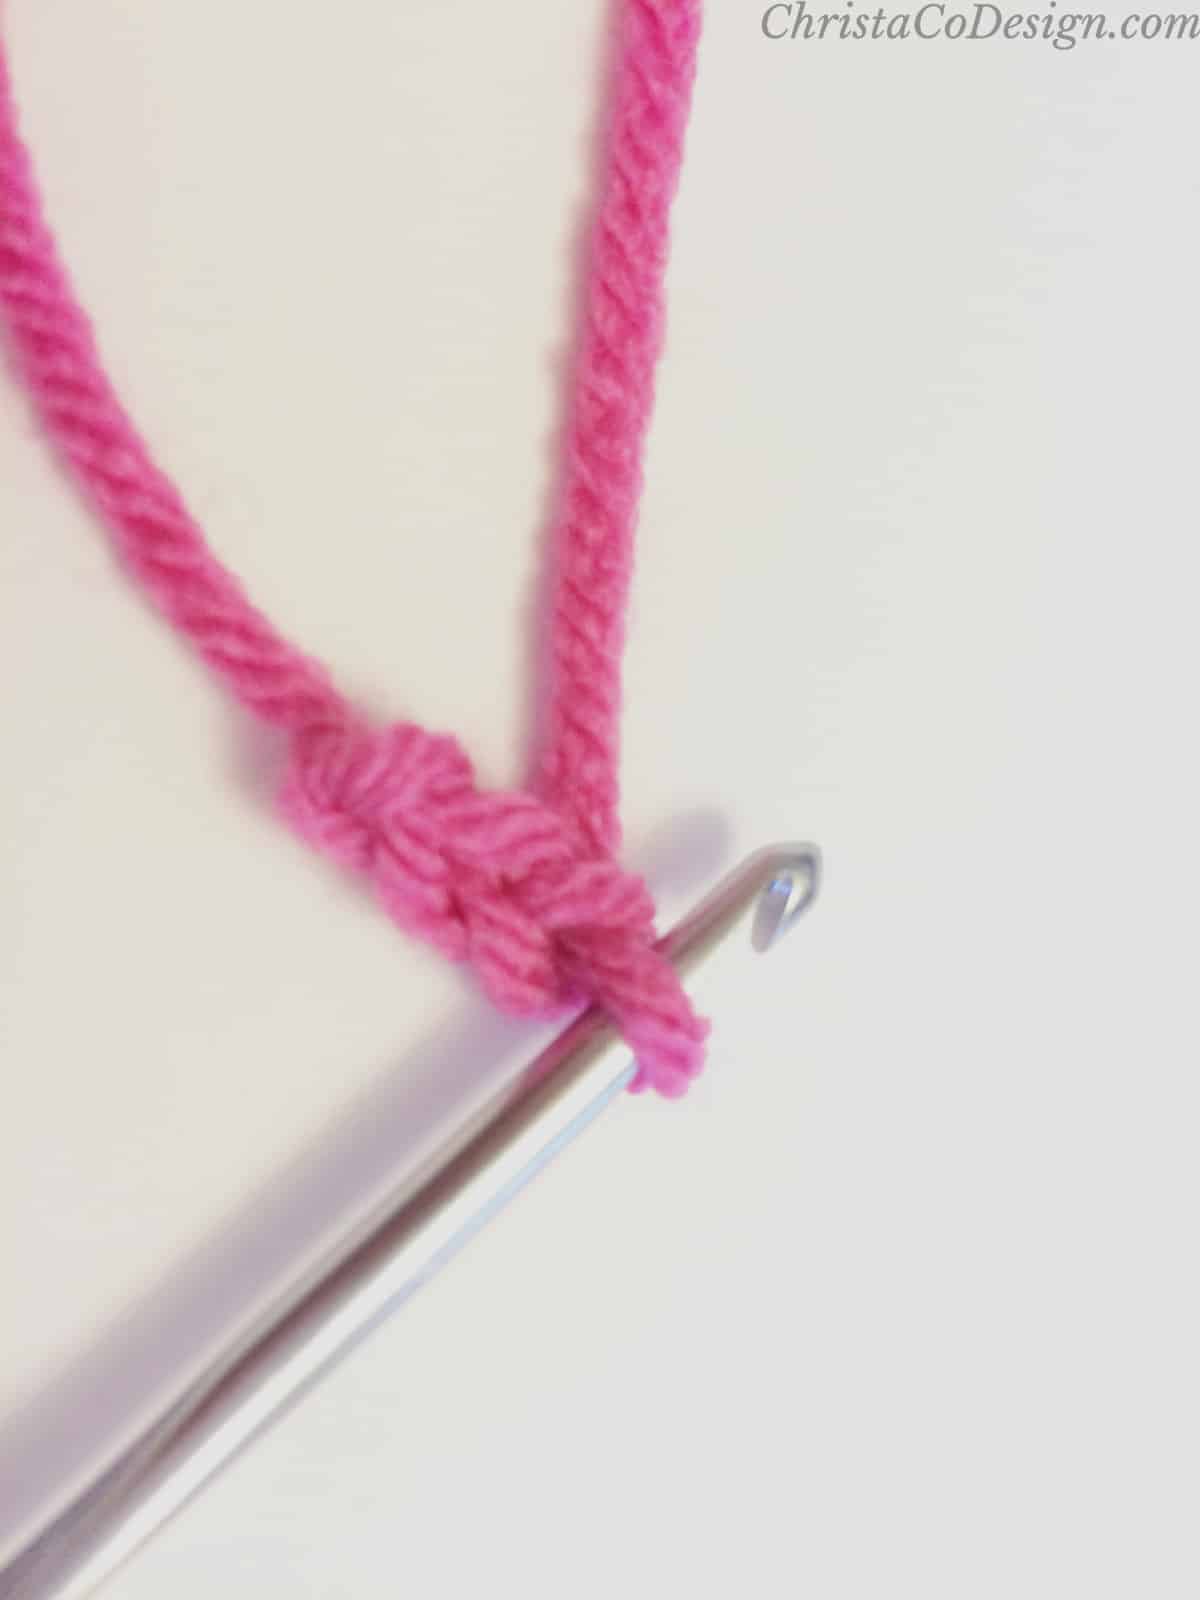
sc in 2nd chain from your hook, turn. (1 st) This is probably the trickiest part since you’re starting with so few chains.
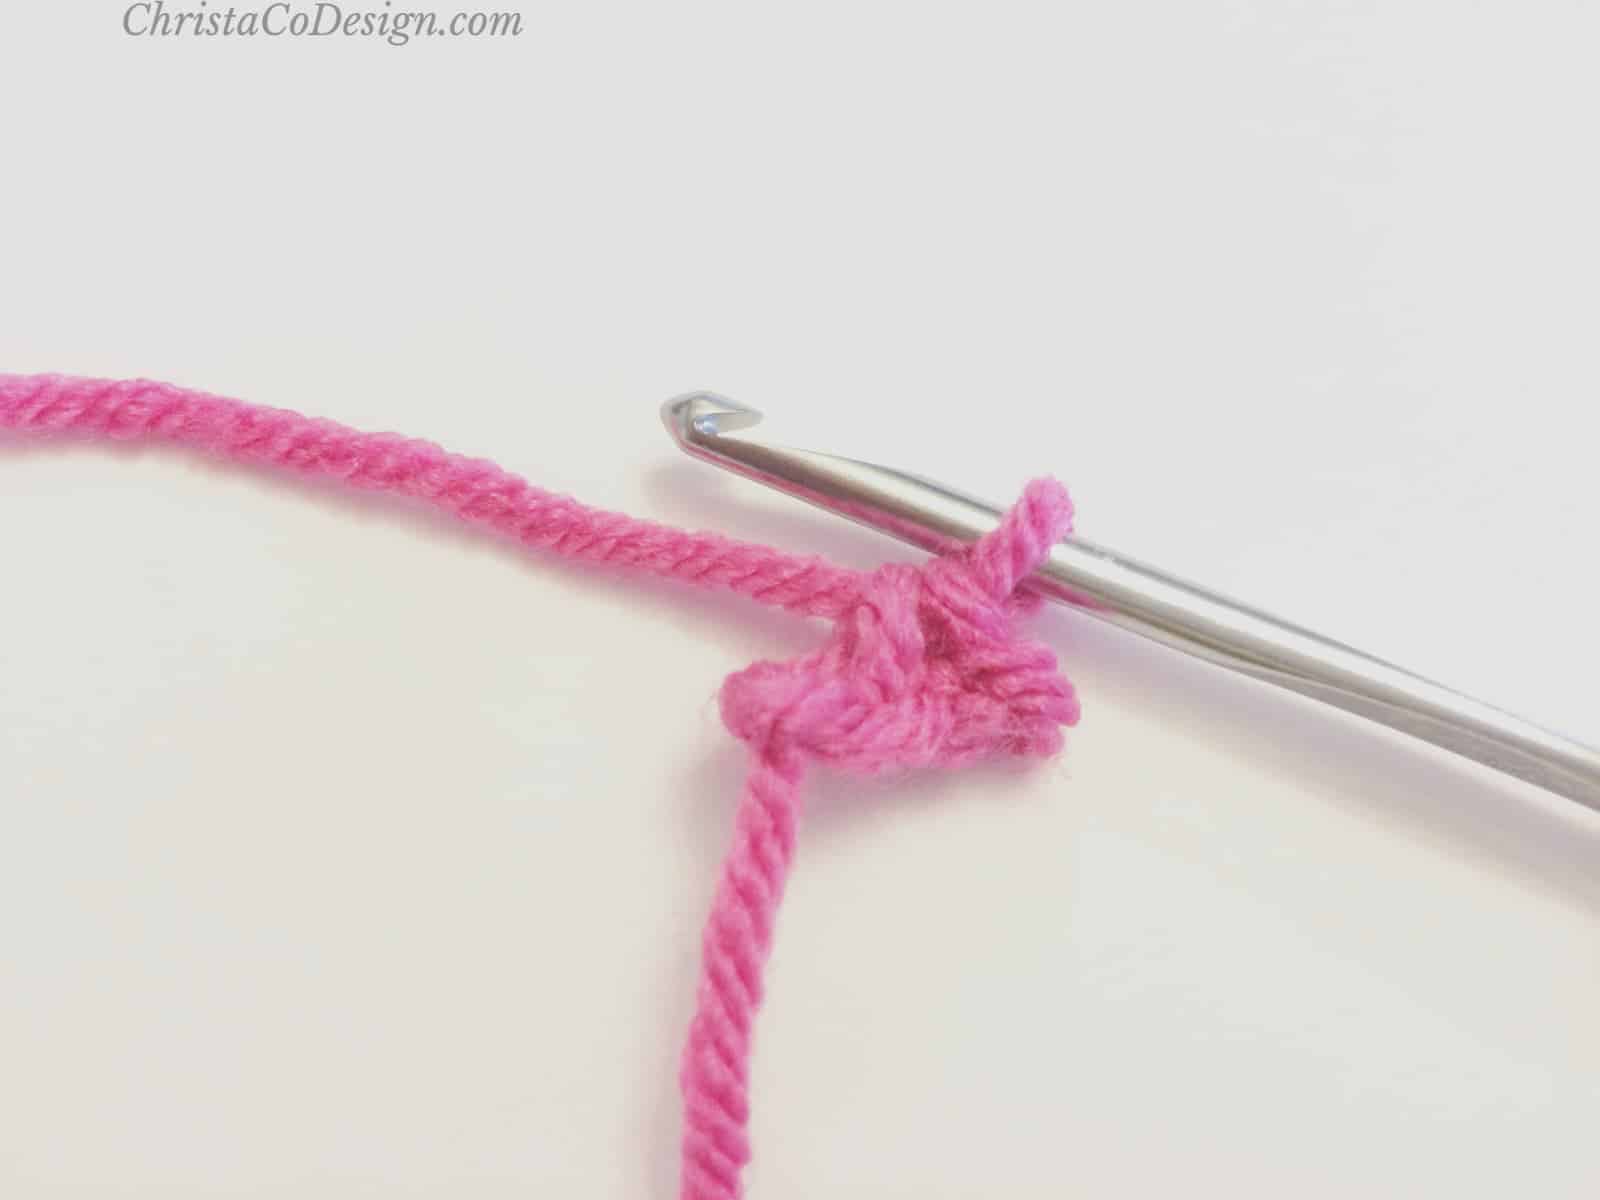
Row 2. Ch 1, into the same stitch make 3 sc, turn. (3 sts)
Row 3. Ch 2, starting in same st hdc, 2 hdc in next st, hdc in last st, turn (4 sts)
Row 4. Ch 2, starting in same st place 2 hdc,
hdc next 2 sts, 2 hdc in last st, turn (6 sts)
Row 5. Ch 2, starting in same st place 2 dc, hdc next 4 sts, 2 dc in last st, turn. (8 sts)
Row 6. Ch 2, starting in same st place 2 dc, hdc next 6 sts, 2 dc in last st, turn. (10 sts)
Row 7. Ch 2, starting in same st place 2 dc, hdc next 8 sts, 2 dc in last st, turn. (12 sts)
Row 8. Ch 2, starting in same st place 2 dc, hdc next 10 sts, 2 dc in last st, turn. (14 sts)
Row 9. Ch 2, starting in same st place 2 dc, hdc next 12 sts, 2 dc in last st, turn. (16 sts)
Row 10. Ch 2, starting in same st place 2 dc, hdc next 14 sts, 2 dc in last st, turn. (18 sts)
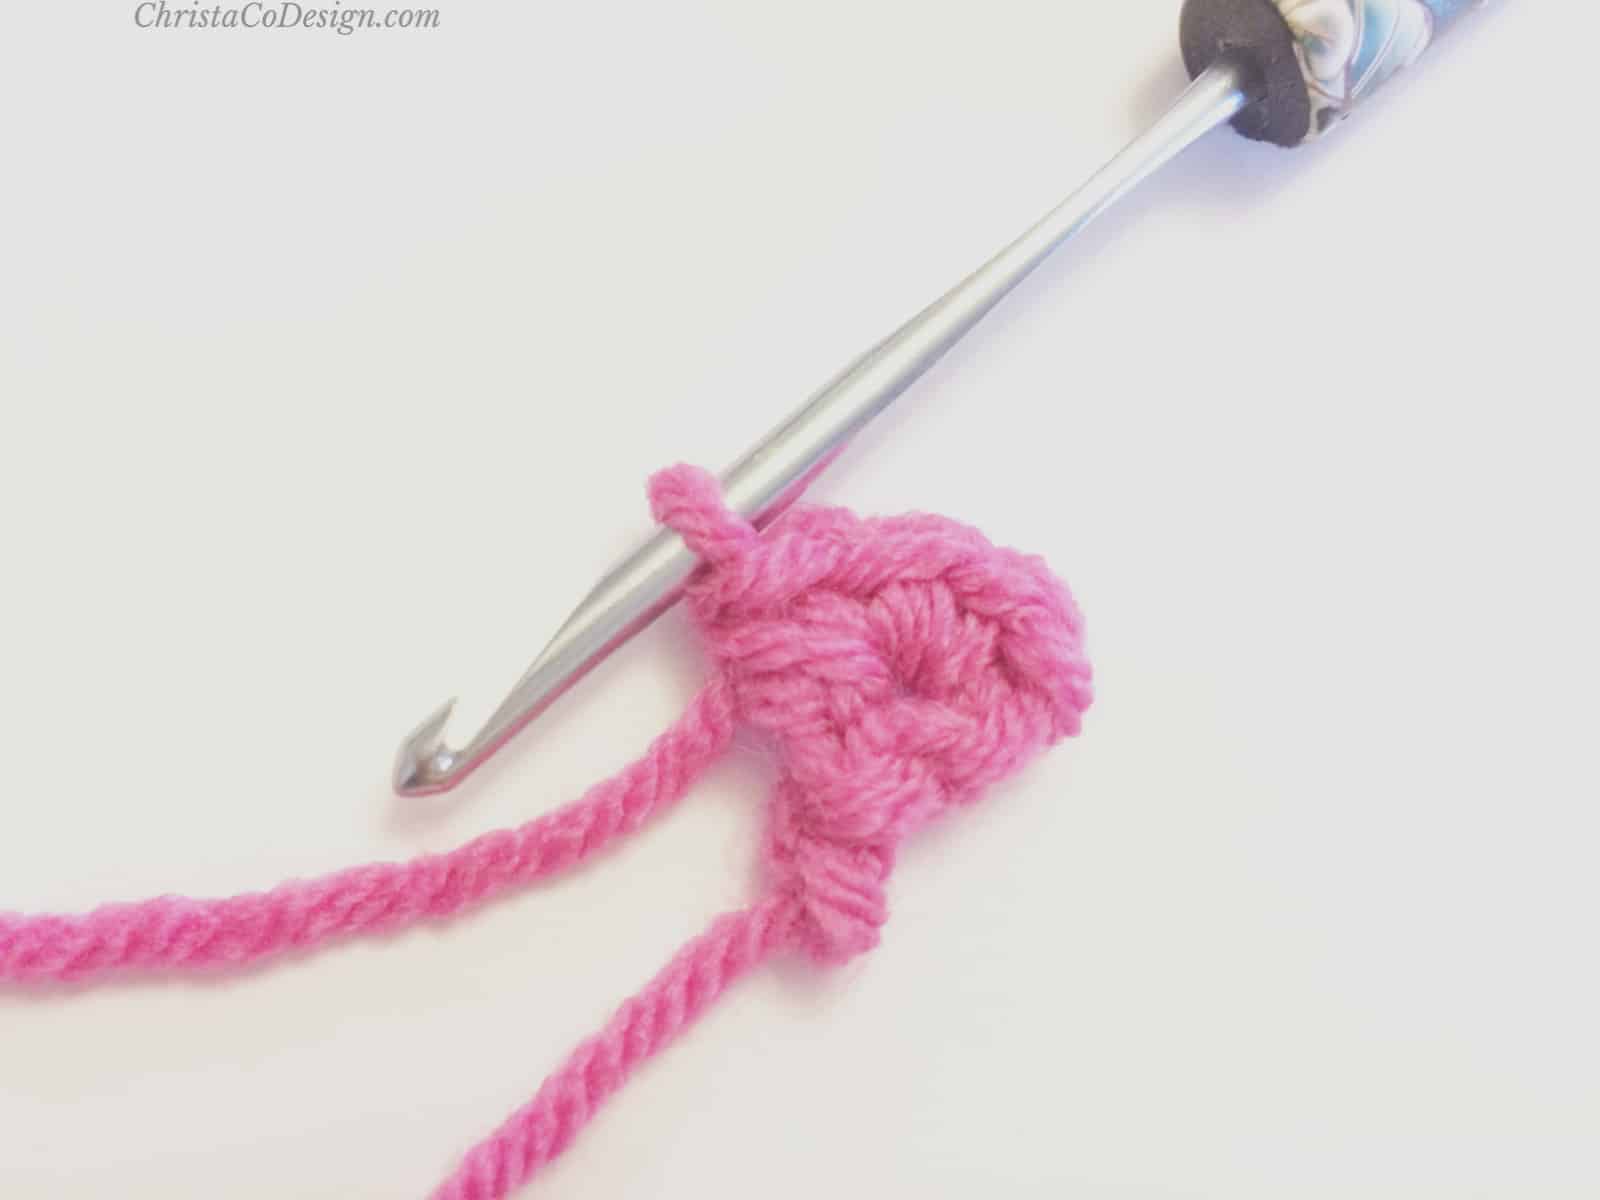
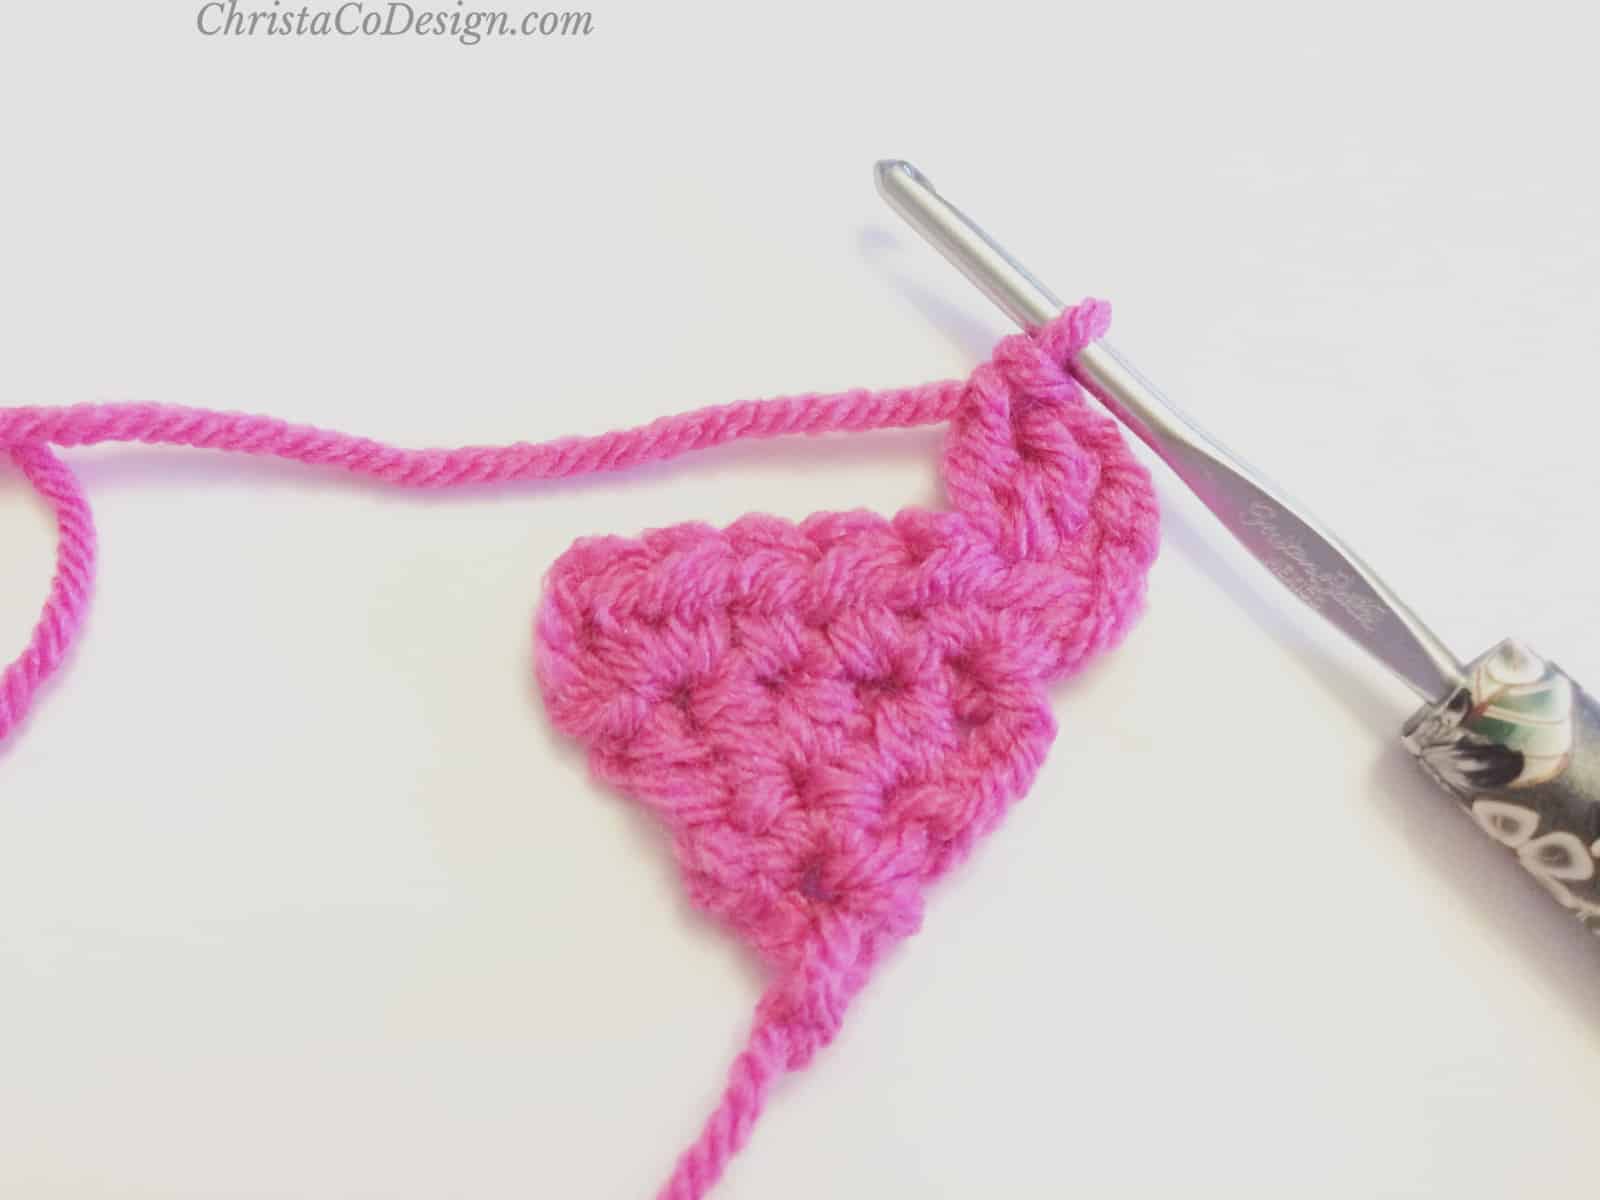
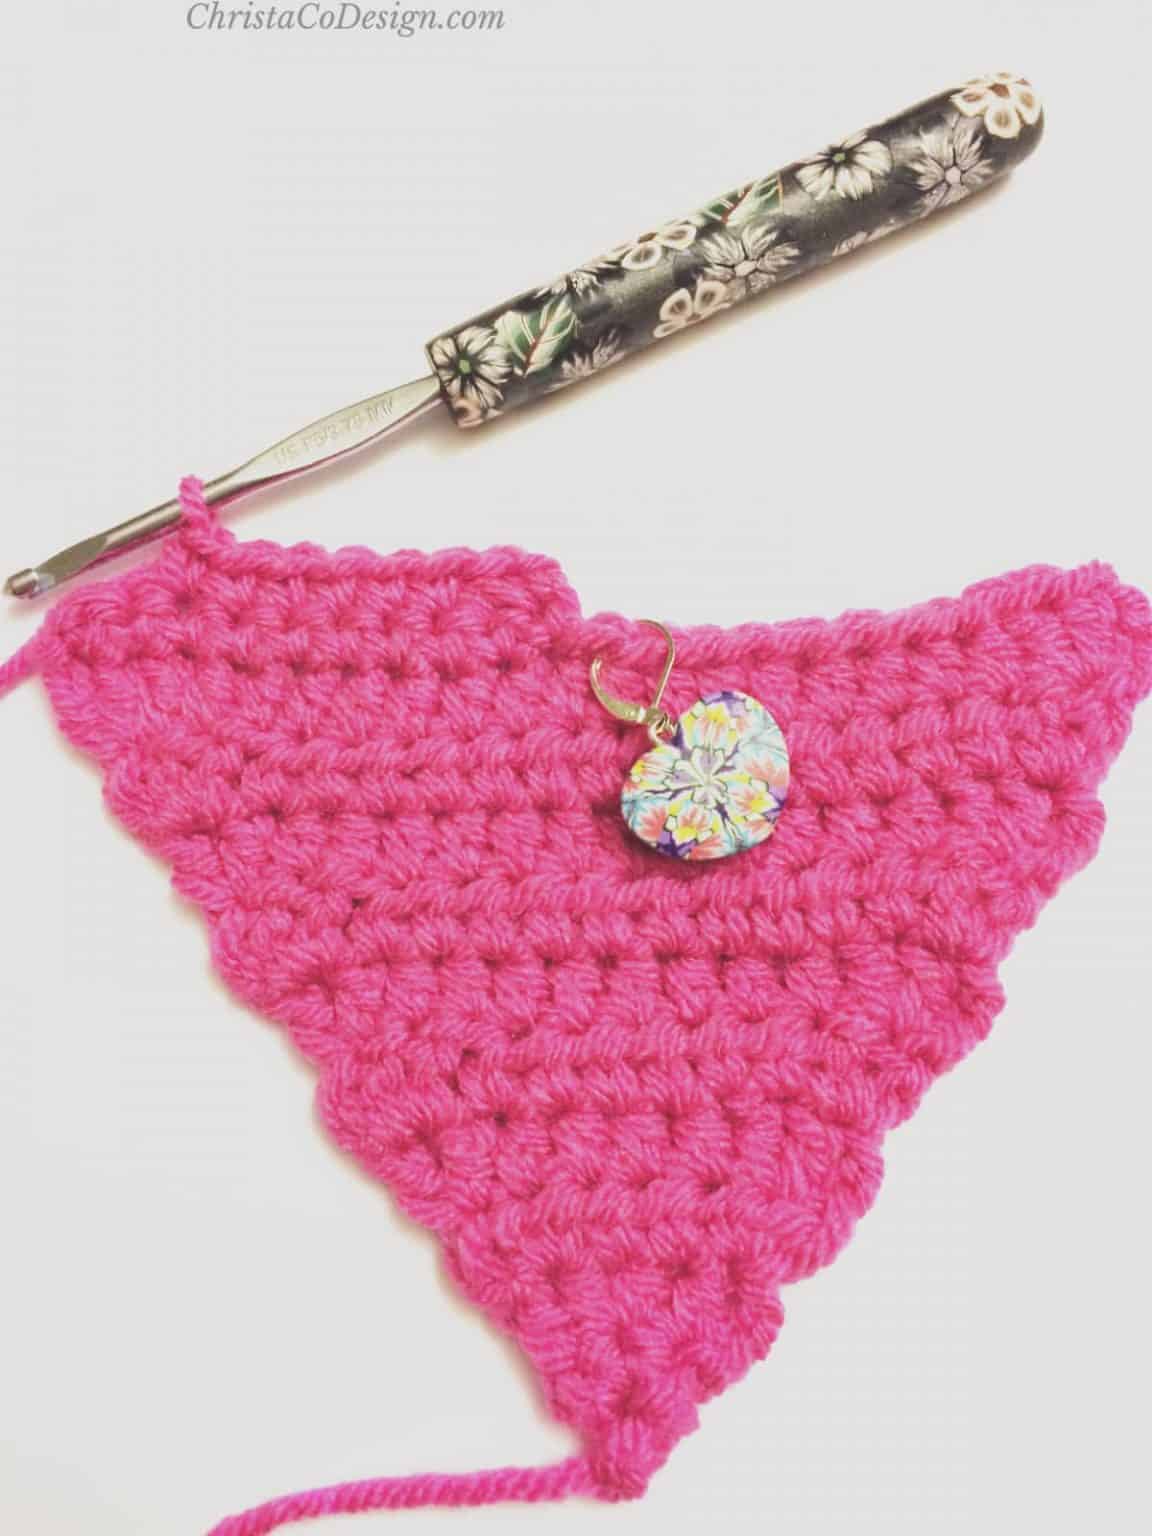
Row 11. Ch 2, starting in same st place 2 dc, hdc next 16 sts, place 3 dc in last st, turn (21) *Here you’re creating an odd number of stitches. Add a stitch marker to stitch #11, this will be the center between humps. You should have 10 stitches on either side.
Row 12. Ch 1, starting in same st sc in 10 sts, turn. (10 sts)
Row 13. Ch 1, starting in same st sc2tog, sc next 6 sts, sc2tog, turn. (8 sts)
Row 14. Ch 1, starting in same st sc in 8 sts, turn. (8 sts)
Row 15. Ch 1, starting in same st sc2tog, sc in next 4 sts, sc2tog in last 2 sts, turn. (6 sts)
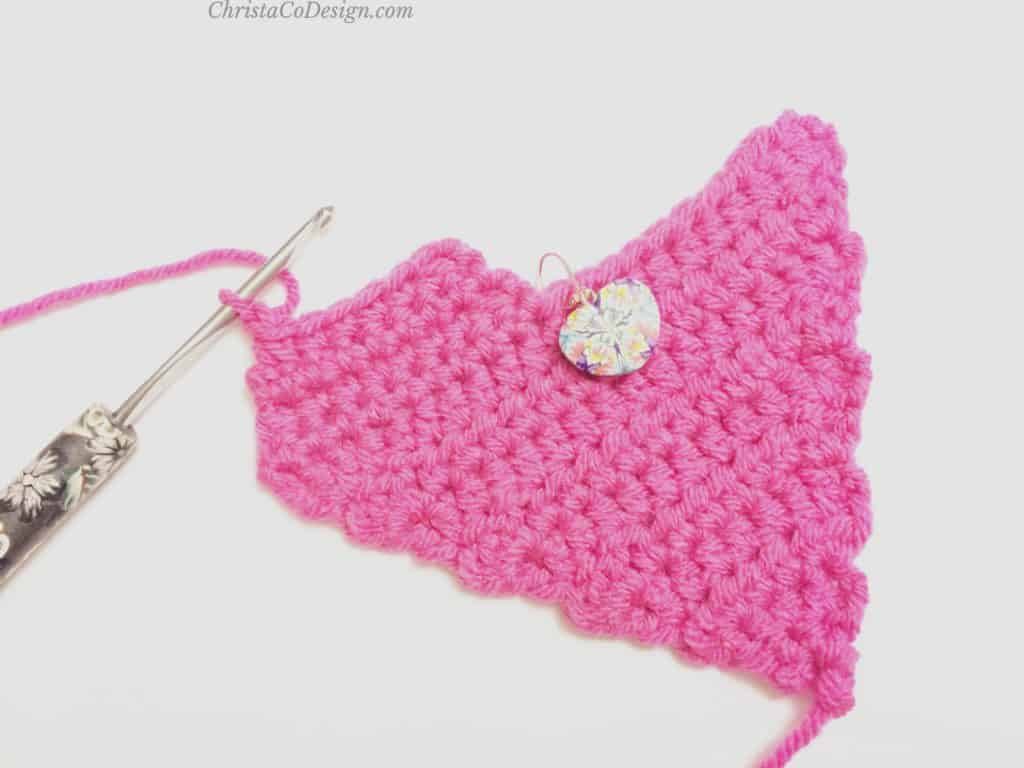
Row 16. Ch 1, starting in same st sc in 6 sts, turn. (6 sts)
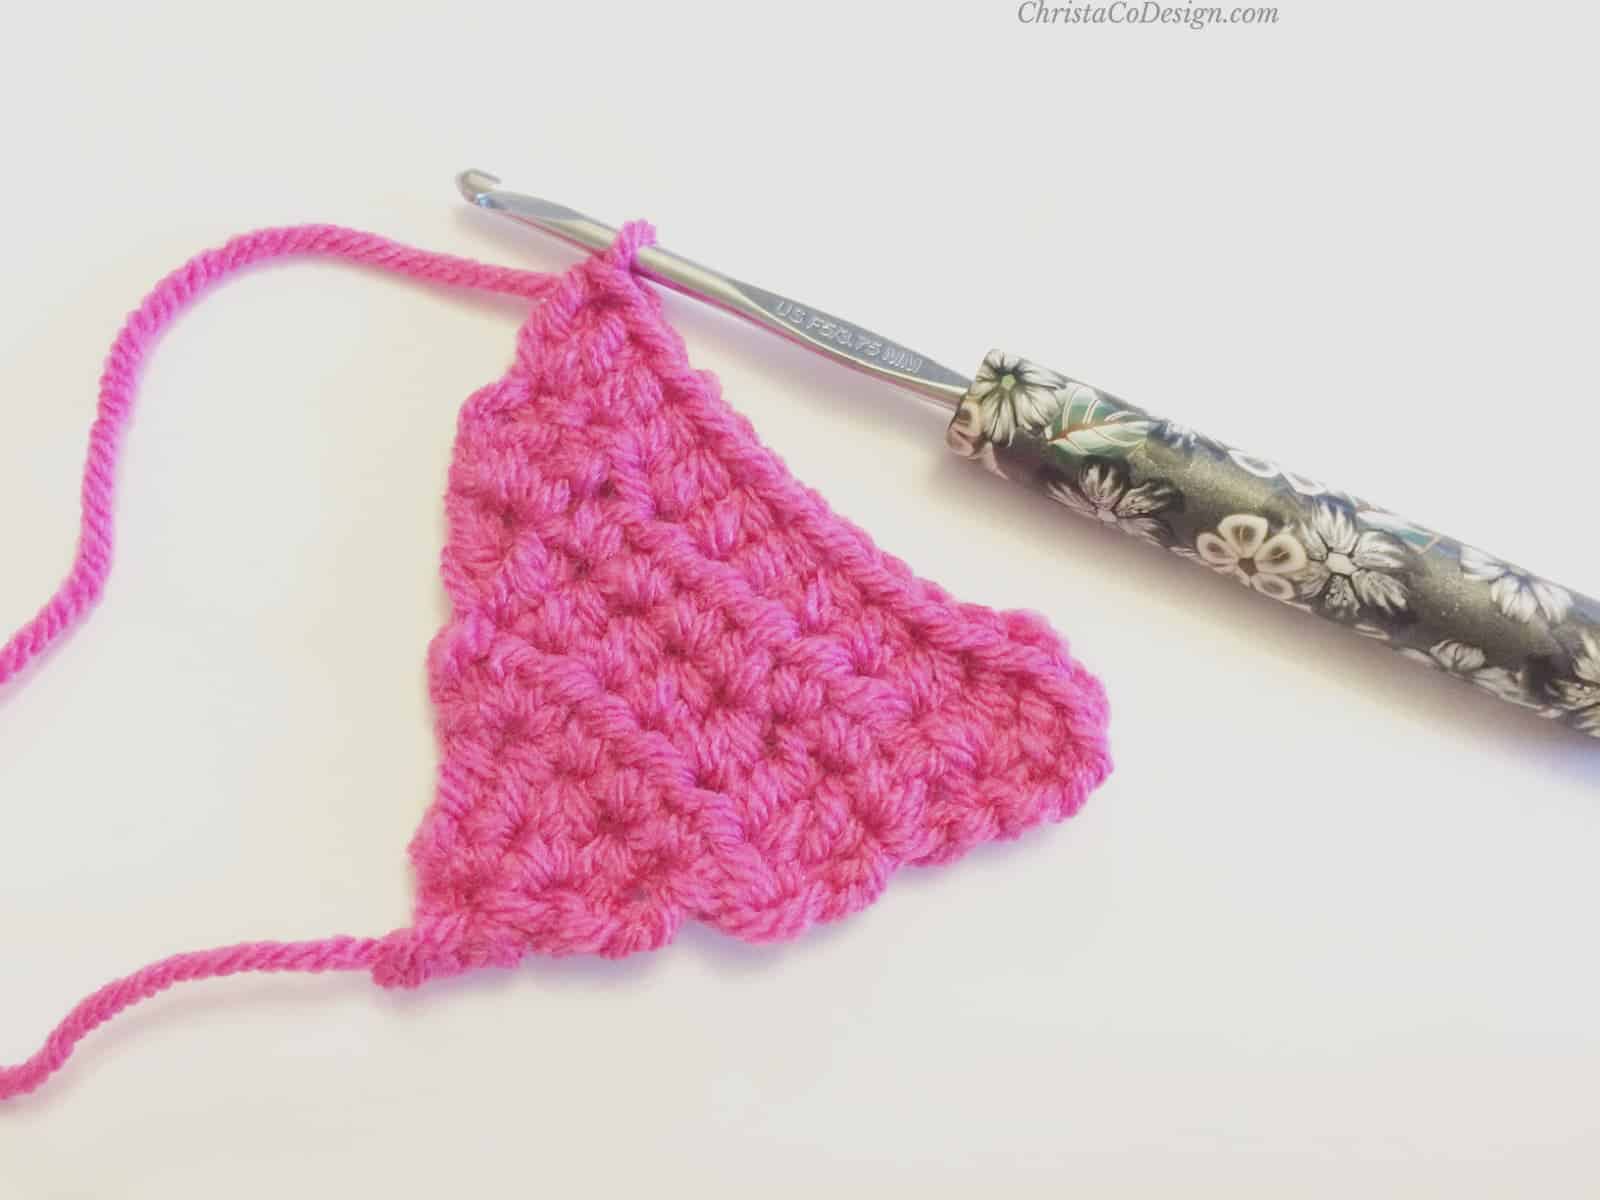
Row 17. Ch 1, starting in same st sc2tog, sc in next 2 sts, sc2tog in last 2 sts, turn. (4 sts)
Row 18. Ch 1, starting in same st sc2tog 2X, finish off.
Flip the heart over and join yarn at the opposite end to form the second hump of the heart.
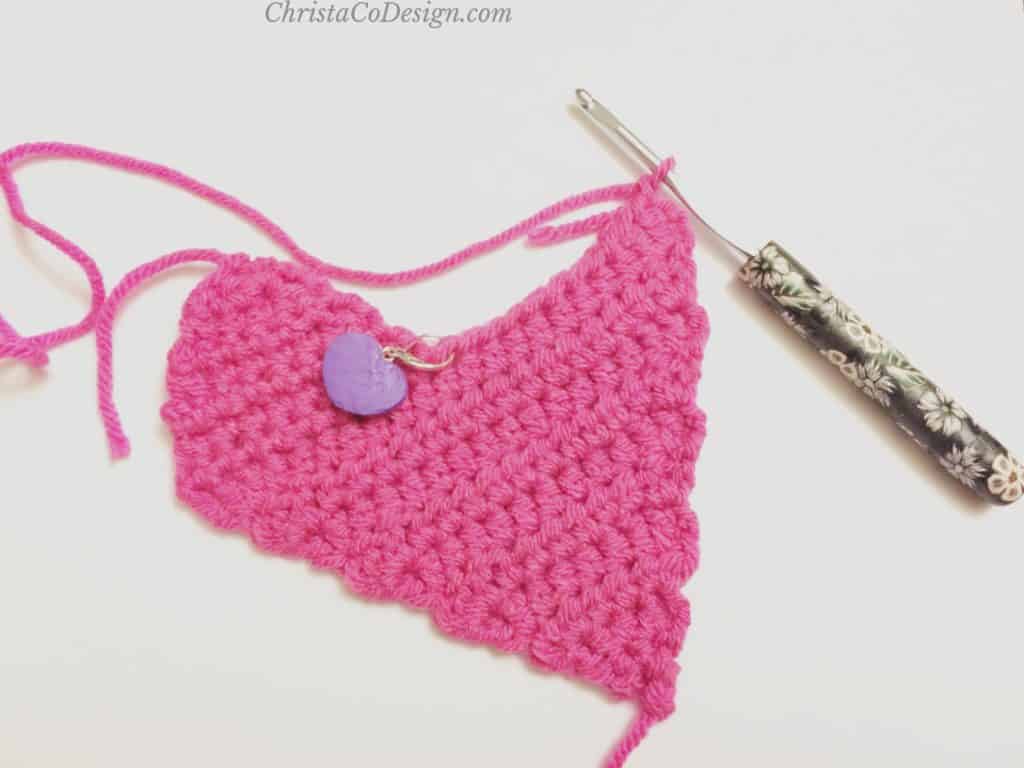
Repeat rows 12-18, leaving the center stitch unworked.
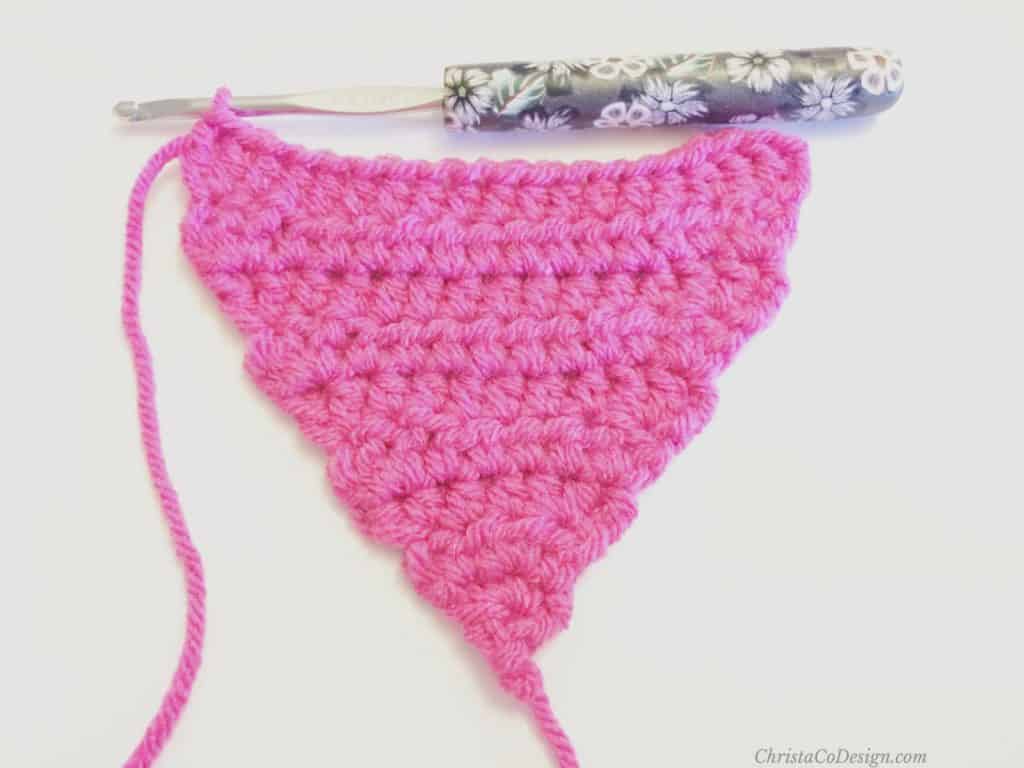
Border
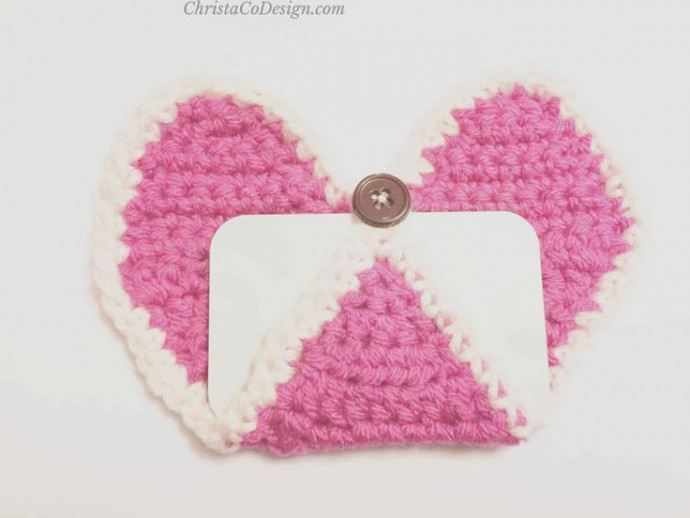
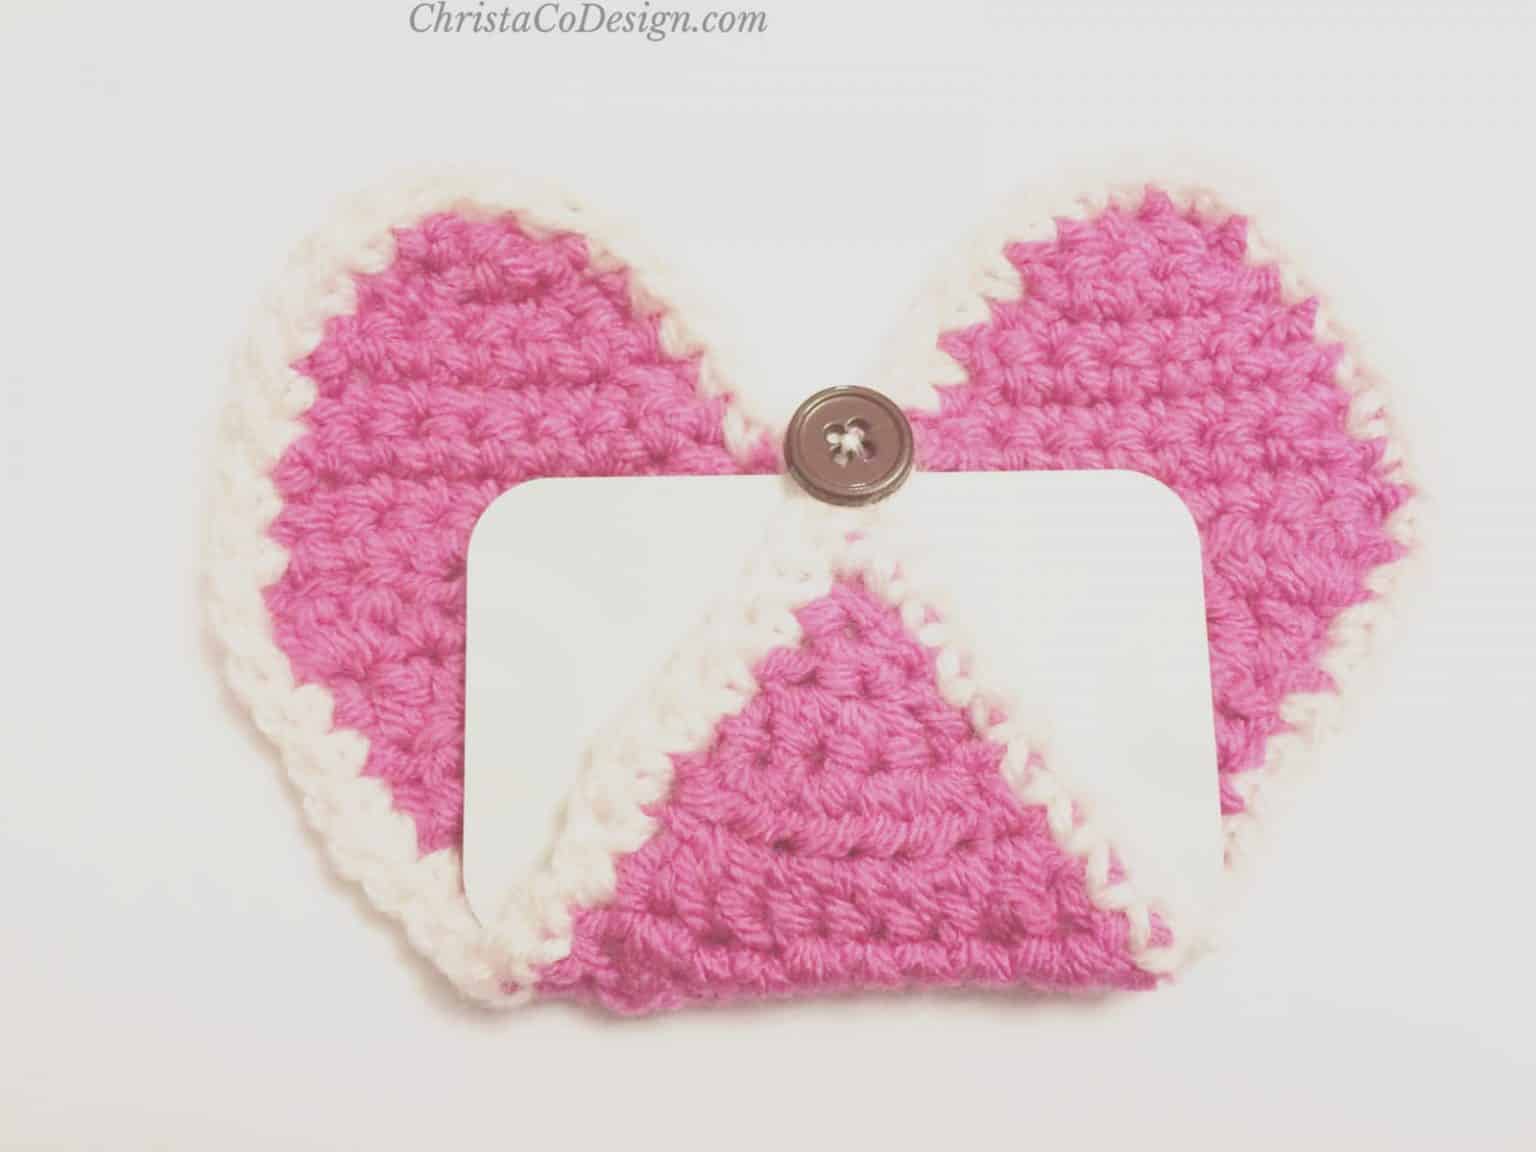
If using a contrasting color, change now. Sc around your heart, be sure to crochet over your tails, work two stitches into the point of the heart, chain 4 (or more if using a large button), sc a 3rd time into the point of the heart, securing the chain button loop, and continue sc around the heart, slip stitch and fasten off.
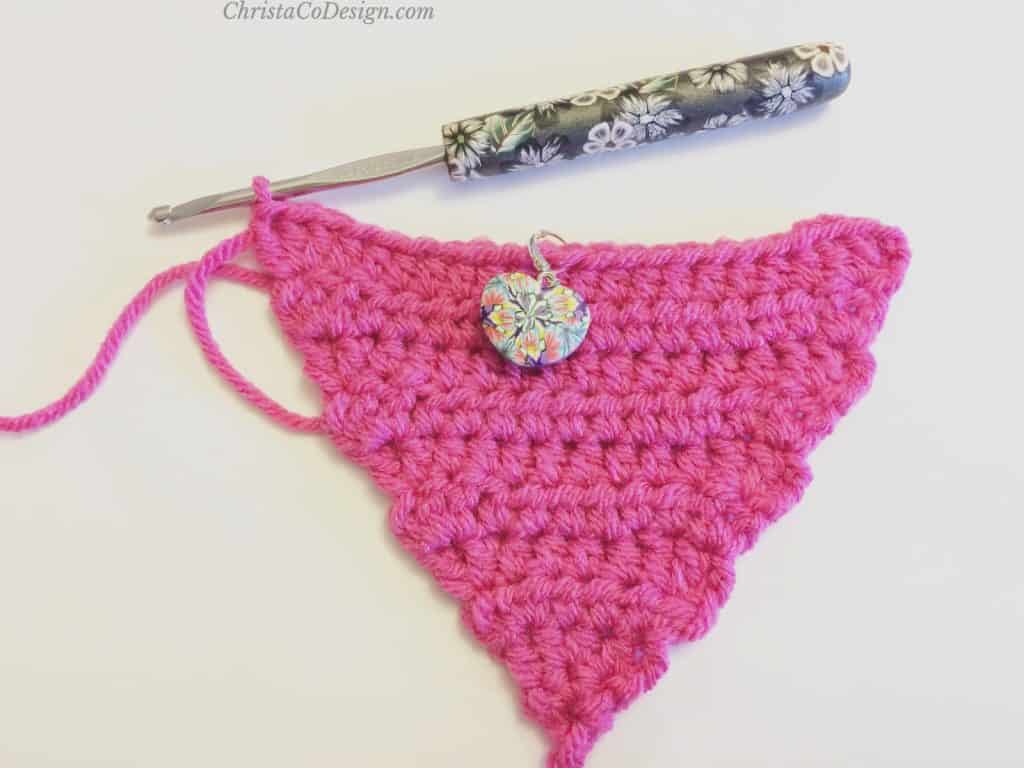
Finishing
Sew button into the dip at the top of the heart.
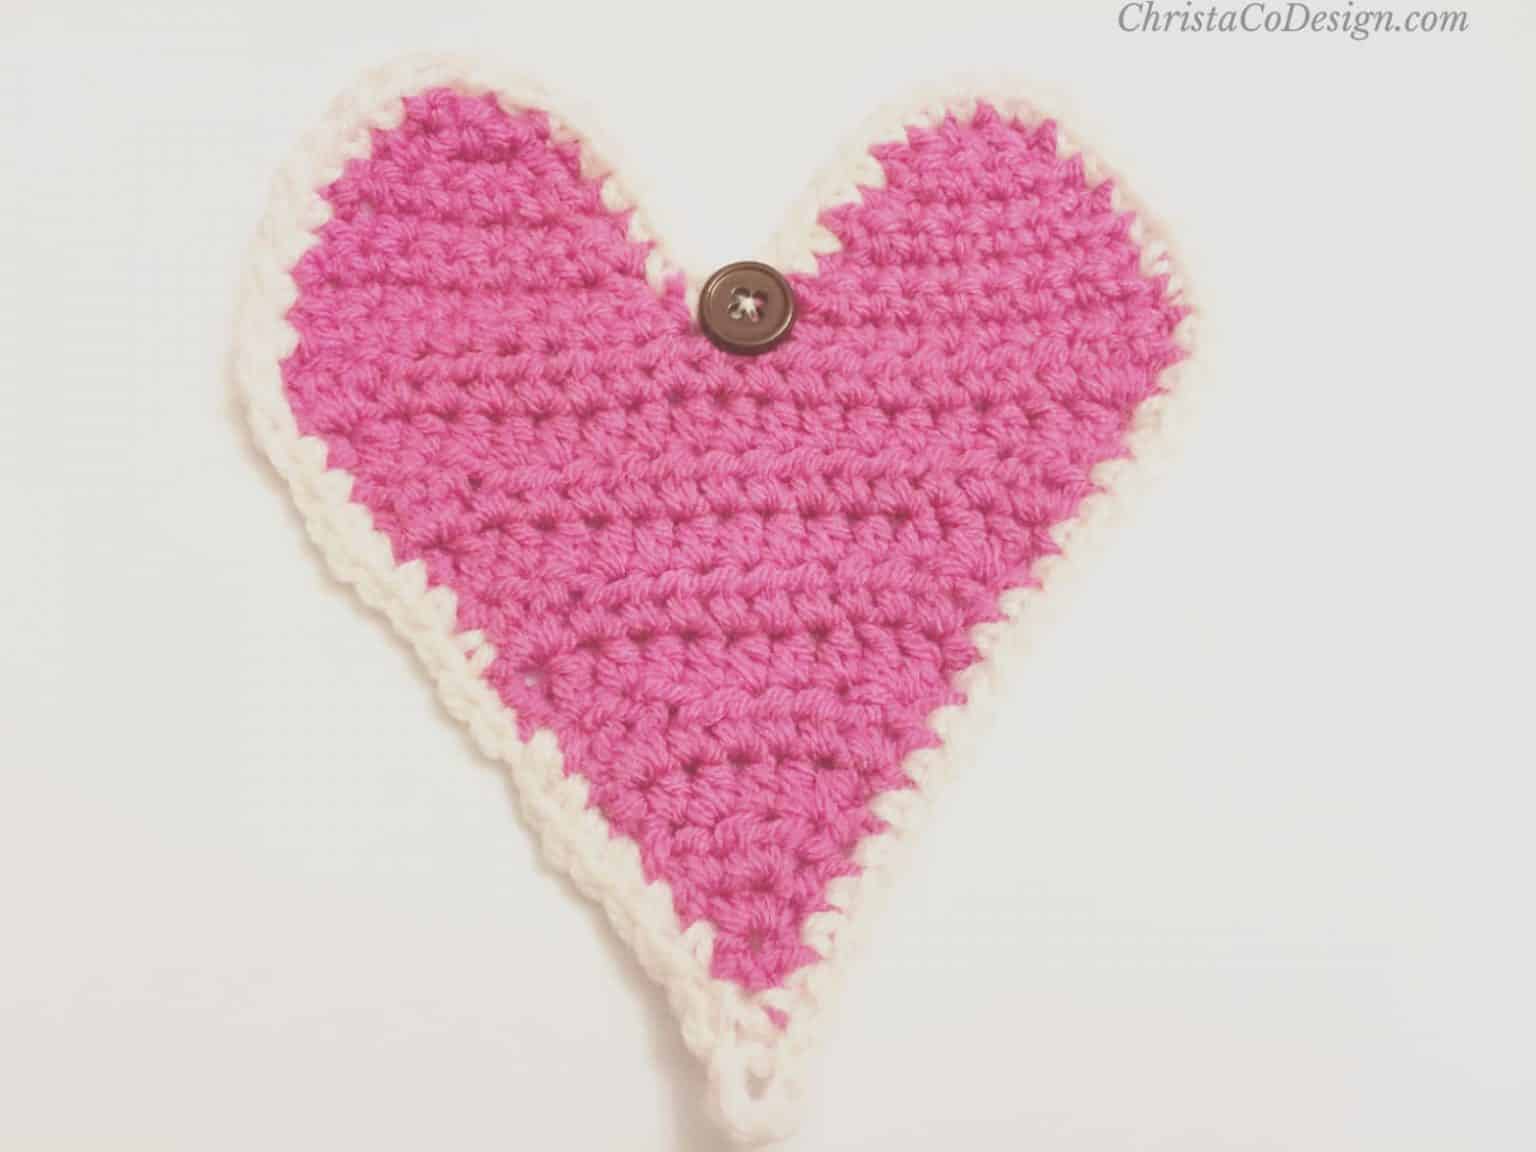
Add a gift card for your loved one and button in place!
- Funny Pictures
-
 Hilarious Memes for Those Bored to Tears
-
 Weekly Treat of Funniest Parenting Memes for Good Laugh out Loud Right Now
-
 Really Funny Pics to End These Weekend Perfectly
- Recipes
-
 Crispy Baked Avocado Fries
-
 Scrambled Chickpea and Spinach Pitas
-
 Cinnamon Pancakes
- Lifehacks
-
 Crochet Basics: Aligned Cobble Stitch
-
 Brick Stitch Crochet Tutorial
-
 Crochet Basics: Wattle Stitch
- Crochet Ideas
-
 Crochet Snorlax Plushie Doll
-
 Crochet Beautiful Penguin Toy
-
 Crochet Tiny Snowman
- DIY
-
 DIY Santa Craft For Kids
-
 Paper Plate Angel Craft
-
 Upcycled Mason Jar Chicken Vase
- Knitting Ideas
-
 Knitted Bridger Cowl
-
 Knitted Keepsake Bag
-
 Knitted Cutie Cupcake Dolls