Crochet Puppy Plastic Bag Holder Tutorial

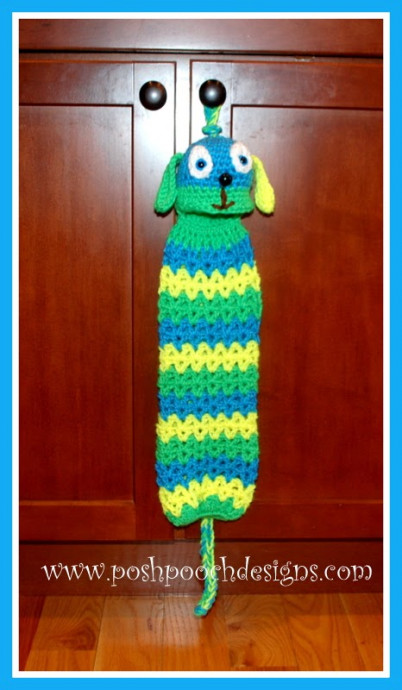
The crochet puppy plastic bag holder is a delightful and practical addition to any home. This charming creation not only keeps your plastic bags neatly organized but also adds a touch of playfulness to your space. With its cute design and functional purpose, this little crochet puppy brings both joy and convenience into your daily life. Say goodbye to untidy piles of plastic bags and hello to a lovable companion that is both adorable and useful!
Skill: Easy and Fun!
Materials
- Crochet Hook - H
- Yarn - Worsted Weight (4) about 3 oz
- I Used I Love This Yarn - 1 oz of each -
- neon blue-C1, neon green-C2 and neon yellow-C3
- white and brown - small amount
- 2 Safety eyes
- 1 safety nose
- 2 ponytail bands
- Small amount of stuffing to stuff head.
- Yarn Needle
Stitches
- Chain (ch)
- Single Crochet (sc)
- Double Crochet (dc)
- Half Double Crochet (hdc)
- Skip (sk)
- Slip Stitch (sl st)
- V Stitch (V St) - (dc, ch1, dc)
Measures - 18 inches long and 9.5 inches around.
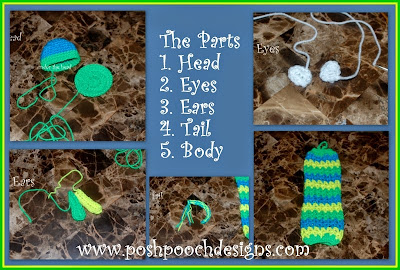
The Pattern is Written in 3 Steps:
- Step 1 - The Parts.
- Step 2 - Head Assembly
- Step 3 - The Body
Step 1 - The Parts
Head - Stitched in the round.
Bottom of the Head
We will use this to sew the bottom onto the top of the head.
Eyes - Make 2
With White yarn, ch 4, 2 sc in the 2nd ch from the hook, 1 sc in the next sc, 2 sc in the last sc, working down the opposite side of the chain, 2 sc, 1 sc, sc, join to 1 sc, tie off leaving a 12 inch tail to sew eye on head.
Ears - Make 2 - 1 yellow, 1 green
Ch 10, 1 sc in the 2nd ch from the hook, 1 sc in the next 2 chs, 1 hdc in the next 3 chs, 1 dc in the next 2 chs, 2 dc in the last ch, working down the opposite side of the chain, 2 dc, 1 dc in next 2 chs, 1 hdc in the next 3 hdc, 1 sc in the next 3 chs, tie off, leaving a 12 inch ch for sewing on head.
Tail
Using 1 strand of each of the 3 colors, ch 18, sc in the 2nd ch from the hook, and in each ch, tie off leaving an 8 inch tail of yarn to attach to body.
Step 2: Head Assembly
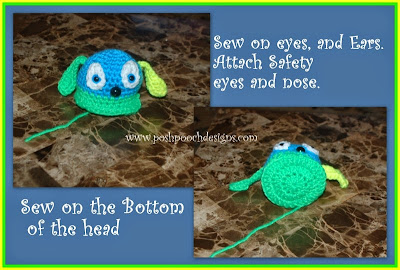
A. Sew the Eyes onto the front of the dog head. Place one safety eye in each eye.
B. Place the Safety nose on the head, centered between the eyes.
C. Sew on the ears, placing one on each side of the head.
D. Stuff the head loosely, then place the circle bottom onto the head. Sew around the bottom edge.
Step 3 - The Body or Bag
Finishing Up
Sew the Back of the head onto the back half of the body, using only 12 of the 24 sc.
Attach the tail to the back of the body at R: 2.
Embroider with brown or black yarn, under the nose, on the face.
Make a Chain using all 2 yarns, 20 chs long, attach to the top of the head of the puppy for a hanger.
- Funny Pictures
-
 Cute Cat Memes That Will Make Your Day Brighter
-
 Spot-on and Funny Memes About Introverts Struggles
-
 Top Wonderful Cat Memes on Their Way to Better Your Day
- Recipes
-
 Creamy Old Fashioned Rice Pudding
-
 Russian Tea Cakes (Snowball Cookies)
-
 Rigatoni with Sausage, Tomatoes, and Zucchini
- Lifehacks
-
 How to Crochet a Harlequin Stitch
-
 Removing The Toughest Stains
-
 Crochet Basics: Crumpled Griddle Stitch
- Crochet Ideas
-
 Crochet Christmas Tree
-
 Crochet Goblet of Fire
-
 Crochet Adorable Ammonite
- DIY
-
 DIY Snowman Wreath
-
 Mini Santa Sleigh Ornament
-
 Crochet Gingerbread House Blanket
- Knitting Ideas
-
 Knitted Easter Bunny
-
 Knitted Mobile Phone/Glasses Case
-
 Knitted Cabled Wallet