Crochet American Flag 12 Inch Granny Square

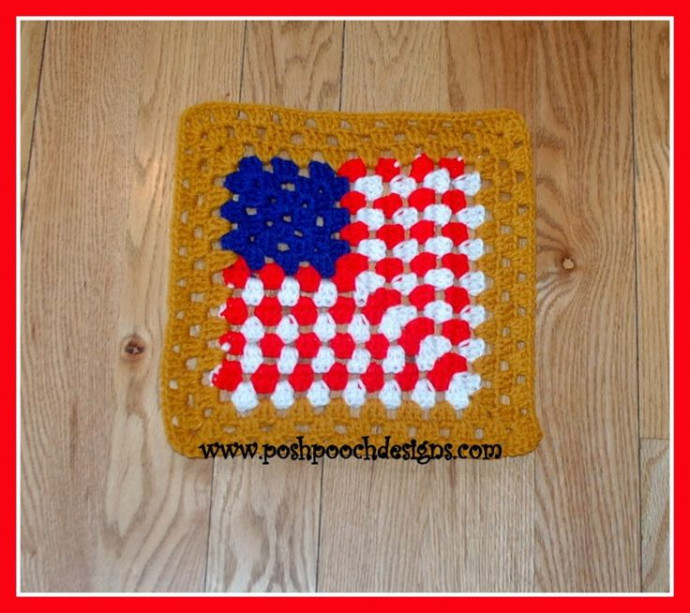
If you're looking to infuse some patriotic charm into your crafting, why not give the Crochet American Flag 12 Inch Granny Square a try? This delightful pattern combines the timeless art of crochet with the classic stars and stripes motif of the American flag, creating a project that's not only fun to make but also proudly displays your love for the red, white, and blue. Whether you're an experienced crocheter or just starting out, this pattern is sure to bring a touch of Americana to your home decor or make a thoughtful gift for a fellow patriot. So grab your hooks and yarn, and let's get stitching!
Skill Level
Easy
Materials
- Hook - H
- Yarn - Worsted Weight (4)
- 1 oz of each - Royal Blue, White, Red, and Golden Rod
- I used Red Heart Super Saver yarn I had on hand.
- Needle for weaving in ends
Stitches
- Chain (ch)
- Slip Stitch (sl st)
- Double Crochet (dc)
Instructions
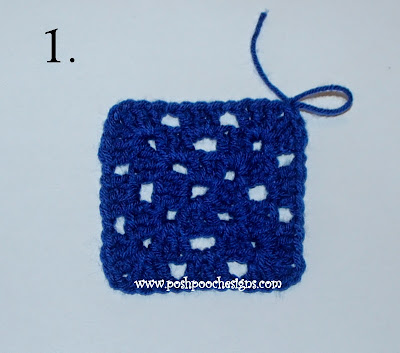
Round 1
With the Royal Blue yarn, ch 5, form in a loop, securely.
Round 2
In the loop ch 3, 2dch, ch 2, *3dc, ch 2* Repeat from *to* 2 more times, join to top of ch 3 (4 groups of 3dc, ch 2).
Round 3
Sl st to the 1st ch2 space, ch 3, 2dc, ch2, 3dc, ch2 (1st corner made). *3dc, ch2, 3dc, ch2 in the next ch2 space* Repeat 2 more times, join to the top of the ch3 (four corners made).
Round 4
Sl st to the 1st ch2 space of the 1st corner, ch 3, 2dc, ch2, 3dc, ch2 in that corner, 3dc, ch2 in the next ch2 space. *3dc, ch2, 3dc, ch2 in the next corner, 3dc, ch2 in the next ch2 space* Repeat from *to* 2 more times, join to the top of ch3 (4 corners, and 3dc in 4 sides) tie off blue yarn and weave in the ends.
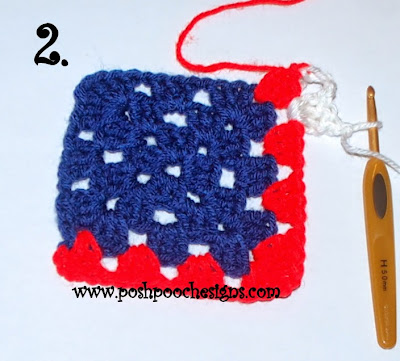
Adding the Red and White Stripes
Round 5
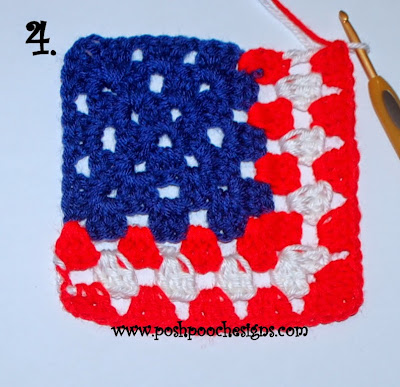
Change to red yarn, attach to 1st corner, ch 3, 2 dc, ch 2 in that corner, 3dc in the next 2 ch2 spaces, 3dc, ch 2, 3dc, ch2 in the corner, Then 3 dc, ch2 in the next 2 ch2 spaces and in the 3rd corner.
Leave red yarn attached, but make sure it is secure and will not unravel.
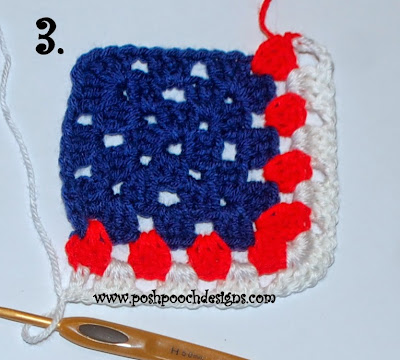
1st White Stripe
Round 6
Change to white yarn by attaching it to the 1st dc of the red yarn, ch 3, then 3dc, ch 2, in the next 3 ch2 spaces, 3dc, ch2, 3dc, ch2 in the corner, then 3dc, ch 2, in the next 3 ch2 spaces, 1dc in the top of the last dc.
Leave your white yarn attached, make sure it is securely fastened and will not unravel.
Round 7
Go back to where the red yarn is attached, ch 3, 3 dc, ch 2 in the loop, 3dc in the next 3 ch2 spaces, 3sc, ch 2, 3dc, ch2 in the corner, then 3 dc, ch2 in the next 3 ch2 spaces and in the 3rd corner. Again, leave your yarn attached.
Round 8
Go back to where the white yarn is attached, ch 3, then 3dc, ch 2, in the next 4 ch2 spaces, 3dc, ch2, 3dc, ch2 in the corner, then 3dc, ch 2, in the next 4 ch2 spaces, 1dc in the top of the last dc.
Leave your white yarn attached, make sure it is securely fastened and will not unravel.
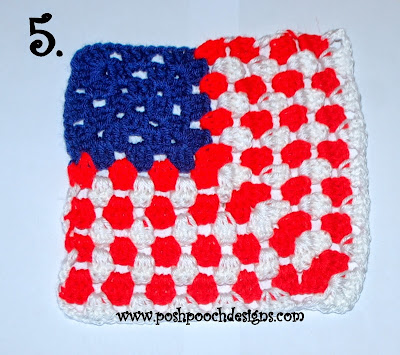
Rounds 9-12
Continue to repeat R:7 and R:8, alternating red and white yarn. When you reach R:12, you should have 6 of the 3dc clusters on each side. Tie off after R:12 and weave in your ends.
Final Rounds
Round 13
Attach the Golden Rod yarn to the top corner, ch 3, 2dc, ch2, 3dc in that 1st corner, 3dc, ch2 in each ch2 space across, then, 3dc, ch2, 3dc, ch2 in the loop to form the corner.
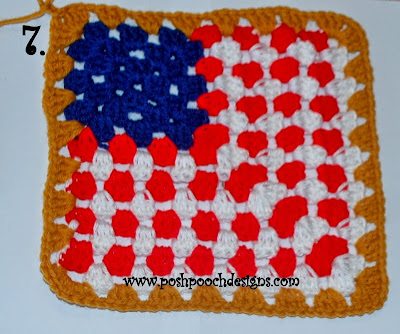
Again, *3dc, ch2 in each ch2 space, and 3dc, ch2, 3dc, ch2 in the next corner.* Repeat from *to* 2 more times, join to the 1st ch 3.
Round 14
Sl st to the center of the 1st corner, ch 3, 2dc, ch2, 3dc, ch2 in that corner, *3dc, ch2 in each ch2 space across.* Repeat from *to* around the square, join to 1st ch 3.
Round 15
Repeat Round 14.
Round 16
Repeat Round 14, then tie off and weave in your ends. (4 corners, and 8 3dc clusters on each side)
Be sure to block your squares for a nice even look.
- Funny Pictures
-
 Hilarious Memes for Those Bored to Tears
-
 Weekly Treat of Funniest Parenting Memes for Good Laugh out Loud Right Now
-
 Really Funny Pics to End These Weekend Perfectly
- Recipes
-
 Crispy Baked Avocado Fries
-
 Scrambled Chickpea and Spinach Pitas
-
 Cinnamon Pancakes
- Lifehacks
-
 Crochet Basics: Aligned Cobble Stitch
-
 Brick Stitch Crochet Tutorial
-
 Crochet Basics: Wattle Stitch
- Crochet Ideas
-
 Crochet Snorlax Plushie Doll
-
 Crochet Beautiful Penguin Toy
-
 Crochet Tiny Snowman
- DIY
-
 DIY Santa Craft For Kids
-
 Paper Plate Angel Craft
-
 Upcycled Mason Jar Chicken Vase
- Knitting Ideas
-
 Knitted Bridger Cowl
-
 Knitted Keepsake Bag
-
 Knitted Cutie Cupcake Dolls