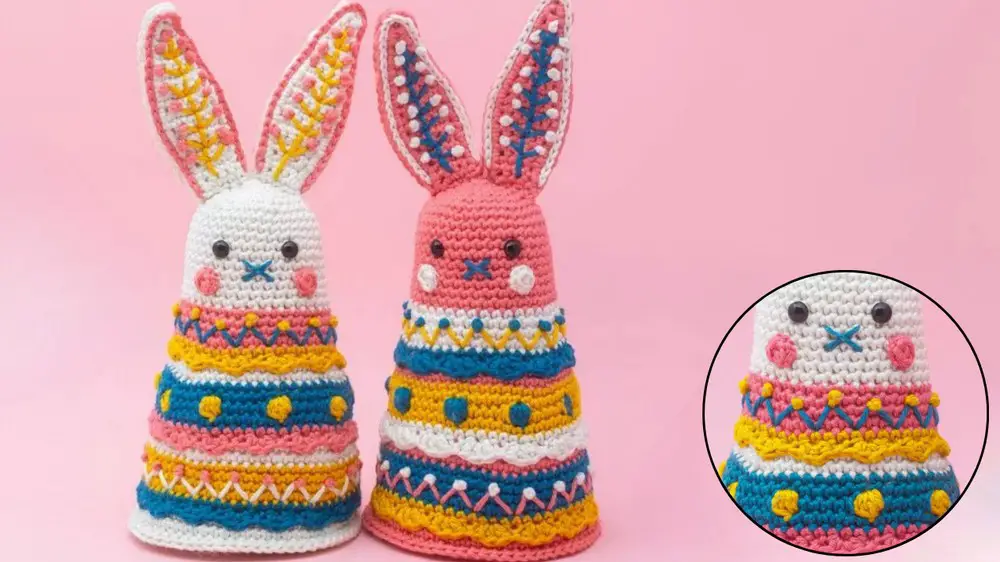
Crochet Folk Bunny: A Charming Handmade Creation

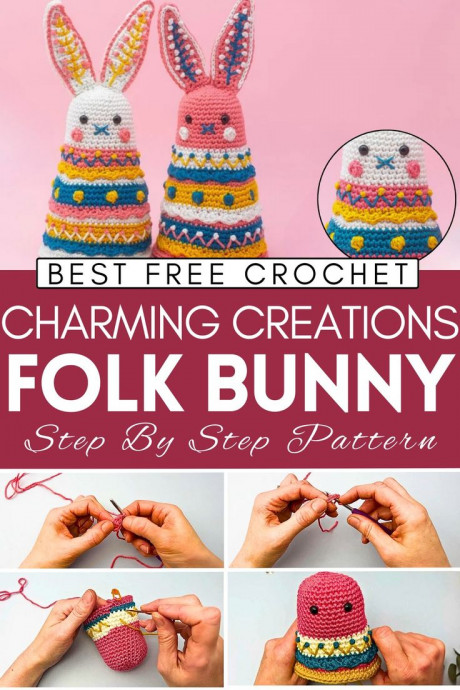
The Crochet Folk Bunny is a delightful and charming handmade creation that is sure to bring a touch of whimsy to any setting. With its intricate details and endearing expression, this sweet bunny is perfect for adding a cozy and playful vibe to your home decor or as a thoughtful gift for a loved one. The combination of crochet craftsmanship and folk art style gives this bunny a unique and lovable personality that will surely brighten your day. It's a wonderful reminder of the joy that can be found in simple, handmade treasures.
Materials Needed
- Yarn in various colors
- Crochet hook
- Stitch marker
- Safety eyes (9 mm diameter)
- Stuffing
- Large blunt needle
- Scissors
Abbreviations
- MC: Magic Circle
- ch: Chain
- sc: Single Crochet (US) / Double Crochet (UK)
- dc: Double Crochet (US) / Treble Crochet (UK)
- tr: Treble Crochet (US) / Double Treble Crochet (UK)
- sl st: Slip Stitch
- st: Stitch
Step-by-Step Pattern
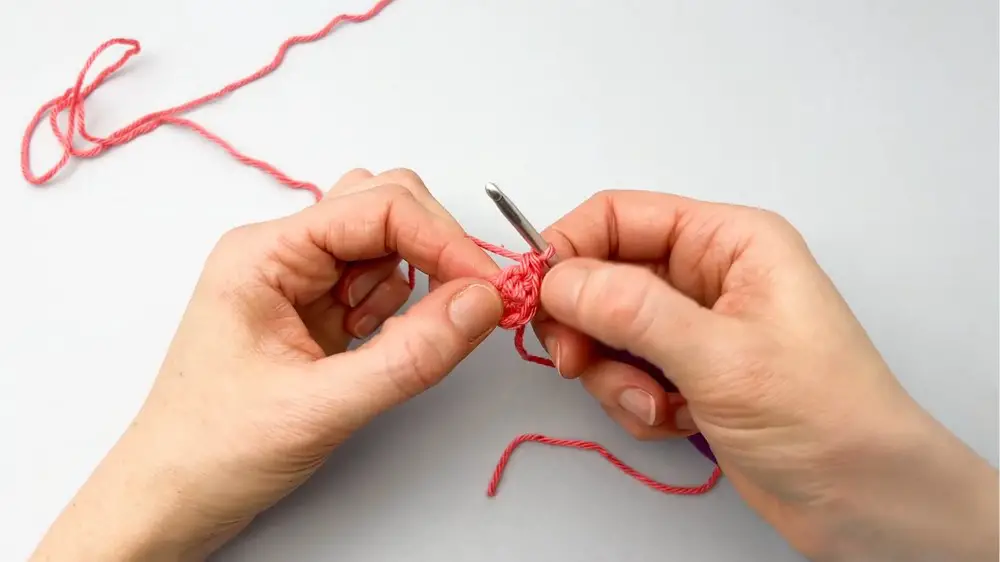
1. Magic Circle
Form a loop with your yarn. Insert the hook under the first strand and pull the second strand through. Ch 1 to secure the loop.
Sc 6 into the circle. Tighten the circle by pulling the tail. (6 sts)
2. Round 2
Inc in each st around. (12 sts)
Use a stitch marker to mark your first stitch of each round.
3. Changing Colors
Begin your last st in the current color up to the point where you have two loops on the hook. Drop the current yarn, pick up the new color, and complete the st using the new yarn.
4. Back Loops Only (BLO)
For working into BLO, only insert your hook into the back loop (the loop furthest from you).
5. Shell Stitch Variation
Skip 1 st, work 3 tr into the following st, skip 1 st, sl st into the next st.
Repeat around.
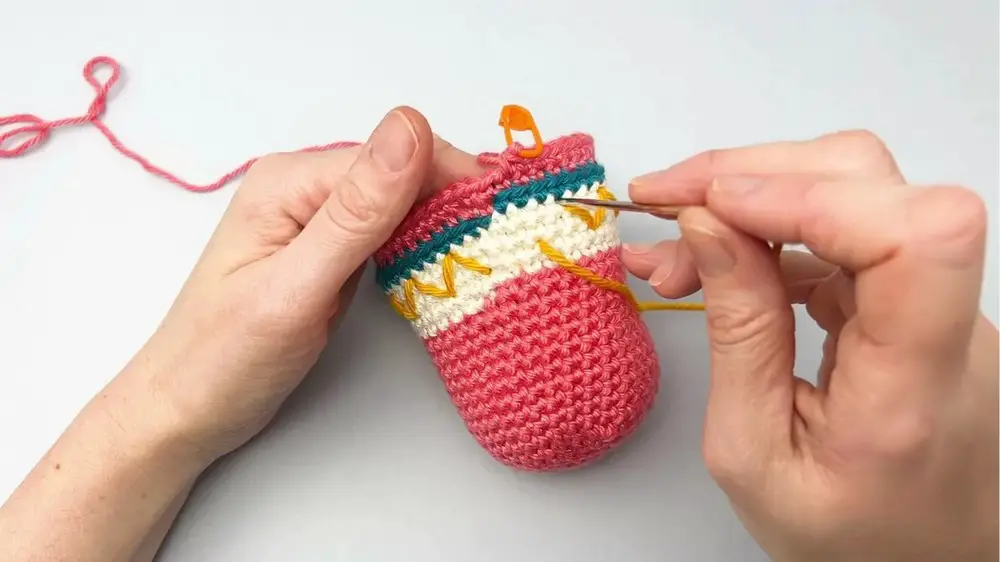
6. French Knots and Zigzags
French Knots: Wrap yarn around the needle three times and bring the needle back into the fabric close to the exit point, securing with a few strands of the yarn to avoid pulling through.
Zigzag Embroidery: Sew at a diagonal over two rounds, making diagonal stitches and counting three sts apart.
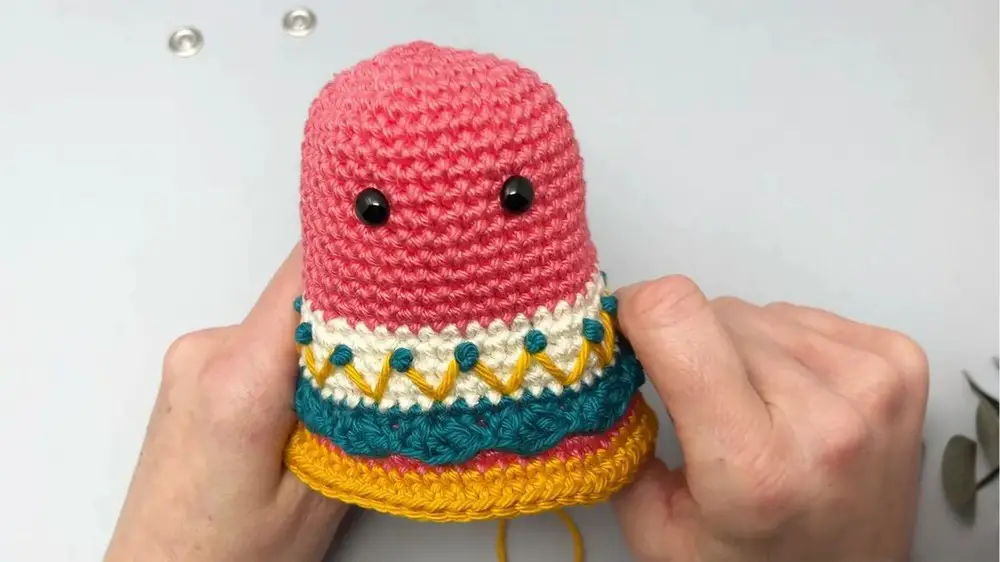
7. Bunny’s Face
Safety Eyes: Insert between rounds 10 and 11, spaced 5 sts apart.
Nose: Create a small cross-stitch one round below the eyes.
8. Bubble Stitch (US Terms)
Sc in the next 5 sts, change to bubble color. In the next st, make 4 unfinished tr (5 loops on hook). Change back to the main color, yarn over and pull through all 5 loops. Repeat around ensuring five sc between each bubble.
9. Ears
Make two ear panels with the raw edge crochet method. Join the edge with SC through both layers. Position the ears at the top, parallel to the magic ring and sew in place.
10. Joining the Body and Base
Line up the last row of the body with any point on the base. Insert the hook through the first st on the body and the corresponding st on the base. Sl st through both layers. Stuff as needed when you have joined halfway.
11. Finishing
Ensure all parts are stuffed properly. Secure loose ends by tying them inside and trimming. Adjust bubble stitches and other detailing as necessary for proper shape and alignment.
12. Adding Cheeks (Optional)
Sew on small cheeks below the eyes.
Final Touches
Hide all knots and loose ends neatly. Adjust any stitches if necessary. Make sure the bunny stands properly by ensuring the base is flat.
- Funny Pictures
-
 Relatable and Funny Memes to Distract You From the Routine
-
 Hilarious Cat Snapchats That Will Leave You With the Biggest Smile
-
 Today’s Top Funny Tweets to Scroll Before Bed
- Recipes
-
 Cappuccino Brownies
-
 Chicken Mushroom Tortellini Bake
-
 Spinach Pie
- Lifehacks
-
 8 Necessary Tips for Baking Bread
-
 Tips & Hacks for Clean Carpets
-
 10 Uses For Old TV Armoires
- Crochet Ideas
-
 Crochet Watermelon Amigurumi
-
 Crochet Flower Hat for your Pet
-
 Crochet Shark Applique
- DIY
-
 Crochet Titus the Barn Owl
-
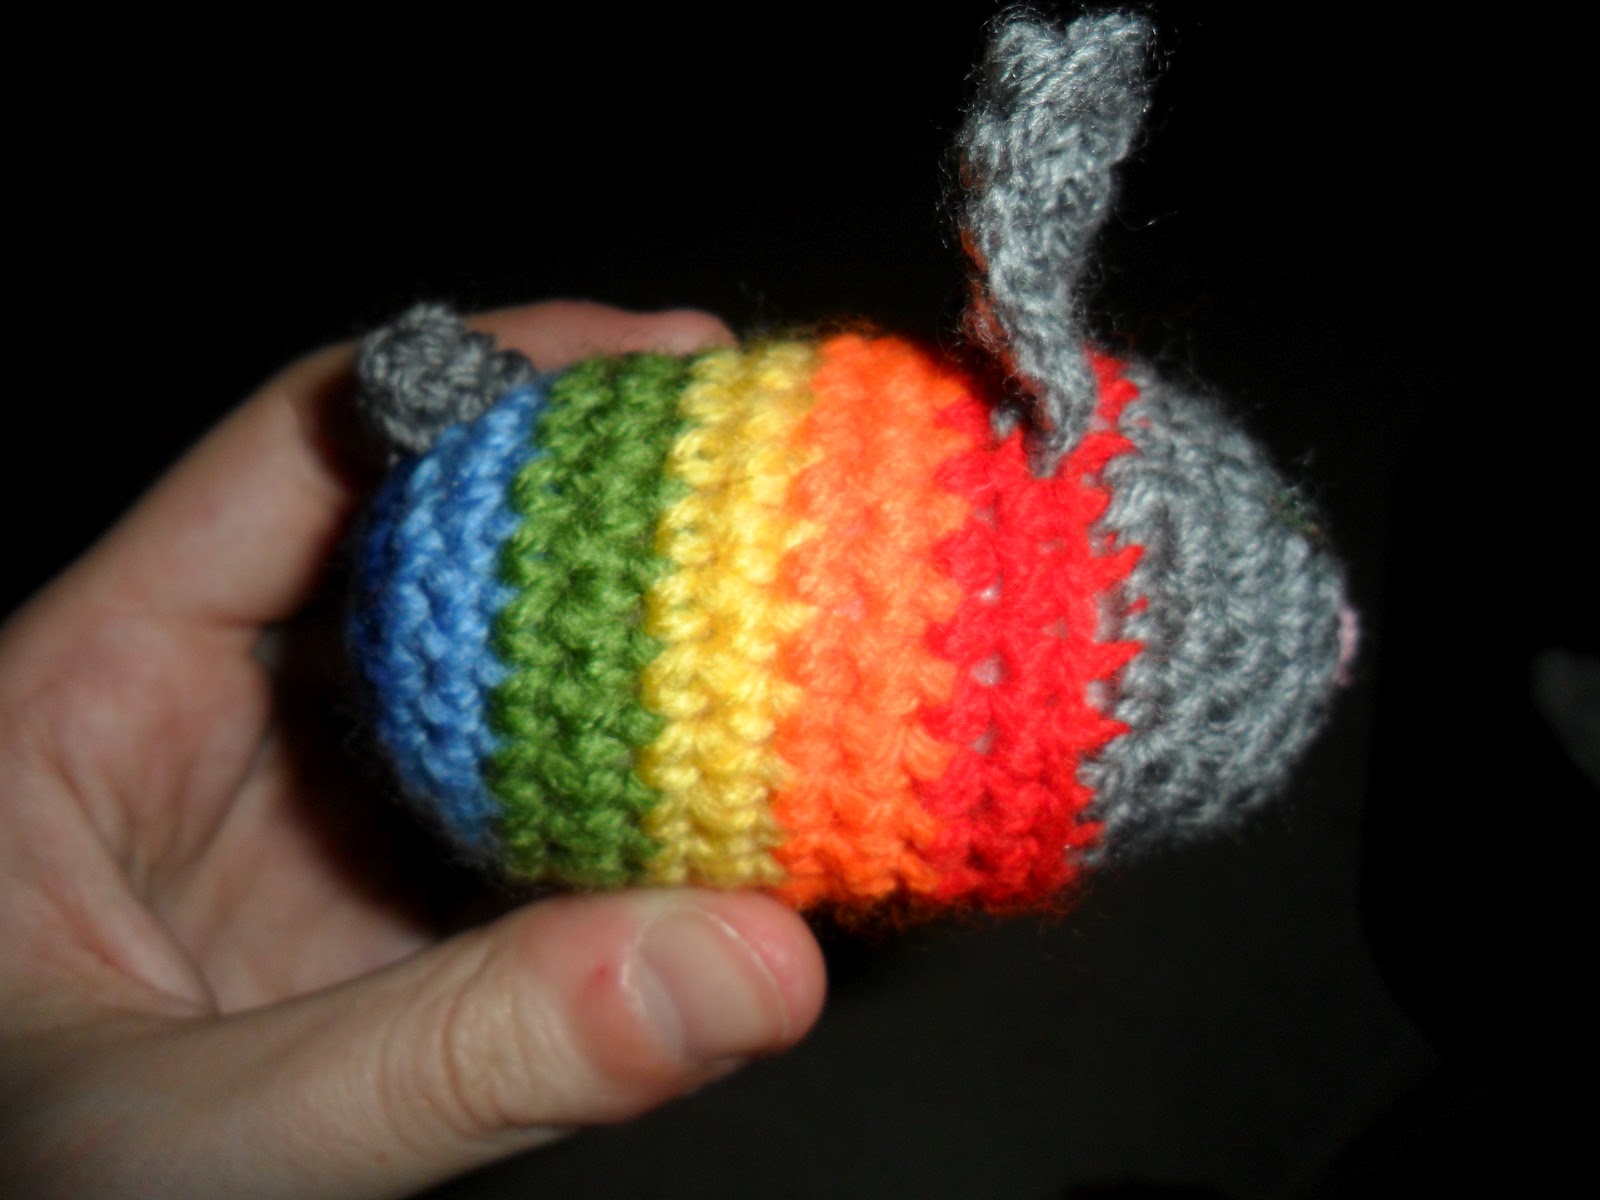 Crochet Rainbow Bunny
-
 DIY Washer Ornaments
- Knitting Ideas
-
 Knitted Star Square Dishcloth
-
 Knitted Free 2025 Year Dishcloth
-
 Knitted Ribbed Adult Hat