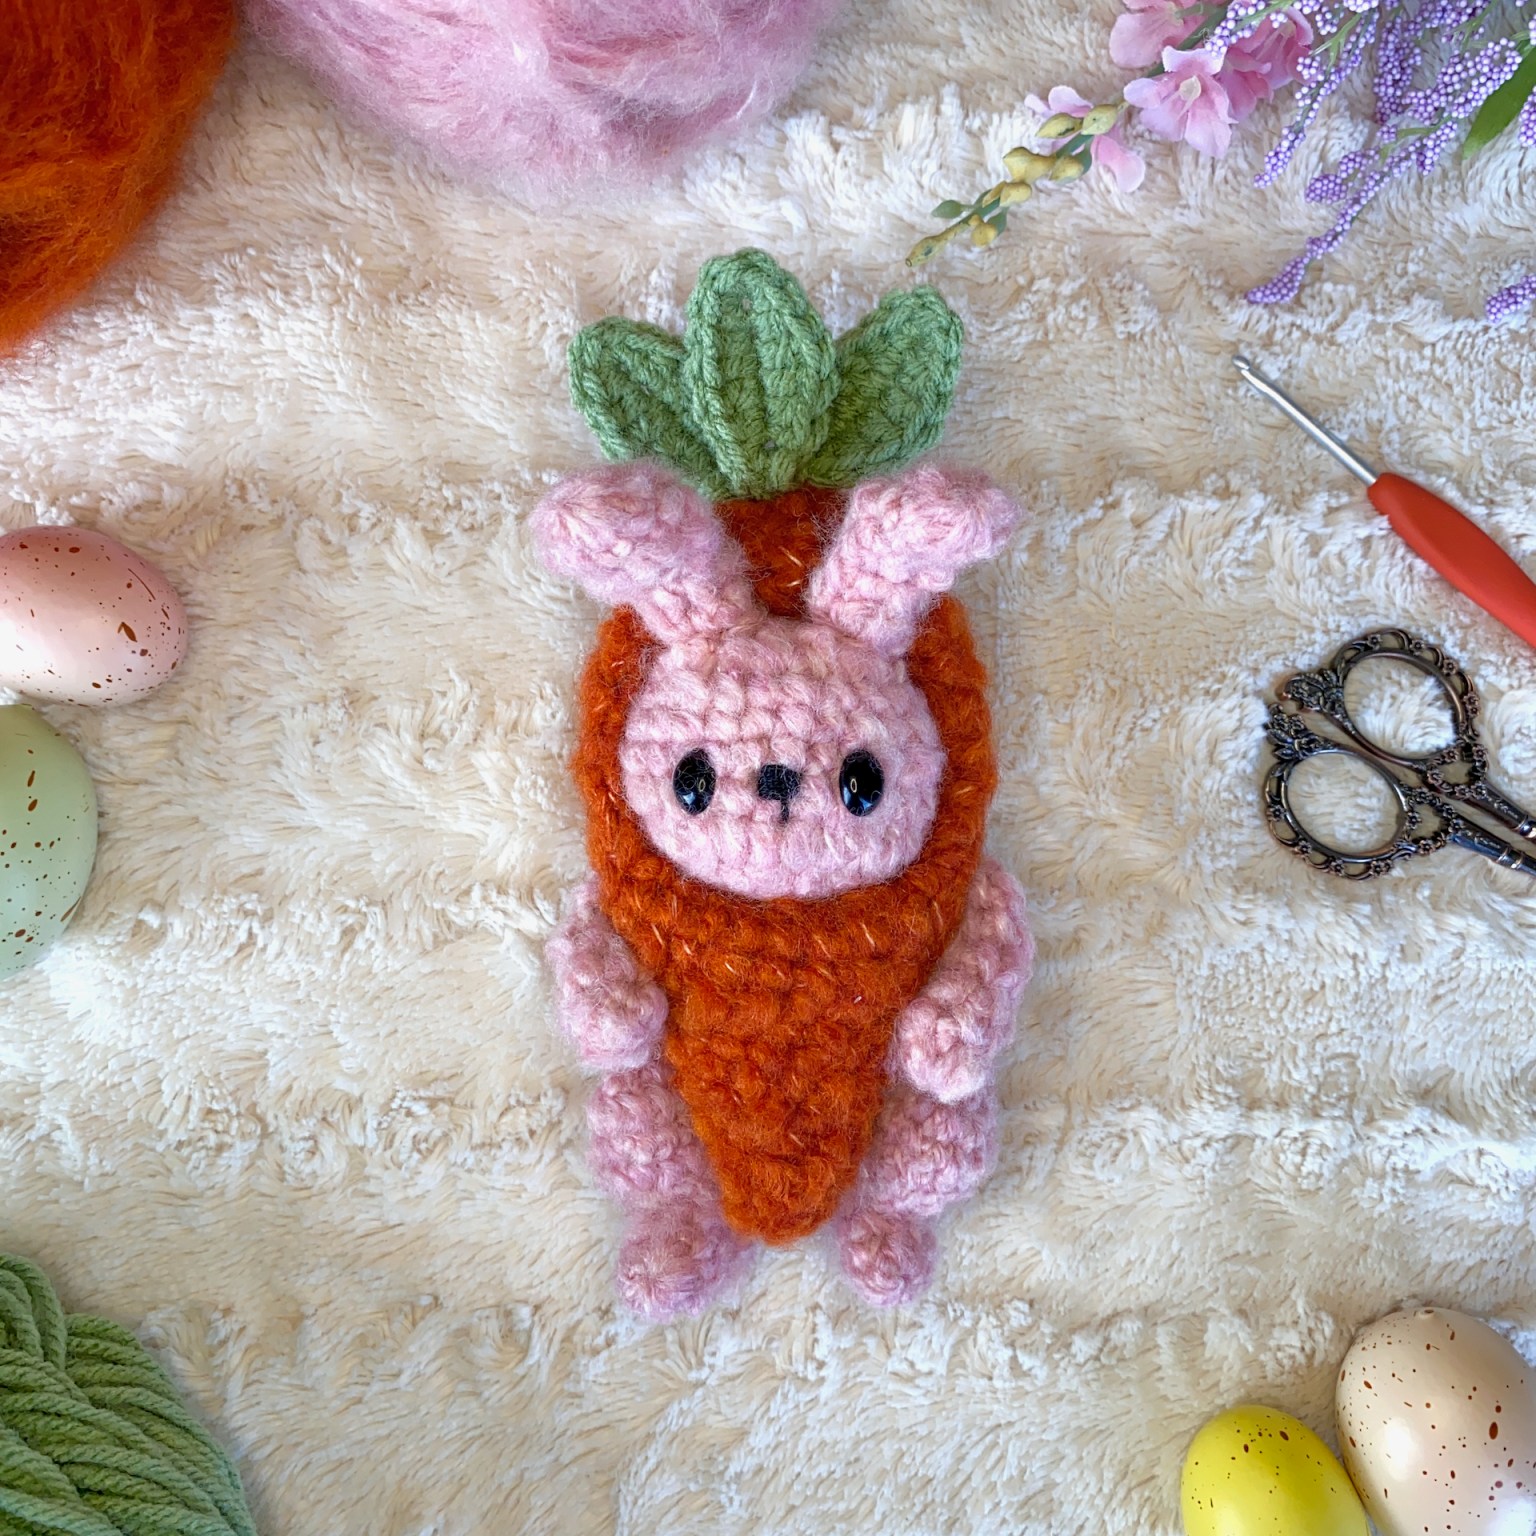
How to Make an Adorable Crochet Bunny in a Carrot Costume


Imagine a precious crochet bunny nestled snugly inside a charming carrot costume! The sight is simply too adorable to resist. With its fluffy ears peeking out from the vibrant orange fabric, this whimsical creation brings joy to anyone who sets eyes on it. It's the perfect combination of cute and clever, making it a delightful addition to any Easter display or a lovely gift to bring a smile to someone's face. The crochet bunny in a carrot costume is sure to warm hearts and spark imagination wherever it goes.
Materials
- 4mm hook for main;
- Lion Brand Wool Ease Aire (Super Bulky, Weight 6) in Cotton Candy (pink) and Spicy (orange) (approx 30g of each) for bunny and carrot;
- Loops and Threads Color Craft in Sage (Worsted, Weight 4)(small amount) or any other worsted weight yarn for leaves;
- Black crochet thread, size 5, for mouth;
- 8mm safety eyes;
- Stitch markers;
- Stuffing;
- Tapestry needle.
Terms and Stitches
- Ch – Chain
- Slst – Slip stitch
- MR – Magic Ring
- Sc – Single Crochet
- Hdc – Half double crochet
- Dc – Double crochet
- Inc – Increase. Work a regular sc increase
- Dec – Decrease. Work a regular sc decrease
Pattern
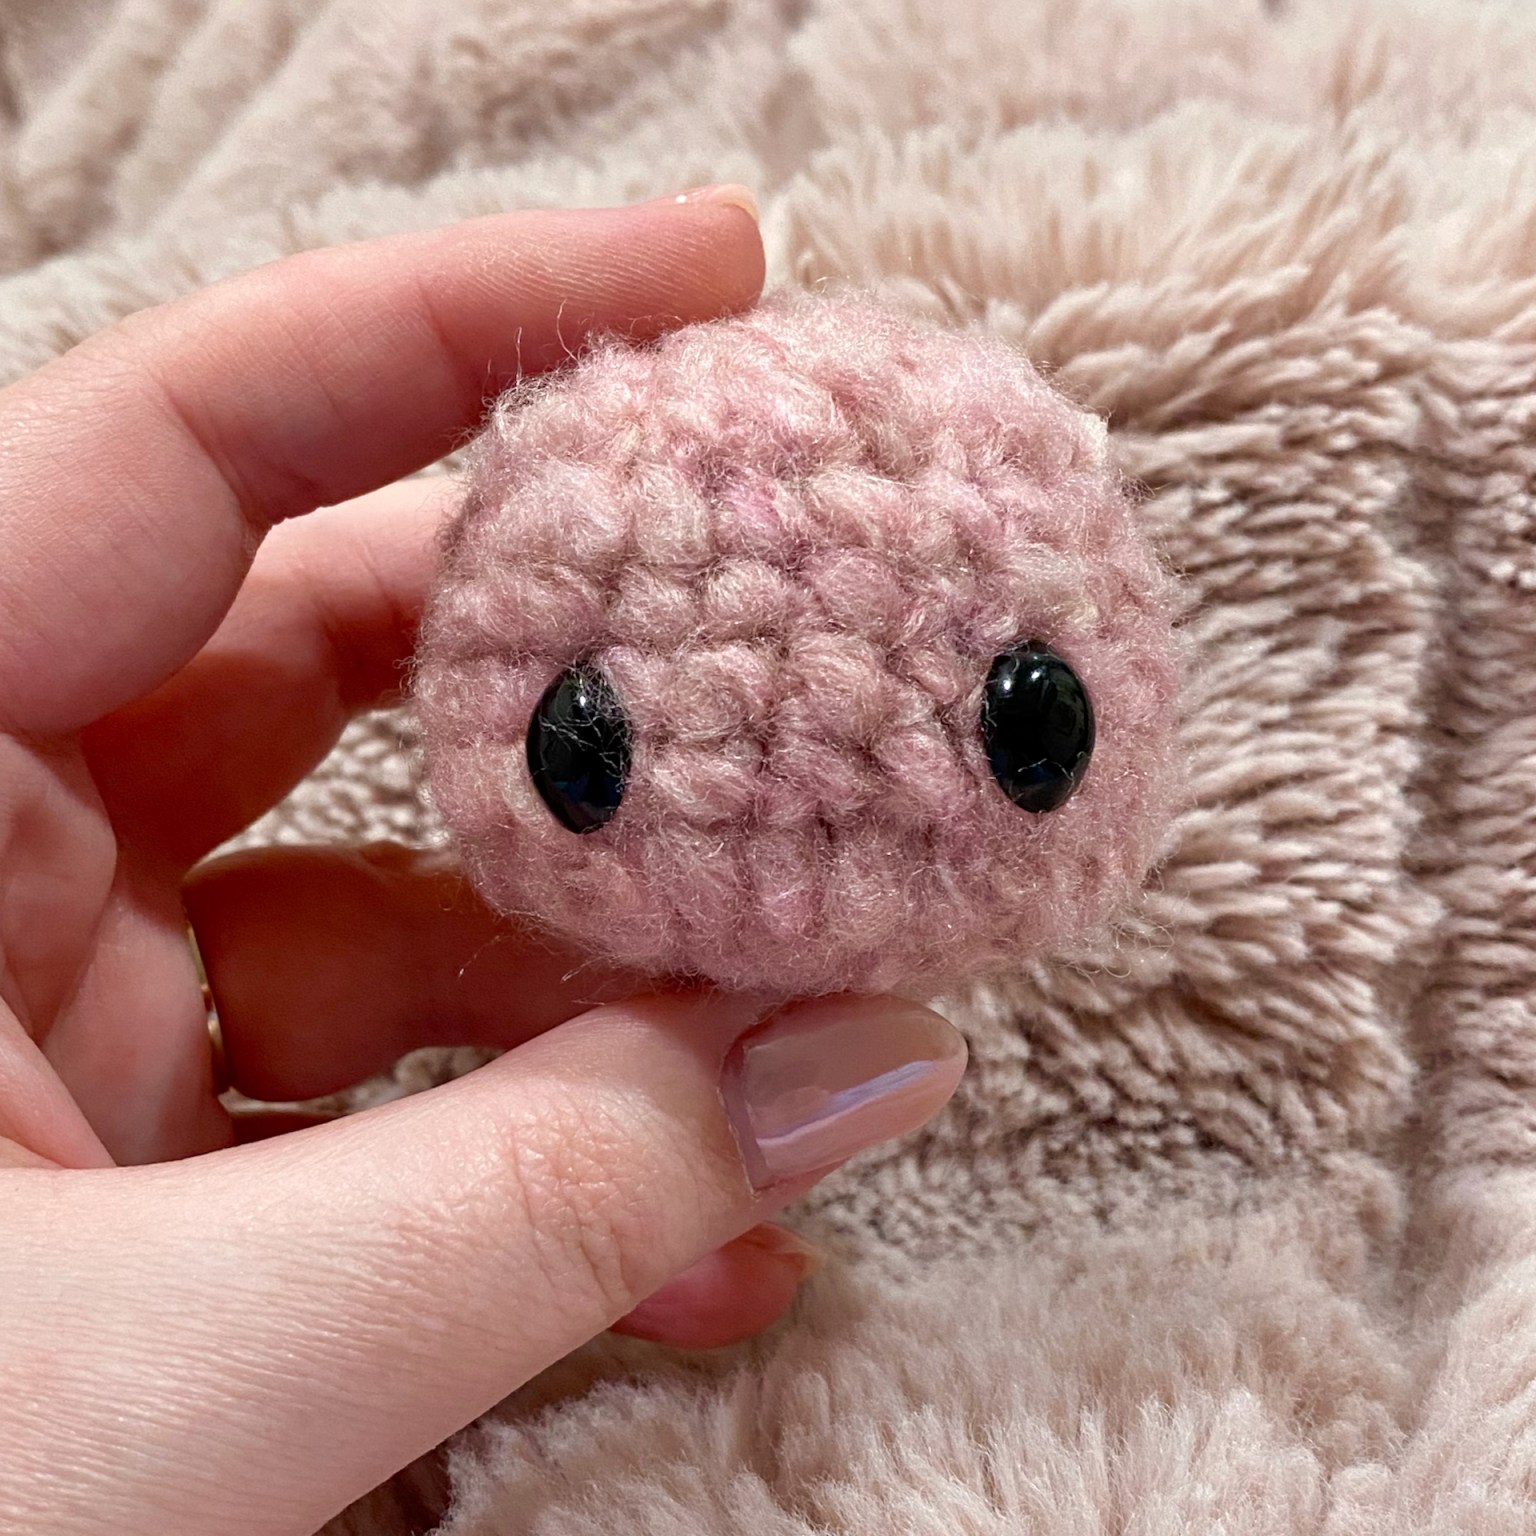
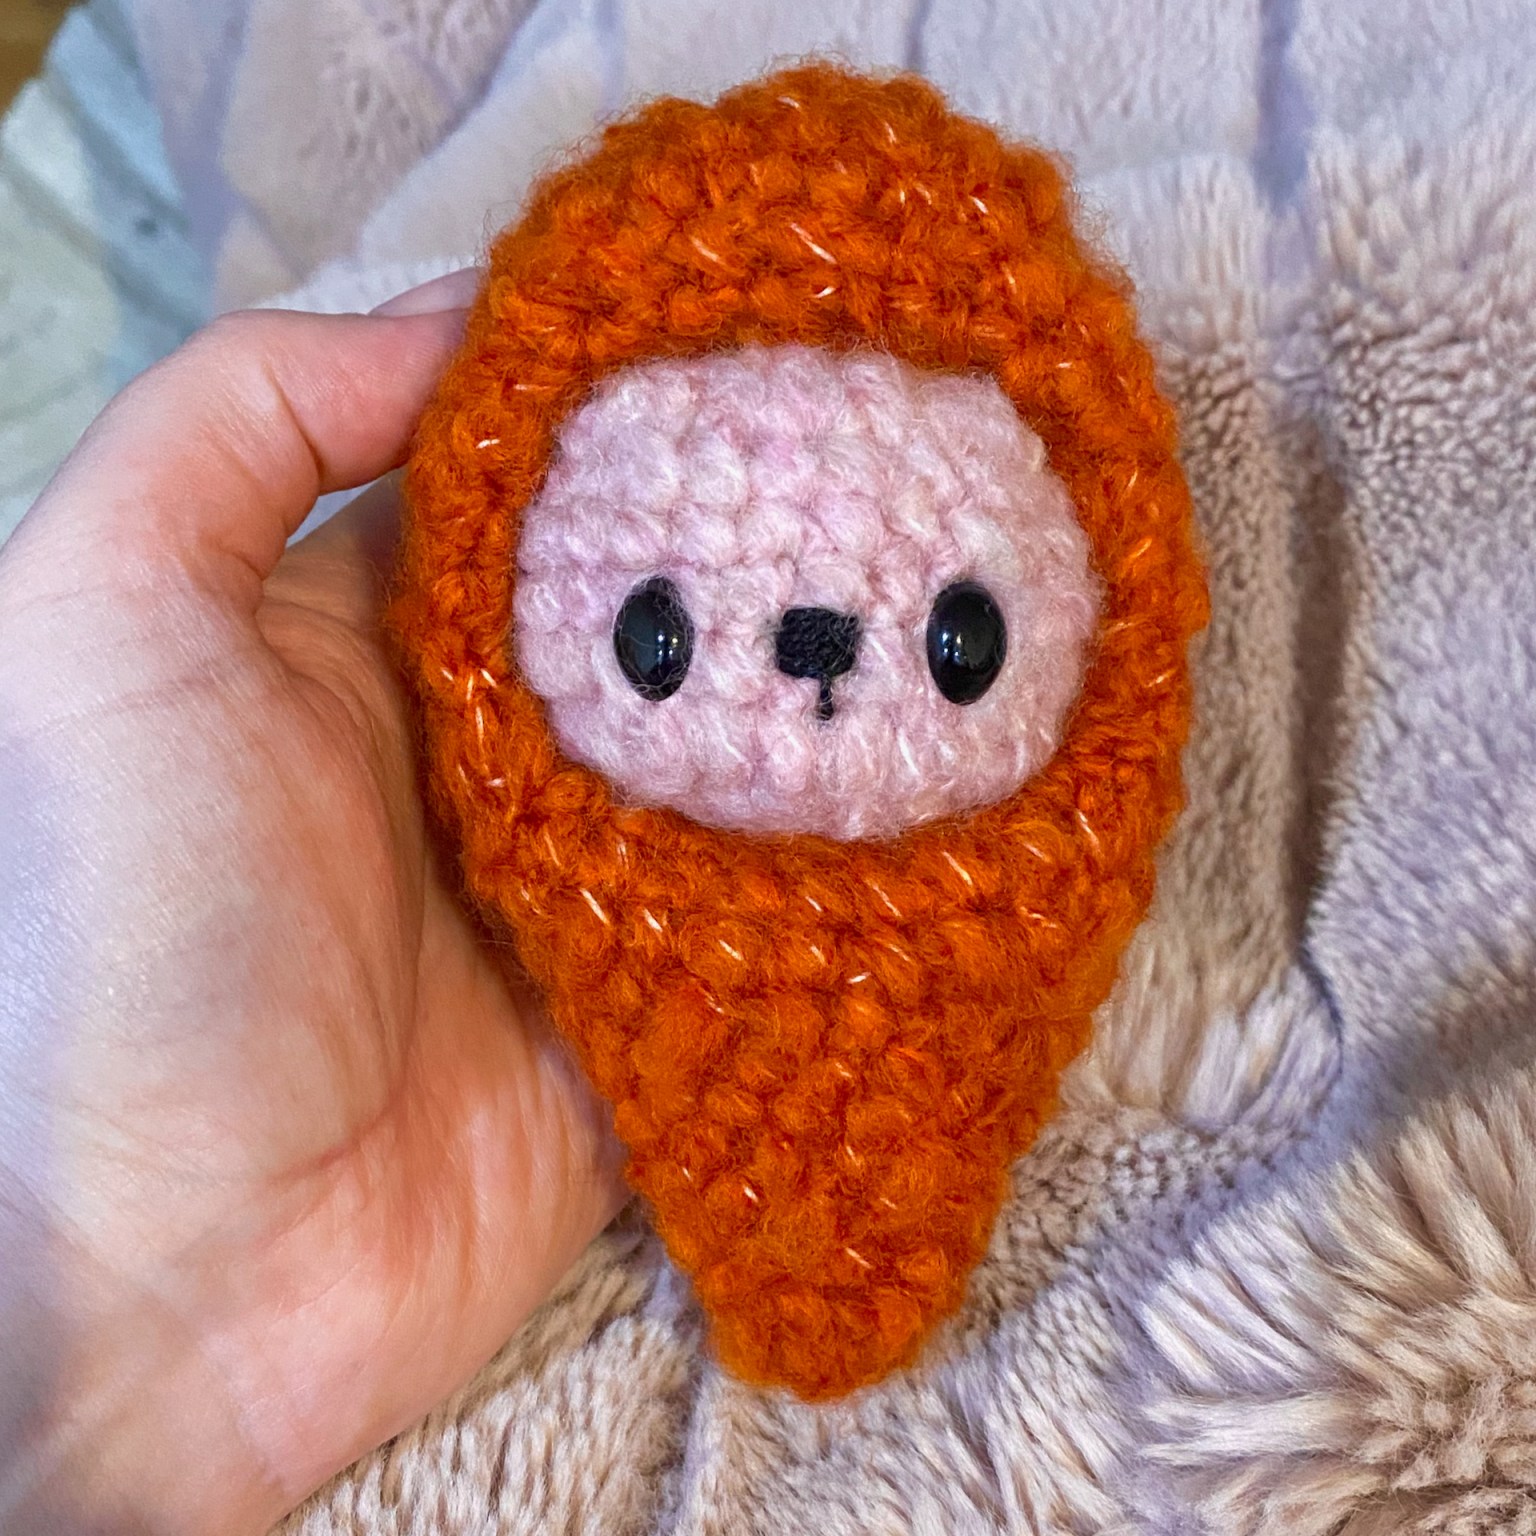
Head (Make 1)
- Rnd 1: In pink, work 6 sc into a MR (6 sts)
- Rnd 2: Inc in each st around (12 sts)
- Rnd 3: *Sc in first st, inc in next st, repeat from * five more times (18 sts)
- Rnd 4: *Sc 2, inc in next st, repeat from * five more times (24 sts)
- Rnds 5-9: Sc in each st (24 sts)
- Rnd 10: *Sc 2, dec, repeat from * five more times (18 sts)
- Rnd 11: *Sc 1, dec, repeat from * five more times (12 sts)
Insert 8mm safety eyes into the head between rows 6 and 7 with approximately 5 stitches between them.
Stuff.
- Rnd 12: Dec around (6 sts)
Tie off, leaving a long tail for closing. Weave yarn end through each stitch and pull to close. Using black crochet thread, stitch a nose between the eyes (between rows 6 and 7) across one stitch (stitch around several times to make it as big as needed). Stitch a small vertical line underneath the nose. Weave ends. Set aside.
Carrot (Make 1)
- Rnd 1: In orange, work 6 sc into a MR (6 sts)
- Rnd 2: *Sc 2, inc, repeat from * once more (8 sts)
- Rnd 3: *Sc 3, inc, repeat from * once more (10 sts)
- Rnd 4: *Sc 4, inc, repeat from * once more (12 sts)
- Rnd 5: *Sc 5, inc, repeat from * once more (14 sts)
- Rnd 6: *Sc 6, inc, repeat from * once more (16 sts)
- Rnd 7: *Sc 7, inc, repeat from * once more (18 sts)
- Rnd 8: *Sc 5, inc, repeat from * twice more (21 sts)
- Rnd 9: *Sc 6, inc, repeat from * twice more (24 sts)
- Rnd 10: *Sc 7, inc, repeat from * twice more (27 sts)
- Rows 11 to 16 are worked in flat rows. After row 16 you will join and continue to work in the round.
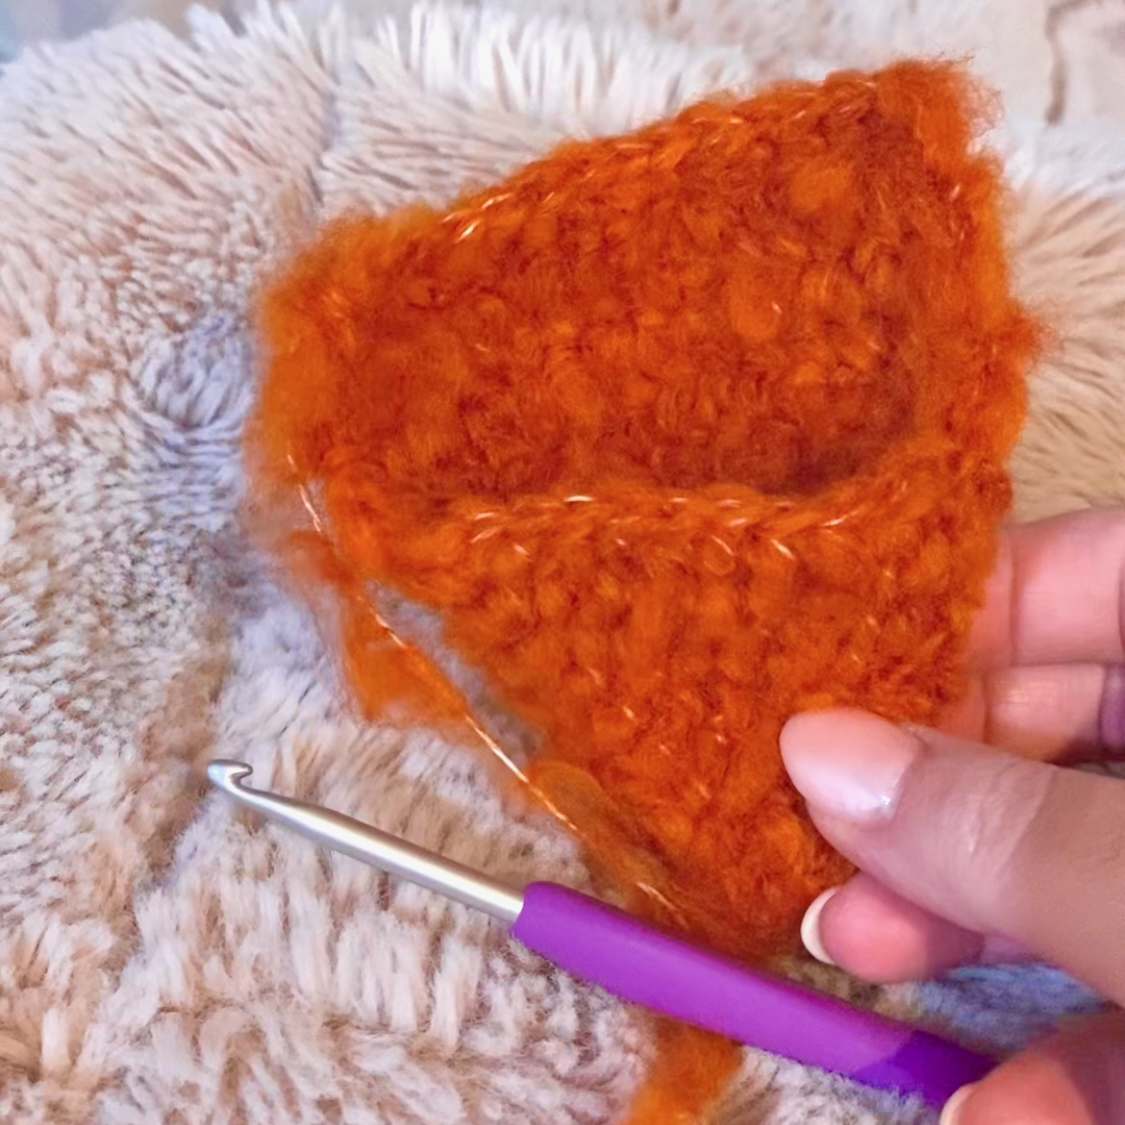
- Rows 11-15: Sc 15 (15 sts), ch 1, turn.
- Row 16: Sc 15, ch 12, join to the first st of the row (15 sts), ch 1, turn.
- Rnd 17: Sc in each ch, sc 15 (27 sts)
- Rnd 18: *Sc 8, inc, repeat from * twice more (30 sts)
- Rnd 19: Dec around (15 sts)
- Rnd 20: Sc, dec 7 times (8 sts)
- Rnd 21: Dec around (4 sts)
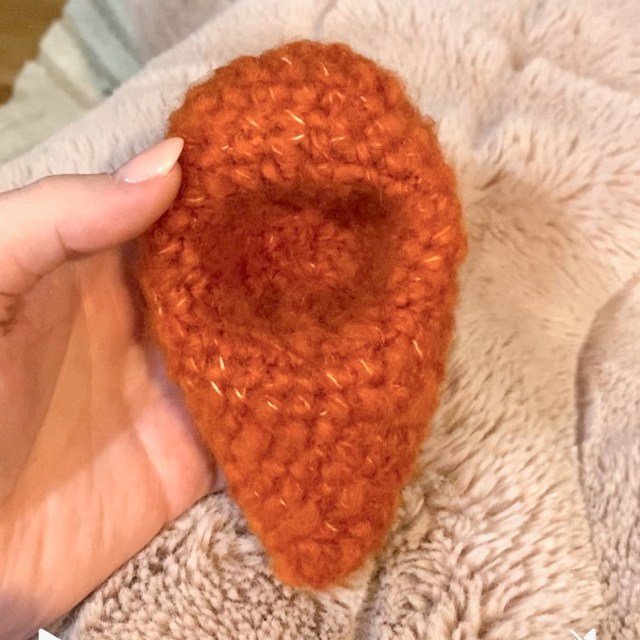
Tie off, leaving a long tail for closing. Using a tapestry needle, weave yarn end through each stitch and pull to close. Stuff top and bottom of carrot lightly.
Filling in the Carrot
Work around the opening of the hole in continuous rounds as follows:
- Rnd 1: Insert hook into the first unworked st of row 10, sc 12 along the “bottom” of the hole, sc 3 along the side of the hole, sc 12 along the top of the hole (i.e., in the chains), sc 3 along the other side (30 sts)
- Rnd 2: *Sc 3, dec, repeat from * five more times (24 sts)
- Rnds 3-7: Sc in each st (24 sts)
- Rnd 8: *Sc 2, dec, repeat from * five more times (18 sts)
- Rnd 9: *Sc 1, dec, repeat from * five more times (12 sts)
Top up carrot stuffing now, if needed but do not stuff the hole area; this will be pushed into the carrot to create a concave shape.
- Rnd 10: Dec around (6 sts)
Tie off, leaving a long tail for closing. Using a tapestry needle, weave yarn end through each stitch and pull to close. Set aside.
Ears (Make 2)
- Rnd 1: In pink, work 6 sc into a MR (6 sts)
- Rnd 2: Sc in each st (6 sts)
- Rnd 3: *Sc 2, inc, repeat from * once more (8 sts)
- Rnd 4: Sc in each st (8 sts)
- Rnd 5: *Sc 2, dec, repeat from * once more (6 sts)
- Rnds 6-7: Sc in each st (6 sts)
Tie off, leaving a long tail to stitch onto the body later. Set aside.
Arms (Make 2)
- Rnd 1: In pink, work 6 sc into a MR (6 sts)
- Rnd 2-6: Sc in each st (6 sts)
Tie off, leaving a long tail for stitching onto the body later. Set aside.
Legs (Make 2)
- Rnd 1: In pink, work 6 sc into a MR (6 sts)
- Rnd 2: Sc in each st (6 sts)
- Rnd 3: Sc in each st (6 sts), ch 1, turn.
- Rows 4 to 5 are worked in flat rows.
- Row 4: Sc 5 (5 sts), ch 1, turn.
- Row 5: Sc 5 (5 sts)
- Fold the ends of row 5 together and slst along the edge to join. Tie off. Weave ends. Insert hook into any st of the opening to continue leg as follows (photos are from a different pattern but use the same technique):
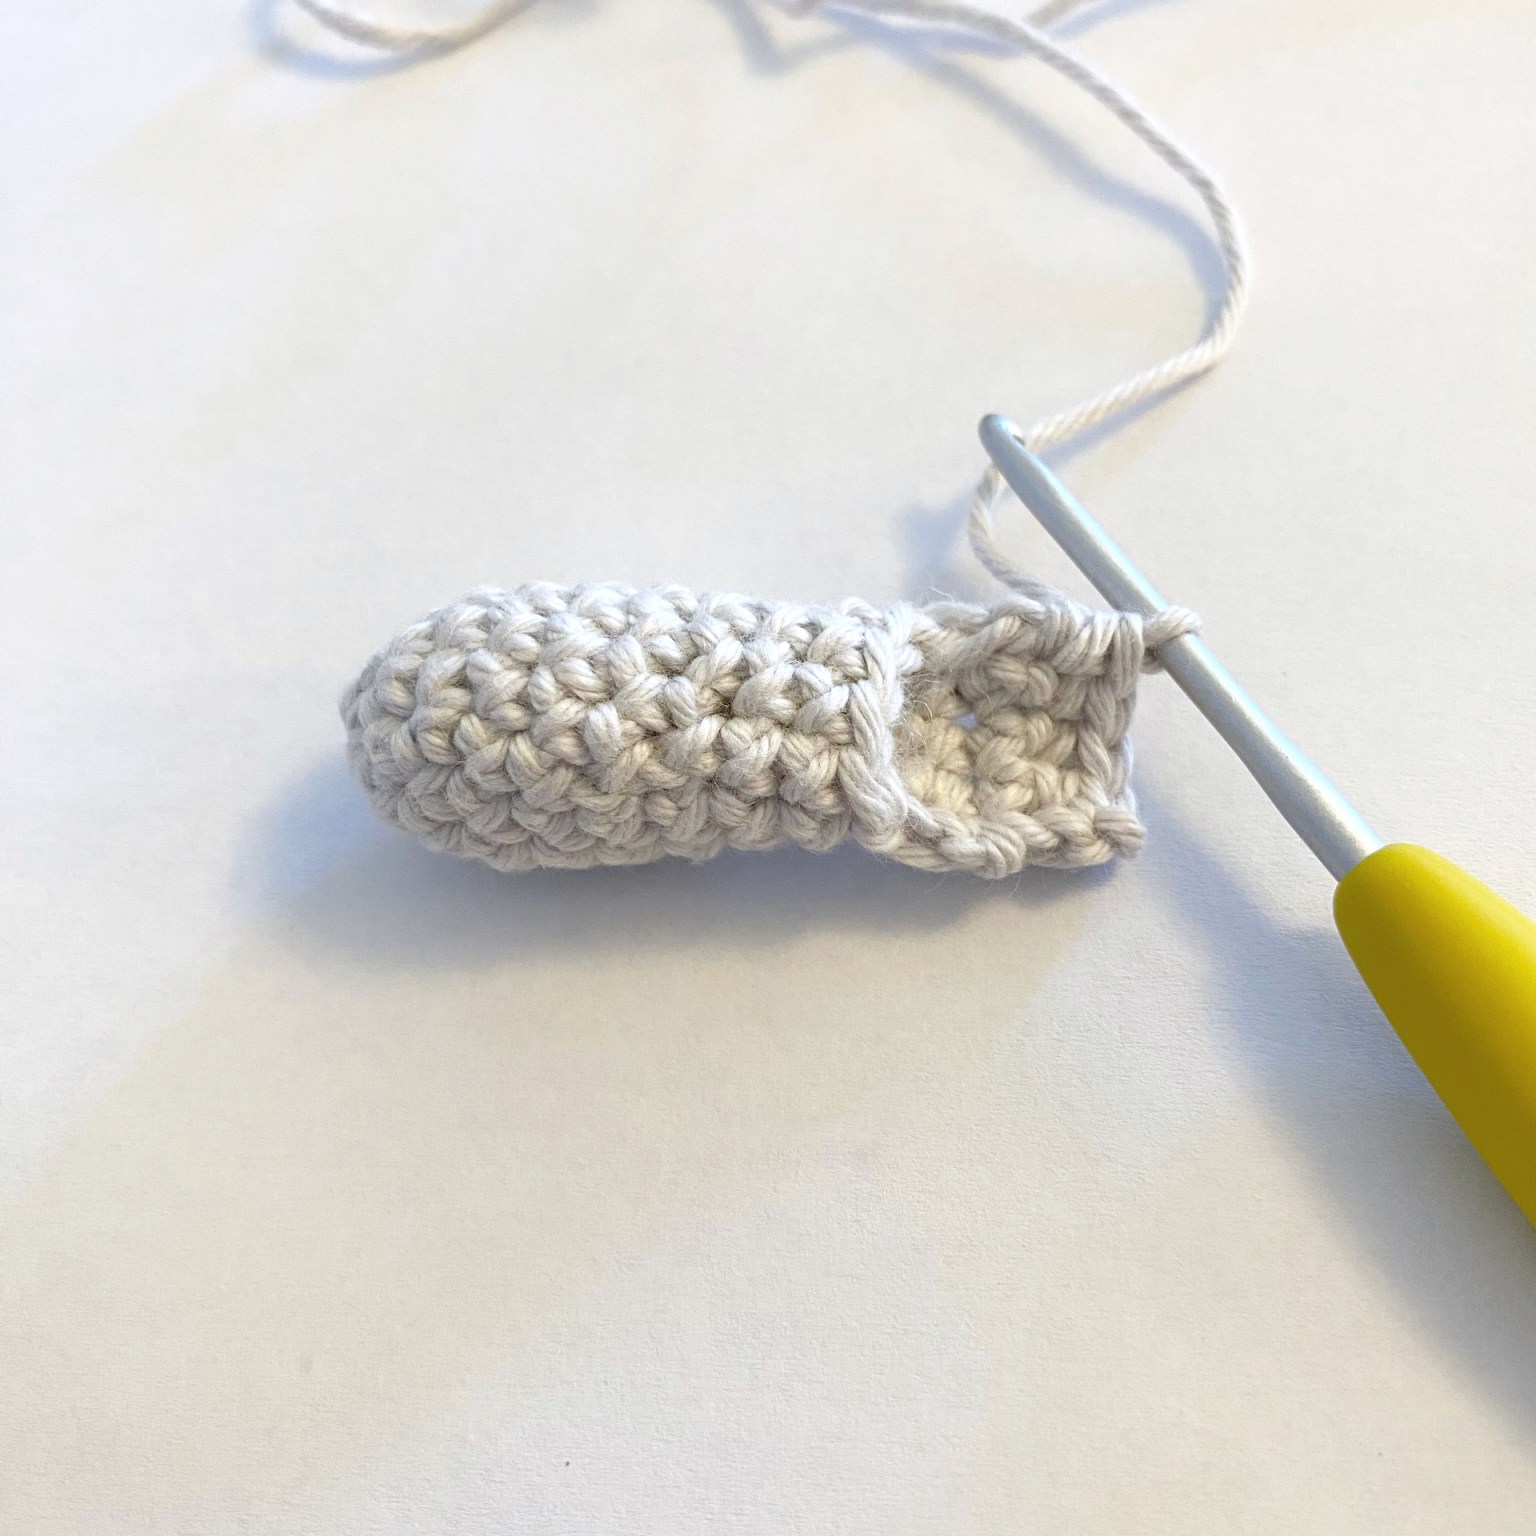
- Rnd 1: Sc 6 evenly around opening (6 sts)
- Rnd 2: Inc in each st (12 sts)
- Rnd 3: *Sc 1, inc, repeat from * five more times (18 sts)
- Rnds 4-5: Sc in each st (18 sts)
- Rnd 6: *Sc, dec, repeat from * five more times (12 sts)
- Stuff leg.
- Rnd 7: Dec around (6 sts)
Tie off. Top up stuffing. Weave yarn end through each st and pull to close.
Tail (Make 1)
- Rnd 1: In pink, work 6 sc into a MR (6 sts)
- Rnd 2: *Sc 2, inc, repeat from * once more (8 sts)
- Rnd 3: *Sc 2, dec, repeat from * once more (6 sts)
Tie off, leaving a long tail for stitching onto the body later. Stuff.
Leaves (Make 3)
- Rnd 1: In green, ch 7, starting in 2nd ch from hook, sc, hdc, dc 2, hdc, (4 sc) in last ch, continue on opposite side of chain, hdc, dc 2, hdc, sc, slst to beginning st.
Tie off. Weave ends.
Move on to assembly below!
Assembly
Insert the head into the concave area of the carrot. The head should fit snugly inside.
Using pins, position the ears onto the top of the head, then remove the head from the carrot and stitch the ears in place. Re-insert the head into the carrot. Alternatively, you can stitch the ears on top of the carrot for a slightly different look!
Stitch the arms to each side of the carrot at row 11. Stitch the hands down as well, if desired (rather than sticking out to the sides).
Stitch the legs to each side of the bottom of the carrot at around rows 6/7.
Stitch the tail to the back.
Position the leaves so that there are two in the back and one in the front centre. Stitch the leaves to the top of the carrot.
You’re done!
- Funny Pictures
-
 Hilarious Memes for Those Bored to Tears
-
 Weekly Treat of Funniest Parenting Memes for Good Laugh out Loud Right Now
-
 Really Funny Pics to End These Weekend Perfectly
- Recipes
-
 Crispy Baked Avocado Fries
-
 Scrambled Chickpea and Spinach Pitas
-
 Cinnamon Pancakes
- Lifehacks
-
 Crochet Basics: Aligned Cobble Stitch
-
 Brick Stitch Crochet Tutorial
-
 Crochet Basics: Wattle Stitch
- Crochet Ideas
-
 Crochet Snorlax Plushie Doll
-
 Crochet Beautiful Penguin Toy
-
 Crochet Tiny Snowman
- DIY
-
 DIY Santa Craft For Kids
-
 Paper Plate Angel Craft
-
 Upcycled Mason Jar Chicken Vase
- Knitting Ideas
-
 Knitted Bridger Cowl
-
 Knitted Keepsake Bag
-
 Knitted Cutie Cupcake Dolls