Crochet Lily Twist Headband Tutorial


The Crochet Lily Twist Headband is a lovely accessory that adds a touch of charm to any outfit! With its intricate design and vibrant colors, this headband is perfect for keeping your hair in place with style. The twist detail adds a unique flair to your look, making it a fun and fashionable choice for any occasion. Whether you're running errands or attending a special event, this headband is sure to become your go-to accessory for a touch of effortless elegance.
Size
Teen/ Adult women: 5.11” (13 cm) wide by 20.8” (52.55 cm) long
To resize the headband, start with more/less chainless foundation half double crochet stitches, multiple of 2 and try the piece around your head!
Gauge
7 crossed hdc or 14 hdc back loops only and 10 rows in pattern repeat = 10 cm x 10 cm (4” x 4")
Supplies
- Yarn: medium weight/aran yarn
- 4.5 mm crochet hook
- Scissors
- Optional stitch marker
Stitches and Abbreviations (US Terms)
- ch: chain
- st: stitch
- Sk: skip
- hdc: half double crochet
- Fhdc: chainless foundation half double crochet
- hdc-blo: half double crochet worked into back loops only
- RS: right side
- WS: wrong side
Special Stitches
BcrHDC: Back Crossed Half Double Crochet: sk 1 st, work 1 hdc into the next st, 1 hdc back into skipped st going behind the last hdc just made, so as not to catch it, inserting the hook from front to back of the work. So, 1 bcr hdc will be made of 2 sts.
FcrHDC: Front Cross Half Double Crochet variation: sk 1 st, work 1 hdc into the next st, 1 hdc back into skipped st going in front of the last hdc just made so as not to catch it, inserting the hook from back of the work to the front.
yo-slst-blo: yarn over slip stitch back loops only: Yarn over (yo) and insert the hook into back loop of indicated st; yarn over and draw the yarn through; (You have now 3 loops on the hook).
Having the 3 loops on the hook, pull/slip the first loop on the hook through the next 2 loops on the hook to complete a Yarn Over Slip Stitch Back Loop Only!
Notes
- Using the foundation half double crochet instead of the foundation chains to begin the project will give more elasticity to your headband.
- The ch1 at beginning of the rows will not count as a st.
- The last stitch of each row will be worked using both top loops. This will make the edge more stable.
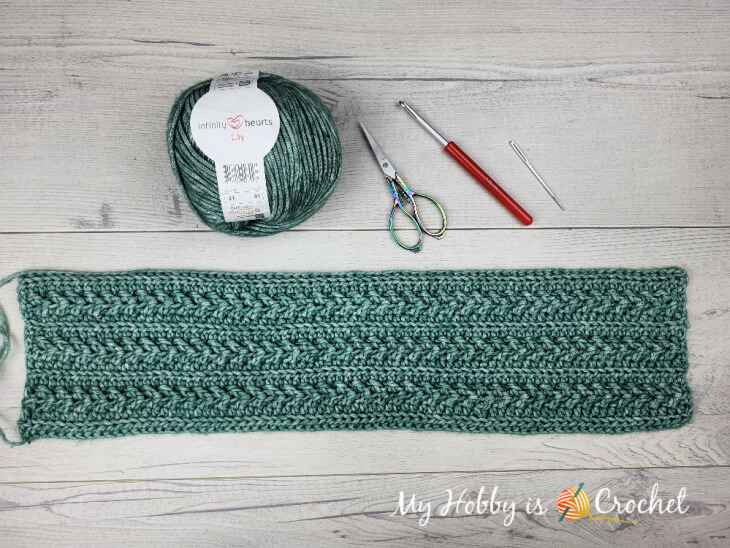
Headband Instructions
Starting Rows
Row 1 (WS): With hook size 4.5 mm work 76 Fhdc, ch 1 turn.
Alternatively, if you do not like to use the chainless foundation half double crochet:
Alternative Row 1 (WS): chain 78. Inserting hook into back bumps of chains, work 1 hdc into 3rd ch from hook and 1 hdc in each ch across; ch 1, turn. (76 sts total; the ch2 at the beginning will not count as a st)
Working the Pattern
Row 2 (RS): work 1 hdc-blo in 1st st and 1 hdc-blo in each st to last st, 1 hdc in last st using both top loops, ch 1, turn. (76 sts total)
Row 3 (WS): 1 hdc in 1st st, 37 BcrHDC, 1 hdc in last st using both top loops, ch 1, turn (76 sts total)
Row 4 (RS): 1 hdc in 1st st, work 37 FcrHDC, 1 hdc in last st using both top loops, ch 1, turn. (76 sts total)
Row 5 (WS): work 1 hdc-blo in 1st st and 1 hdc-blo in each st to last st, 1 hdc in last st using both top loops, ch 1, turn. (76 sts total)
Row 6 (RS): work 1 hdc-blo in 1st st and 1 hdc-blo in each st to last st, 1 hdc in last st using both top loops, ch 1, turn. (76 sts total)
Rows 7-10: Repeat from Row 3 to Row 6!
Rows 11-13: Repeat from Row 3 to Row 5!
Row 14 (RS): work 1 yo-slst-blo in 1st st and 1 yo-slst-blo in each st to last st, 1 yo-slst in last st using both top loops, ch 1, turn. (76 sts total)
Note: Using the yo-slst-blo for the last row will make the first and the last row look more similar.
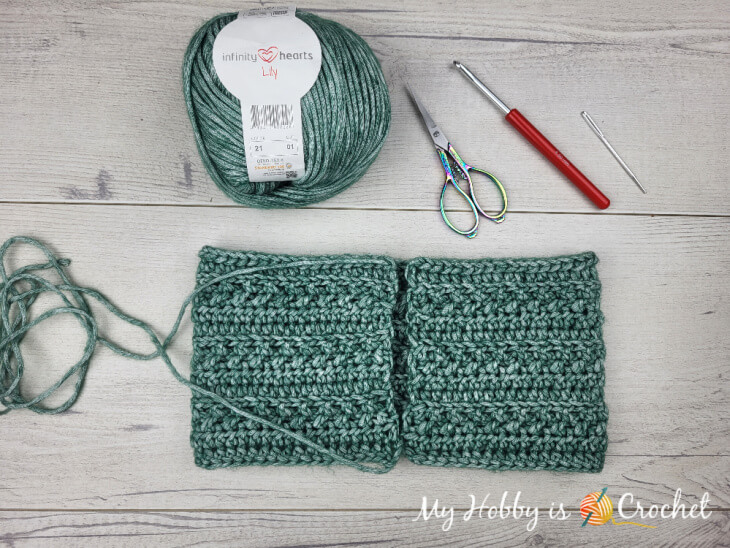
Finishing the Headband
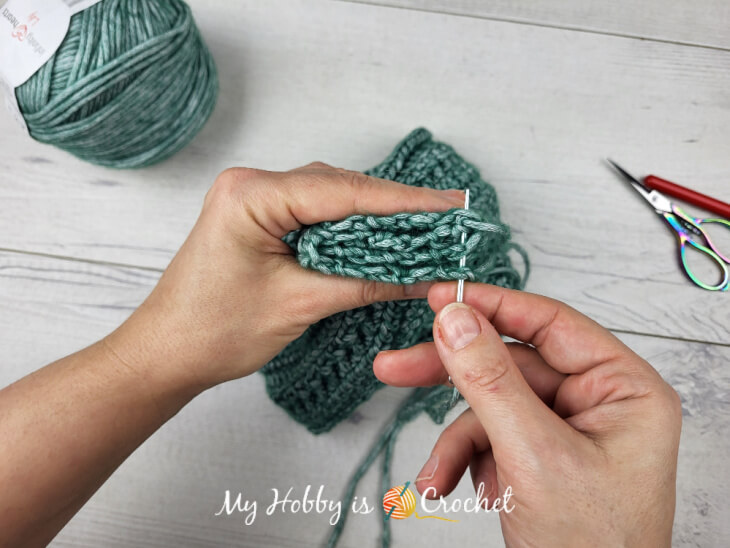
Cut yarn leaving a long tail that will be used to sew the short ends together.
Make the Twist by sewing the short ends together:
Lay the crochet piece flat with the RS facing.
Bring short ends to the middle. (Now you'll be working on the wrong side of the crochet piece)
Fold both ends in half and
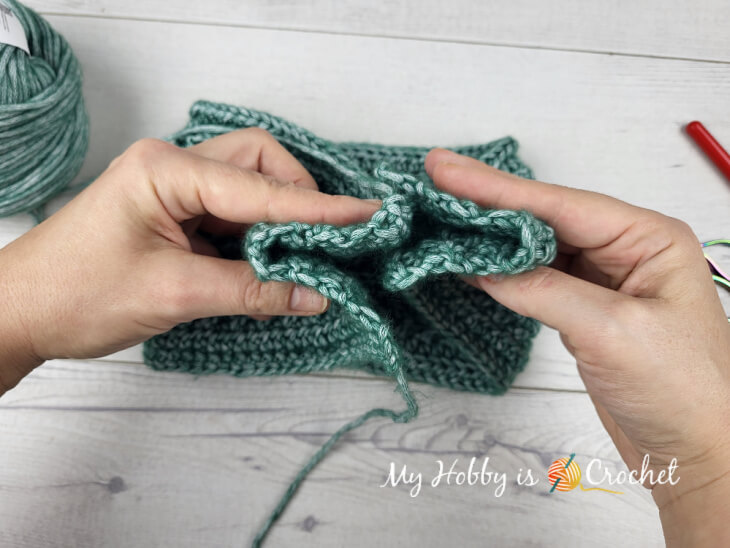
"sandwich" the 4 layers together as seen below
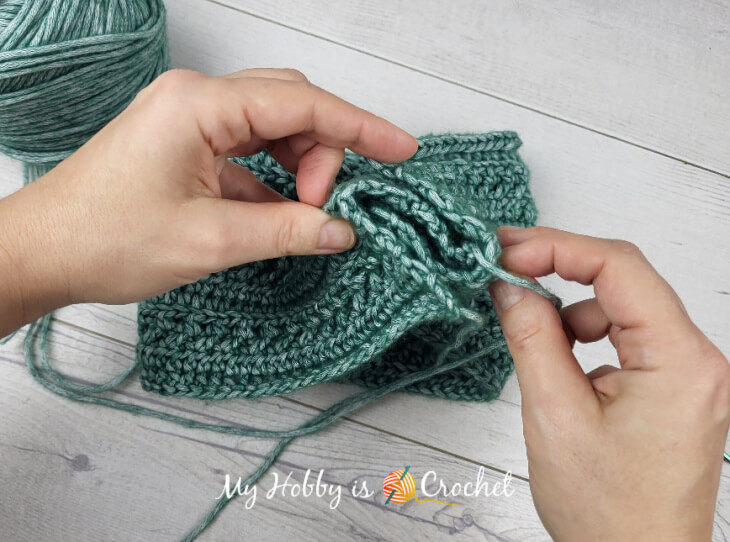
Thread the yarn end and sew along the edge going through all 4 layers. Turn and sew once more to secure.
Cut yarn. Fasten off. Turn the headband to the right side. And your pretty Lily Twist Headband is finished! Now wear it with pleasure!
- Funny Pictures
-
 Feline Memes to Feel Better
-
 Best Funny Pics of the Day Especially for You
-
 Pictures That Have No Right to be This Funny
- Recipes
-
 Strawberry Banana Bread
-
 Baked Beans and Hot Dogs with Biscuit Topping
-
 Roasted Rosemary Lemon Chicken Breasts
- Lifehacks
-
 Crochet Tutorial: Flower Puff Stitch
-
 8 Basic Crochet Tips
-
 7 Crochet Tips And Tricks
- Crochet Ideas
-
 Crochet Snorlax Plushie Doll
-
 Crochet Cat in 1 Row
-
 Crochet Beautiful Penguin Toy
- DIY
-
 Popsicle Stick and Jingle Bell Christmas Tree Ornament
-
 Upcycled Mason Jar Chicken Vase
-
 Make A Candle Holder From Plastic Spoons
- Knitting Ideas
-
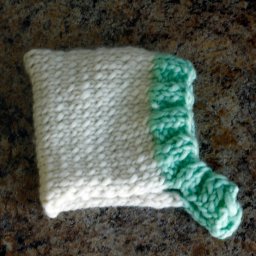
 Knitted Newborn Striped Beanie
-
 Knitted Chunky Newborn Pixie Hat
-
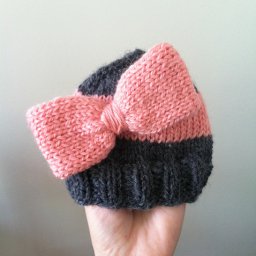 Knitted Big Bow Hat