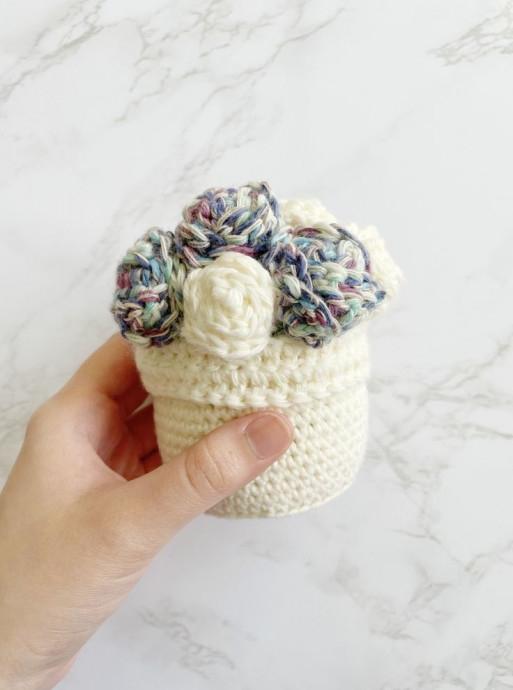
Crochet Vintage Flower Pot Amigurumi

Crochet Vintage Flower Pot Amigurumi
This delightful and charming project brings a touch of nostalgia and creativity to your home decor. This adorable amigurumi adds a whimsical flair to any space and is perfect for plant lovers or anyone who adores unique handmade items. With its intricate details and vintage-inspired design, this crochet flower pot amigurumi makes for a lovely and thoughtful gift or a fun DIY project to unleash your creativity. Get ready to bring a pop of handmade cuteness into your space and watch as this charming piece brings smiles and warmth wherever it's placed.
Materials
– Lion Brand Comfy Cotton Blend Yarn
– Cloud Nine x1 {I accidentally said Ocean Breeze in my video tutorial, since it sort of looked similar. But both colors are equally pretty :)}
– Whipped Cream x1
(Weight 3 Light, 392yd, 7oz)
– CLOVER Crochet Hook, Size G, 4.0mm
– Polyester / other stuffing (yarn scraps)
– Tapestry Needle
– Scissors
– Optional: Pearlized Ball Head Sewing Pins
– Patience
Finished Size
Inches: 4″ in height, 9″ in circumference, at its widest (top of the flowers is 4″)
Centimeters: 10.5cm in height, 23cm in circumference, at its widest (top of the flowers) is 10cm
Abbreviations/Key
- mgc = magic circle
- sc = single crochet
- inc = increase
- dec = decrease
- rep = repeat
- sk = skip
- sl = slip stitch
- dc = double crochet
- ch = chain
- sts = stitch
Notes
– The placing of the flowers is at random; I recommend using the pins to see how you want your flowers to look before sewing them on.
– Flip the double crochet flap of the plant pot to form the “brim” of the pot; you can choose to sew it down or just leave it.
– This pattern is written in US terms.
Crochet Vintage Flower Pot Amigurumi Instructions
Flower Pot
*Using Whipped Cream*
R1: 6sc mgc (6)
R2: Inc; rep all around (12)
R3: Inc, sc; rep all around (18)
R4: Inc, sc 2; rep all around (24)
R5: Inc, sc 3; rep all around (30)
R6: Inc, sc 4; rep all around (36)
R7: Inc, sc 5; rep all around (42)
R8: *sc in the back loop; rep* all around (42)
R9 – R16: sc; rep all around (42)
R17: dec, sc 4; rep all around (40)
R18 – R22: sc; rep all around (40)
R23: Ch2, *dc in the front loop; rep* all around (40)
R24: Dc; rep all around (40)
Sl, leave a long yarn tail to sew on the soil later, cut and tie it off.
Soil
*Using Cloud Nine*
R1: 6sc mgc (6)
R2: Inc; rep all around (12)
R3: Inc, sc; rep all around (18)
R4: Inc, sc 2; rep all around (24)
R5: Inc, sc 3; rep all around (30)
R6: Inc, sc 4; rep all around (36)
R7 – R9: Sc; rep all around (36)
R10: Dec, sc 2; rep all around (27)
Sl, cut your yarn tail, and tie it off.
Flowers
Chain either 25, 35, 45
Sk2 ch (counts as 1dc) dc 5 into the 3rd chain, *sk1, sl, sk1, dc 6; repeat* to the end of the row.
Cut, leave a yarn tail to later sew and assemble the flowers, then tie it off.
Smallest: Ch25
Medium: Ch35
Large: Ch45
I made 11 flowers, 4 small (3 in white, 1 in cloud nine), 4 medium (2 in white, 2 in cloud nine), and 3 large (all three in cloud nine).
Assembly
Stuff the plant pot with cotton before sewing on the soil with the white yarn tail. Then roll, sew, and secure each flower so they won’t unravel before you use pins to try out the placement of flowers on the pot. Sew on the flowers, and you’re done with your crochet vintage flower pot amigurumi!


