Crochet S.C Bunny Loaf Pattern

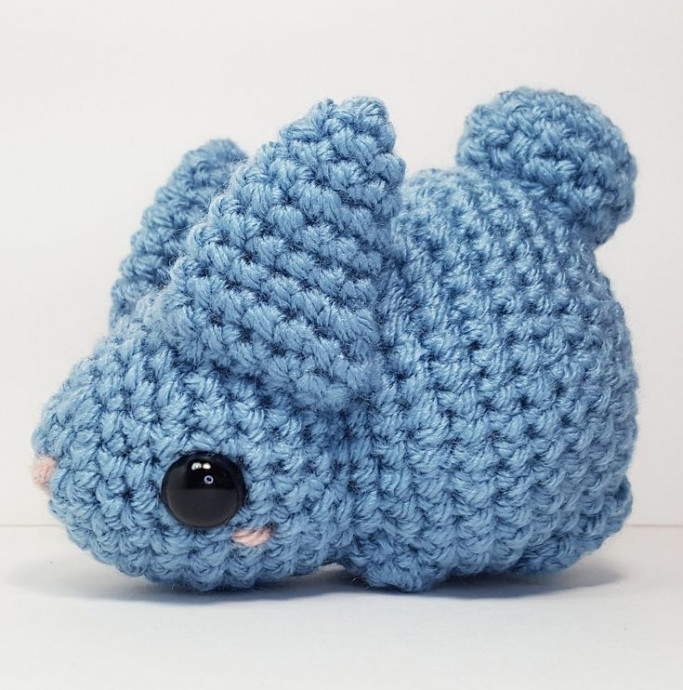
The Crochet S.C Bunny Loaf is an adorable and charming creation that is sure to bring joy to anyone who sees it. With its soft texture and cute design, this bunny loaf is perfect for cuddling or displaying as a cute decoration. Whether you're an experienced crocheter looking for a fun project or a beginner wanting to try something new, this bunny loaf is a delightful way to spend your time. Its sweet expression and lovable shape make it a great gift for friends, family, or even yourself!
Materials
To create the Bunny Loaf, you will need the following materials:
- 2.75mm crochet hook
- Worsted weight yarn
- Worsted weight yarn for nose
- 12mm safety eyes
- Fiberfill
- Yarn needle
- Stitch markers
Abbreviations
- MC = Magic Circle
- Sc = Single crochet
- Sl St = Slip stitch
- St = Stitch
- Rnd = Round
- Sc rnd = Single crochet in every stitch of the round
- Inc = Increase, 2 single crocheting in the same stitch
- Dec = Decrease, next 2 stitches crocheted together
- […] = Repeat instructions within brackets as specified
Techniques
Magic Circle: Essential to the start of most amigurumi projects.
Invisible Decrease: Good for preventing gaps and giving a more uniform look to your single crochets.
Working in Front Loops: For this pattern, always work single crochets in the front loops of the stitches unless otherwise specified. This helps the stitches stack up straighter.
Stitch Markers: Use a stitch marker (like a bobby pin) for keeping track of the beginning of your rounds, placing it in the first stitch of the round.
Staggered Rounds: Staggered rounds offset the pattern's increases or decreases. For example, instead of [4 sc, inc] x6, you can stagger it to 2 sc, inc, [4 sc, inc] x5, 2 sc.
Close: To close a piece, thread your yarn needle with the yarn end and put it through each of the front loops of the last round’s single crochets, usually 6 stitches, and pull tight. It should look like a mini magic circle. Then put the needle through the center of it and out through the piece. Tie your knot and stuff the ends back into the piece.
Whip Stitch: This usually means the finished piece is folded flat with the last single crochet or yarn end at the edge. Thread your yarn needle with the yarn end and whip stitch the opening closed through only the front loops.
Pattern
Head and Body
The head and body are one piece, starting with the head.
RND 1: 6 single crochets in magic circle (6 stitches)
RND 2: 6 increases (12 stitches)
RND 3: [1 sc, 1 inc] x6 (18 stitches)
RND 4: 6 single crochet rounds (18 stitches)
RND 5: [1 sc, 1 inc] x6, 6 single crochets (24 stitches)
RND 6: 1 sc, 1 inc, [2 sc, 1 inc] x5, 1 sc, 6 single crochets (30 stitches)
RND 7-9: Three single crochet rounds (30 stitches)
RND 10: 1 sc, 1 dec, [2 sc, 1 dec] x5, 1 sc, 6 single crochets (24 stitches)
RND 11: [1 sc, 1 dec] x6, 6 single crochets (18 stitches)
RND 12: 12 increases, 6 single crochets (30 stitches)
RND 13: [3 sc, 1 inc] x6, 6 single crochets (36 stitches)
RND 14: 2 sc, 1 inc, [4 sc, 1 inc] x5, 2 sc, 6 single crochets (42 stitches)
Place safety eyes between RND 6 and RND 7, around ten stitches apart, and stuff the head after the eyes are positioned.
RND 15-18: 4 single crochet rounds (42 stitches)
RND 19: 2 sc, 1 dec, [4 sc, 1 dec] x5, 2 sc, 6 single crochets (36 stitches)
RND 20: single crochet round (36 stitches)
RND 21: 2 sc, 1 dec, [4 sc, 1 dec] x5, 2 sc (30 stitches)
RND 22: [3 sc, 1 dec] x6 (24 stitches)
RND 23: 1 sc, 1 dec, [2 sc, 1 dec] x5, 1 sc (18 stitches)
Start stuffing the body.
RND 24: [1 sc, 1 dec] x6 (12 stitches)
RND 25: 6 decreases (6 stitches)
Fully stuff and close.
Nose
The nose is pretty simple, consisting of just two stitches. (The example is a bit sloppy; take your time!)
Thread yarn through the magic circle and stitch across the length, looping it through at least twice. You can add a stitch down the center for a 'Y' shape. Pull the ends through the head and body and cut.
Ears (x2)
These ears are wider with a bit of a dip.
RND 1: 4 single crochets in magic circle (4 stitches)
RND 2: 4 increases (8 stitches)
RND 3: single crochet round (8 stitches)
RND 4: [1 sc, 1 inc] x4 (12 stitches)
RND 5-7: 3 single crochet rounds (12 stitches)
RND 8: 2 increases, 8 single crochets, 1 inc (16 stitches)
RND 9: single crochet round (16 stitches)
RND 10: [5 sc, 1 dec] x2 (14 stitches)
The ears are not stuffed. Whip stitch the opening closed and attach them to the head, starting between RND 6 and RND 7, sewing back across four rounds, with seven stitches apart between the ears.
Tail
The tail is a small ball.
RND 1: 6 single crochets in magic circle (6 stitches)
RND 2: 6 increases (12 stitches)
RND 3: [1 sc, 1 inc] x6 (18 stitches)
RND 4: [1 sc, 1 dec] x6 (12 stitches)
Fully stuff the tail and sew it on between RND 19 and RND 20 at the center of the body, sewing back across four rounds.
Front Paws (x2)
Just two magic circles.
RND 1: 8 single crochets in magic circle (8 stitches)
Slip stitch into the next stitch, cut yarn, and thread the yarn needle. Sew on starting between RND 11 and RND 12 of the body, leaving a two-stitch space between the front paws.
Back Paws (x2)
These are chain rounds.
RND 1: Ch 4 +1, turn, 4 sc, rotate, 4 sc (8 stitches)
Slip stitch into the next stitch, cut yarn, and thread your yarn needle. Sew on starting between RND 15 and RND 16, leaving a two-stitch space between the back paws.
And the little bunny is complete!
- Funny Pictures
-
 Cute Cat Memes That Will Make Your Day Brighter
-
 Spot-on and Funny Memes About Introverts Struggles
-
 Top Wonderful Cat Memes on Their Way to Better Your Day
- Recipes
-
 Creamy Old Fashioned Rice Pudding
-
 Cream of Mushroom Soup
-
 Homemade Breakfast Sausage
- Lifehacks
-
 Crochet Basics: Crumpled Griddle Stitch
-
 Crochet Basics: Sedge Stitch
-
 Surprising Ways to Use Dryer Sheets
- Crochet Ideas
-
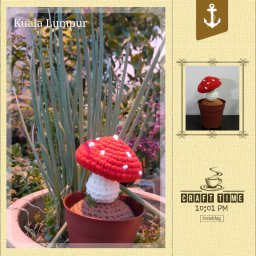 Crochet Amigurumi Mushroom Plant
-
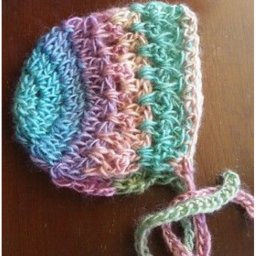 Crochet Sweet Baby Bonnet
-
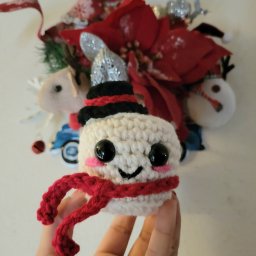 Crochet Festive Marshmallow
- DIY
-
 DIY Snowman Wreath
-
 Mini Santa Sleigh Ornament
-
 Crochet Adorable Baked Cake
- Knitting Ideas
-
 Knitted Easter Bunny
-
 Knitted Mobile Phone/Glasses Case
-
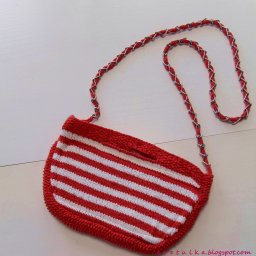 Knitted Mini Summer Purse