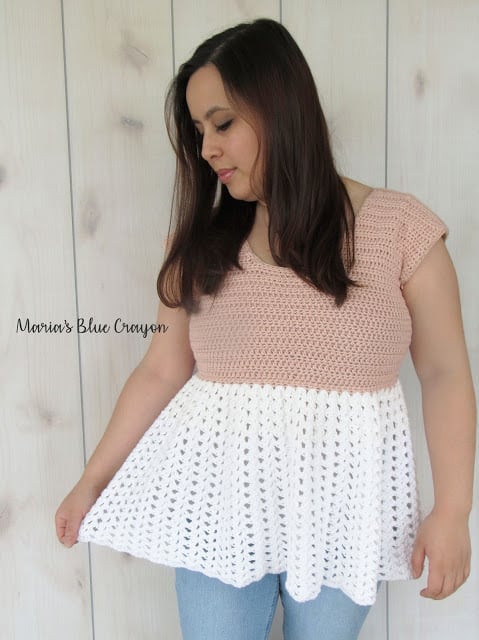
How to Create Your Own Cotton Top: A Step-by-Step Crochet Guide

Materials
I Love This Cotton! (~180 yards per skein)
I used two colors: warm blush (Color A) and white (Color B)
- S/M/L: 2 skeins Color A, 3 skeins Color B
- XL: 3 skeins Color A, 3 skeins Color B
- 2X/3X: 3 skeins Color A, 4 skeins Color B
H/5.00mm hook
Tapestry needle
Scissors
Notes
The top portion will be made by creating two panels. We will start by working from the bottom up for the panels.
The chain at the beginning of each row/round will not count as a stitch unless stated otherwise.
I will refer to colors as Color A and Color B. Color A is the top portion (I used pink), and Color B is the bottom portion of the top (I used white).
Abbreviations (US Terms)
- Ch = chain
- sc = single crochet
- hdc = half double crochet
- dc = double crochet
- st = stitch(es)
- sk = skip
- sl st = slip stitch
- dec = decrease
Gauge
4” x 4” in half double crochet ~ 14 stitches x 12 rows
Sizes
- Small: 32-34″ bust
- Medium: 36-38″ bust
- Large: 40-42″ bust
- XL: 44-46″ bust
- 2X: 48-50″ bust
- 3X: 52-54″ bust
Pattern
Starting with Color A
- Row 1: Ch 38 (48, 58, 68, 78, 88), hdc across, turn (36, 46, 56, 66, 76, 86)
- Row 2: Ch 2, hdc across, turn (36, 46, 56, 66, 76, 86)
- Row 3: Ch 2, 2hdc, hdc until last st, 2hdc in last st, turn (38, 48, 58, 68, 78, 88)
- Row 4: Repeat Row 3 (40, 50, 60, 70, 80, 90)
- Row 5: Repeat Row 3 (42, 52, 62, 72, 82, 92)
- Row 6: Repeat Row 3 (44, 54, 64, 74, 84, 94)
Repeat Row 2 until you have a total of 15 (18, 21, 24, 27, 30) rows. Do not fasten off; we will start working on the neckline.
- Row 1: Ch 2, hdc in next 16 (21, 25, 31, 36, 41) st, dec, turn
- Row 2: Ch 2, hdc across, turn
- Row 3: Ch 2, hdc across until last 2 st, dec over last 2 st, turn
- Repeat Row 2 & 3, 3 times
- Repeat Row 2 8 times
Fasten off.
Flip over your piece, attach yarn to the other side of the main portion of the top, and repeat the neckline pattern.
Make two panels.
Assemble the two panels together by putting them together and sewing up the top portions and the sides. For sizes Small & Medium, leave about 7” opening; for sizes Large & XLarge, leave about 8.5” opening; and for 2X & 3X, leave about 10″ opening.
Attach Color B yarn to the bottom of the top portion you just sewed together. We will now be working in rounds.
- Round 1: Ch 3 (counts as st), (dc, ch 1, 2dc) in the same space as ch 3, *sk st, (2dc, ch 1, 2dc) all in the next st, repeat from * around, join to beginning ch 3, and sl st 2 times to get to the ch 1 space from the previous round
- Round 2: Ch 3 (counts as st), (dc, ch 1, 2dc) in the same space as ch 3, *(2dc, ch 1, 2dc) all in the next ch 1 space from the previous row, repeat from * around, join to beginning ch 3, sl st 2 times to get to the ch 1 space from the previous round
- Repeat Round 2 for 23 (23, 27, 27, 31, 31) rounds
*Make the top as long or short as you’d like by adding or removing rows.


