How to Crochet a Pumpkin: Step-by-Step Instructions

You’ll Need:
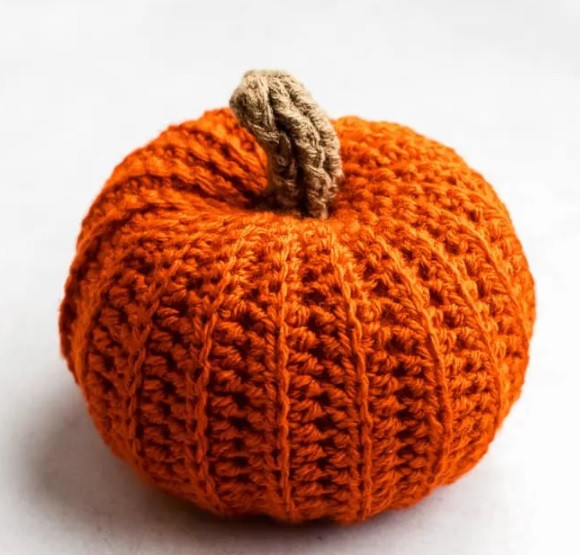
2 balls of Lion Brand Basic Stitch Premium yarn in Cayenne color;
Crochet hook 4 mm;
Tapestry needle;
Stuffing.
Size:
5” wide x 5” tall.
Special Stitches:
Front Post Double Crochet: Yarn over, insert hook from front to back to front around the post of the corresponding stitch below, yarn over and pull up a loop (3 loops on the hook). Yarn over, draw through 2 loops on hook (2 loops on the hook). Yarn over, draw through 2 loops on hook, again.
Instructions:
Row Instructions:
Row 1: Ch 31. Starting in the 2nd ch from the hook, and working in blo for all stitches, make 3 sl st, 6 sc, 12 hdc, 6 sc, 3 sl st. Turn. (30)
Row 2: Ch 1. Working in blo, 3 sl st, 6 sc, 12 hdc, 6 sc, 3 sl st. Turn. (30)
Repeat Row 2 until the piece measures 12 in long. (Measured across the center at the widest point.) I crocheted 40 rows.
Last Row: You can make the last row and seam the short sides in the same step. To do this, fold the short sides together, right sides facing out. Insert the hook through both the starting chain stitches and the back loops of the working stitches as you crochet the last row of stitches.
Assembly:
If you didn’t join the sides as you worked the last row of crochet, join the sides with a mattress stitch.
Then, turn the pumpkin so that the raised “V” shapes point down.
With a matching piece of yarn and a darning needle, sew a running stitch along the top edge.
Pull the ends of the yarn to gather the top edge. Tie a knot, cut the excess yarn, and weave in the ends. Next, stuff the pumpkin with fiber-fill through the bottom opening.
In the same way as before, sew a running stitch along the bottom edge. Pull the ends of the yarn to gather the bottom edge. Tie a knot, cut the excess yarn, and weave in the ends.
You can stop here, or you can make some additional stitches to create a sculpted, “squashed” pumpkin shape.
To do this, make some long stitches that run vertically between the stem end and the bottom end. I made four stitches down through the center of the pumpkin, overlapping them in an X shape (almost like sewing on a button.) Pull these stitches with slight tension to give the pumpkin a more realistic shape. Knot the yarn to secure, and weave in the ends.
Pumpkin Stem:
Make a magic ring.
Round 1: Make 6 dc into the magic ring, sl st to the first dc to join round. (6)
Round 2: Ch 2. Fpdc in each st around, sl st to first fpdc to join round. (6)
Repeat round 2 until your stem is as long as you’d like. I made 5 rounds.
Fasten off, leaving a long tail.
Using a darning needle and the yarn tail, whipstitch the top of the stem to the top of the pumpkin. Fasten off and weave in the end.