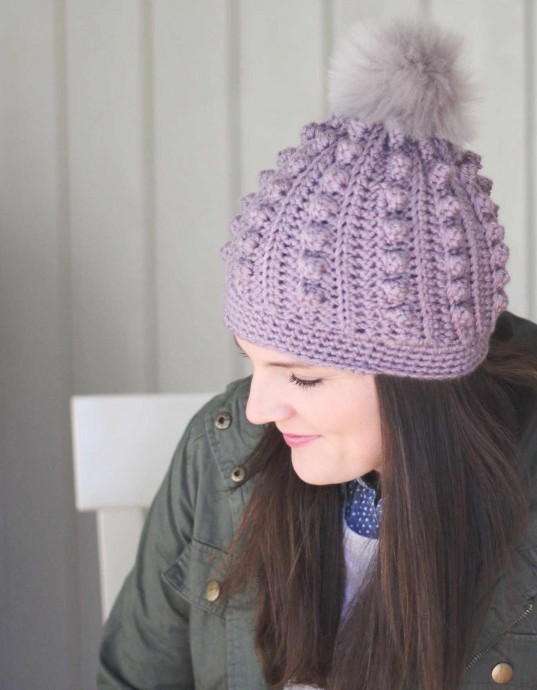
How to Crochet a Stylish Bobble Hat with Worsted Weight Yarn

You’ll Need:
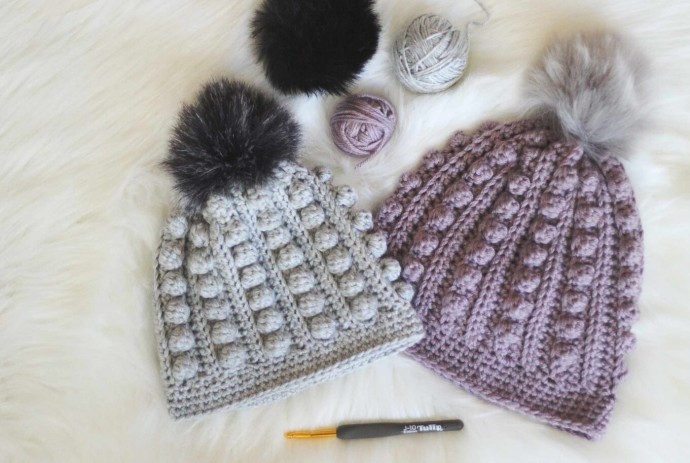
2 Skeins of Worsted Weight Yarn (approximately 7 oz total): Brava Worsted in the color Seraphim (purple) and Dove Heather (gray);
Crochet hook J;
Fur Pompom;
Large Eye Tapestry Needle;
Scissors.
Notes:
This pattern is worked using two strands of worsted weight yarn held together.
If you’d like a slouchier hat, add 6 stitches to your beginning chain and 2 rows to your brim.
Special Stitches:
Bobble:
If you’re familiar with decrease stitches or double crocheting stitches together, you will dc4tog in the same stitch. If you need step-by-step instructions, keep reading.
Yarn over, insert hook into the stitch, pull up a loop.
Yarn over, pull through the first two loops on hook.
Yarn over, insert hook into the same stitch, pull up a loop.
Yarn over, pull through the first two loops on your hook. There should now be 3 loops on your hook.
Yarn over, insert hook into the same stitch, pull up a loop.
Yarn over, pull through the first two loops on hook. There should now be 4 loops on your hook.
Yarn over, insert hook into the same stitch, pull up a loop.
Yarn over, pull through the first two loops on hook. There should now be 5 loops on your hook.
Yarn over, pull through all loops.
Bobble made.
HDC in the Back Loop Only:
Rather than working into both loops as you usually would, just work into the back loop.
Instructions:
Ch 26 somewhat loosely. Leave a long tail at the beginning for closing the top of your hat later.
Your starting chain should measure approximately 9 inches. If you find that you’re much shorter, go up a hook size.
Row 1:
hdc in the second chain from hook and in each stitch across. Ch 1, turn. (25 stitches)
Row 2:
Working in the back loop only (BLO), hdc in the first stitch and in each stitch across. Ch 1, turn. (25 stitches)
Row 3:
Working in the BLO, hdc in the first stitch and in each stitch across. Ch 1, turn. (25 stitches)
Now it’s time to work our first bobble row. If you haven’t already, I recommend practicing a few before you start.
Row 4:
On this row, you’ll be working through both loops. sc in the first stitch and in the next two stitches. *bobble in the next stitch, sc in the next two stitches across.* ending with a sc in the last stitch. Ch 1, turn. (You should have 17 sc and 7 bobble stitches when you complete this row for a total of 25 stitches)
Rows 5-7:
Working in the BLO, hdc in the first stitch and in each stitch across. Ch 1, turn. (25 stitches)
Row 8:
sc in the first stitch and in the next two stitches. *bobble in the next stitch, sc in the next two stitches across.* ending with a sc in the last stitch. (You should have 17 sc and 7 bobble stitches when you complete this row for a total of 25 stitches).
Repeat rows 5-8 nine more times for a total of 44 rows.
When you have finished creating this portion of the pattern, you should have a rectangular piece of “fabric.”
At this point, lay your finished piece out longways with the bobbles up. Fold your rectangle in half so that the stitches on the short ends match up. Single crochet to join so that you have a tube. You could also whip stitch this together, but I prefer using a single crochet join.
At this point, I do not cut my yarn. I chain one, turn my work so that I can work into the bottom of the hat to create the band at the bottom.
Round 1:
Work 62 sc around the bottom edge of your hat. I do not sl st to join. I just continue working in a spiral. Mark your first stitch so you don’t lose track of where a row begins and ends.
Round 2:
sc in the first stitch of the previous row and in each stitch around. Mark your first stitch with a stitch marker. (62 stitches)
Rounds 3-4:
Repeat row 2. Cut yarn and weave ends after the final sc round – don’t weave the end at the top yet, we’re going to use it next. (62 stitches)
Now it’s time to cinch the top of your hat so you don’t have a gaping hole up there. You’re going to weave into every other stitch. After you’ve done that, pull tight to close, and hide your tail by weaving it on the inside of the hat.