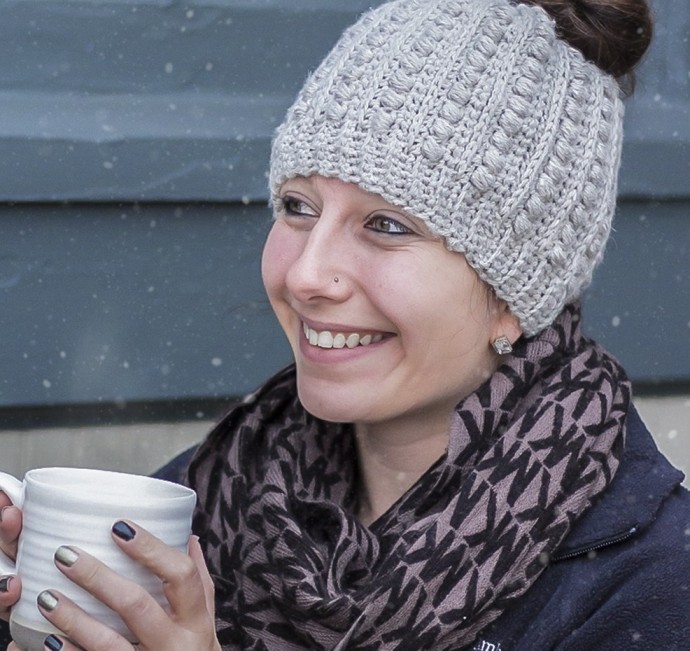
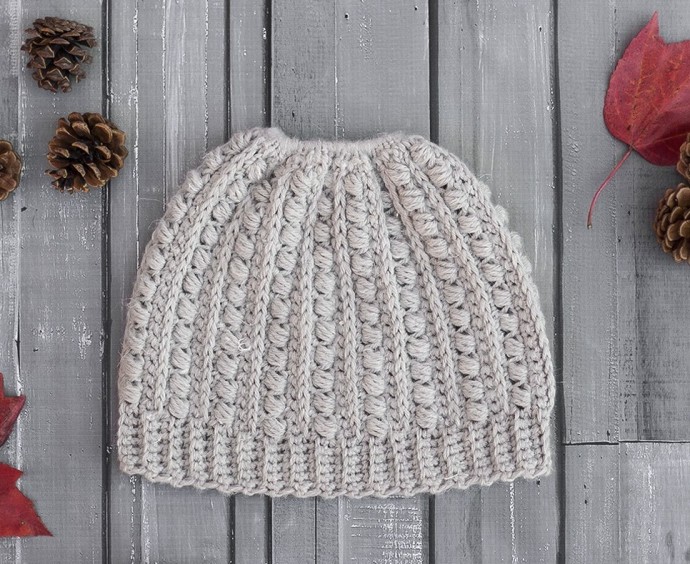
How to Crochet a Stylish Hat with Special Stitches

You’ll Need:
190-200 yards of #4 aran weight. Individual yardage listed under each size in the pattern.
Crochet hook 5.5 mm.
Yarn needle.
Hair elastic.
Size:
8.25″ tall x 21″ around.
Special Stitches
Large Bean Stitch (LBS):
Insert hook into stitch, yarn over and pull through (2 loops on hook). Yarn over, insert hook into same stitch, yarn over and pull through (4 loops on hook). Yarn over, insert hook into same stitch, yarn over and pull through (6 loops on hook). Yarn over, insert hook into same stitch, yarn over and pull through (8 loops on hook). Yarn over and pull through all 8 loops. Chain 1 to close the stitch.
3rd Loop Only:
Half double crochet stitches have a 3rd loop that we utilize in this pattern. When working in turned rows, as in this pattern, the 3rd loop can be found just below the front loop on the side of the work that is facing you. When instructed to work in “3rd loop only,” insert your hook into this special loop. This creates a delicate braided look on the opposite side of the pattern.
Instructions
Base Round:
Attach yarn to hair elastic and secure with a knot. Work 84 SC around the hair elastic. Join with a SL ST to the top of the first SC. (84)
Row 1:
CH 29. SC in 2nd CH from hook and in each remaining CH. SL ST to the base of the CH 29, then SL ST to the next ST along the Base Round. (28 + 2 SL STS)
Row 2:
CH 1, turn. Skipping over the CH 1 and the 2 SL STS along the Base Round, SC in each of the first 22 STS of the previous row. SC in BLO of each of the next 5 STS. SC in both loops of the final ST. (28)
Row 3:
CH 1, turn. SC in first ST. SC in BLO of each of the next 5 STS. (SK next ST, LBS in next ST) 11 times; row is complete. SL ST in each of the next 2 empty STS along the Base Round. (28 + 2 SL STS)
Row 4:
CH 1, turn. Skipping over the CH 1 and the 2 SL STS along the Base Round, HDC in each of the first 22 STS of the previous row. SC in BLO of each of the next 5 STS. SC in both loops of the final ST. (28)
Row 5:
CH 1, turn. SC in first ST. SC in BLO of each of the next 5 STS. SC in 3rd loop of each of the next 22 STS; row is complete. SL ST in each of the next 2 empty STS along the Base Round. (28 + 2 SL STS)
Row 6:
CH 1, turn. Skipping over the CH 1 and the 2 SL STS along the Base Round, SC in each of the first 22 STS of the previous row. SC in BLO of each of the next 5 STS. SC in both loops of the final ST. (28)
Row 7:
CH 1, turn. SC in first ST. SC in BLO of each of the next 5 STS. (LBS in next ST, SK next ST) 11 times; row is complete. SL ST in each of the next 2 empty STS along the Base Round. (28 + 2 SL STS)
Row 8:
CH 1, turn. Skipping over the CH 1 and the 2 SL STS along the Base Round, HDC in each of the first 22 STS of the previous row. SC in BLO of each of the next 5 STS. SC in both loops of the final ST. (28)
Row 9:
CH 1, turn. SC in first ST. SC in BLO of each of the next 5 STS. SC in 3rd loop of each of the next 22 STS; row is complete. SL ST in each of the next 2 empty STS along the Base Round. (28 + 2 SL STS)
Rows 10-81:
Repeat Rows 2-9, in order, 9 more times.
Rows 82-84:
Repeat Rows 2-4.
Fasten off, leaving a long tail for sewing the seam.
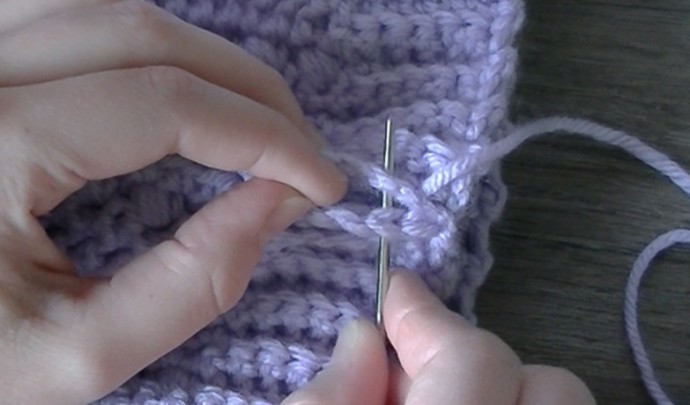
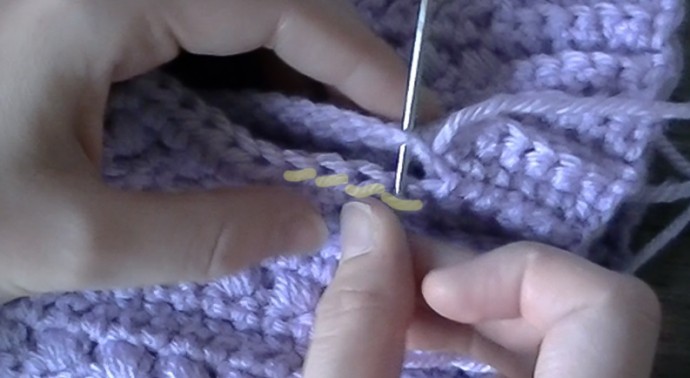
Seaming
Turn hat inside out. Thread your yarn needle onto the long finishing tail and sew the first 6 stitches (the ribbed band) together, stitch by stitch.
Once you finish with the ribbed section, sew the rest of the seam up, stitch by stitch, putting your needle through the 3rd loop only of the final row of HDCs and across to the corresponding stitch on the other side of the seam. This will ensure that the seam creates a row of visible top loops to match the other 3rd loop rows around the hat. Fasten off and weave in your ends.