How to make a magic loop

Also known as a Drawstring Ring or Magic Ring, the Magic Loop is popular when working amigurumi. Work as follows:
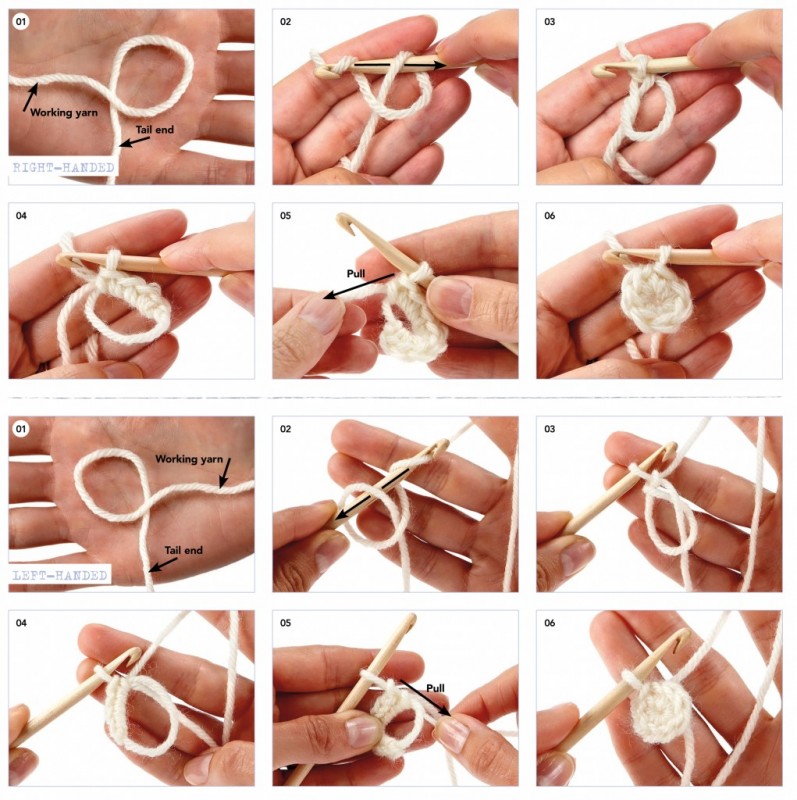
Step 1 To start a Magic Loop, don’t make a slipknot. Instead, make a loop with the yarn, leaving a tail around 10cm long. Make sure the tail end is on the bottom.
Step 2 Now insert your hook into the loop, from front to back. Wrap the working yarn around the hook anticlockwise and pull the yarn through the Magic Loop.
Step 3 Now make a turning chain, the correct length for the stitches you want to work. In the example above, we’ve worked double crochet stitches, so we’ve made one chain for the turning chain.
Step 4 Now work your stitches into the Magic Loop, making sure all the stitches are worked over both the loop itself and the tail end (so two strands of yarn).
Step 5 Once you’ve worked the number of stitches you need, simply pull the tail end of the yarn to draw up the ring – magic!
Step 6 Close rnd with a slip stitch as usual.
Thank You for The Instructions along with the Pictures I have been Trying the Magic Loop with No Success but With I Really Believe I Can Do It Thank You !!!!!