

Make a Cute Crochet Winnie the Pooh Amigurumi — Free Step-by-Step Pattern

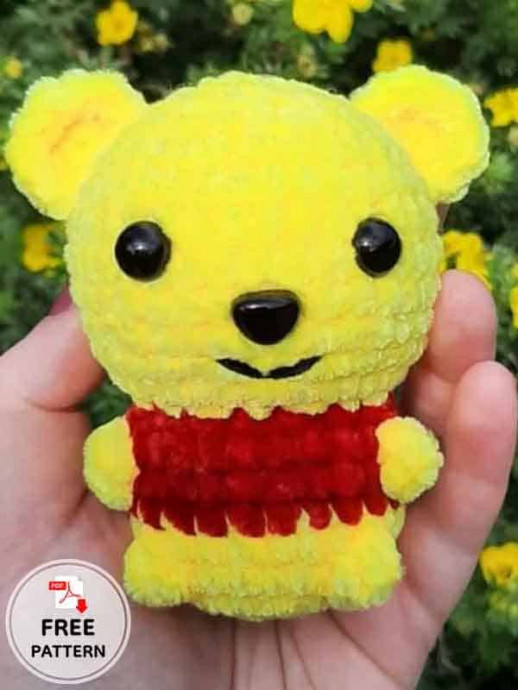
Create a cuddly Crochet Winnie the Pooh Bear with this easy-to-follow amigurumi pattern. This project uses simple stitches and color changes to recreate Pooh's signature yellow body and red shirt. The pattern below includes materials, common abbreviations, the body and ear instructions, and finishing details so you can bring this nostalgic character to life.
Materials and Tools
- Yarns: 4 mm chenille yarn (yellow, red, and black)
- Hook: 4 mm
- Safety eyes: 10 mm
- Darning needle (to sew ears)
- Stuffing and scissors
Abbreviations
MR: Magic ring
Sc: Single crochet
Inc: Increase
Dec: Decrease
Ch: Chain
Slst: Slip stitch
FO: Fasten off
BOB: Bobble stitch
Let’s start making the Crochet Winnie The Pooh Bear. Follow rounds carefully and change colors where indicated.
Body
Start with yellow yarn.
R1. 8 sc in MR (8)
R2. 8 inc (16)
R3. (1sc,inc)x8 (24)
R4. 8 sc, 1 BOB, 6 sc, 1 BOB, 8 sc (24)
R5-6. 24 sc (24) (2 rounds)
Change to red yarn.
R7. 24 sc (24)
R8. 6 sc, (in yellow: 1 BOB), 10 sc, (in yellow: 1 BOB), 6 sc (24)
R9. 24 sc (24)
R10. (1sc,dec)x8 (16)
Change to yellow yarn.
R11. (1sc,inc)x8 (24)
R12. (1sc,inc)x12 (36)
R13-18. 36 sc (36) (6 rows)
R19. (4sc,dec)x6 (30)
Stuff the body and place safety eyes between rounds 16 and 17, 6 stitches apart.
R20. (3sc,dec)x6 (24)
R21. (2sc,dec)x6 (18)
R22. (1sc,dec)x6 (12)
R23. 6 dec (6)
Ears (Make Two)
R1. 5 sc in MR (5)
R2. 5 inc (10)
FO and leave a long tail for sewing.
Details & Finishing
Use a piece of black yarn to embroider the mouth. Sew the ears onto the head using the long tails and a darning needle. Weave in all ends securely and shape the stuffing as you close the final rounds for a smooth finish.
Tips
- Keep consistent tension to ensure even stitches and proper shaping.
- Adjust stuffing firmness to achieve the look you prefer — firmer for a more sculpted amigurumi, softer for a cuddle toy.
- Secure safety eyes firmly and consider placing a felt circle inside if you need extra reinforcement for toys intended for small children.
Enjoy stitching your Winnie the Pooh bear! Share variations by changing yarn weight or hook size to make different sizes, and experiment with facial expressions by varying the embroidery.
Most Popular
🧶 Listen while you crochet
3 cozy stories from a little yarn shop
Enjoyed it? A like and a subscribe help our little channel grow 💛