Crochet 4 Petal Flower Square Pattern

Crochet 4 Petal Flower Square is a delightful and charming pattern that brings a touch of whimsy to any crochet project. This design features four delicate petals that form a beautiful flower motif within a square shape, making it perfect for adding a pop of creativity to your creations. Whether you're a seasoned crocheter or just starting out, this pattern offers a fun and rewarding challenge that will surely brighten up your projects. So grab your hook and yarn, and let's crochet some blooming magic together!
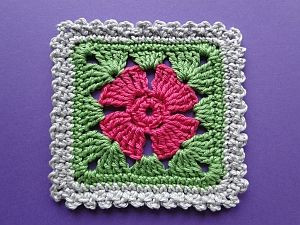
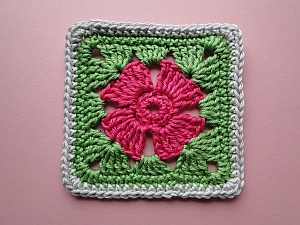
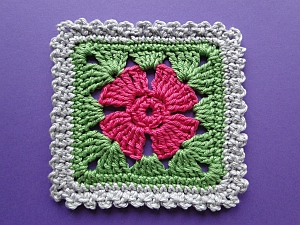
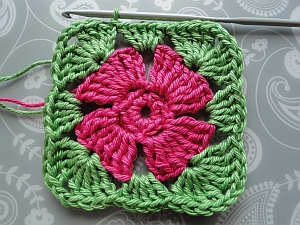
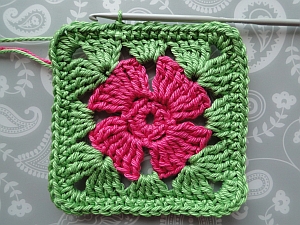
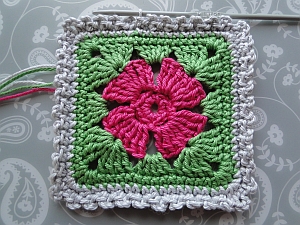
My first crochet flower square is in the style of a granny square flower, and can be worked with a plain edging for joining, or surrounded by a pretty frill edging for a single piece:
Measures just over 3½"/9 cm wide
Measures just over 4 "/10 cm wide
Or work in a single color to the end of Round 5, and add my flower square loopy edging!
The 4 Petal Crochet Flower Square Pattern
The pattern is written in US terms, with UK equivalents noted at the beginning of each round where necessary.
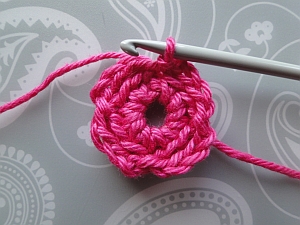
Round 1
sc = UK dc
Ch 6, ss into 6th ch from hook to form a ring.
Ch 1, 11 sc into ring, ss into 1st sc to join.
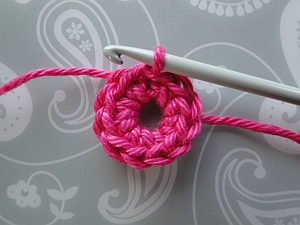
End of Round 1
Round 2
Ch 4, skip stitch you joined into, skip next stitch, ss into next stitch.
(ch 4, skip next 2 stitches, ss into next stitch) 3 times, working your last ss into the joining ss from the last round.
End of Round 2
Round 3
trc = UK dtr
Ss into 1st 4 ch space. Ch 4 - counts as trc; 6 trc into same space. (ch 2, 7 trc into next 4 ch space) 3 times.
Ch 2, ss into top of 4 ch.
If changing colour, ss into next stitch also, to strengthen the join. Tie off, weaving your thread to the back through the same stitch. Then join your new yarn into the centre stitch of any petal (i.e. the top of the 4th dtr of that petal.)
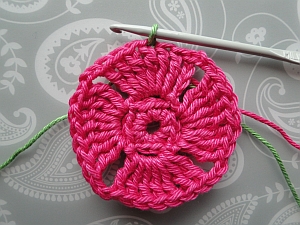
Joining new color at end of Round 3
If you are continuing with the same colour, ss into each of the next 3 stitches to the middle of the 1st petal.
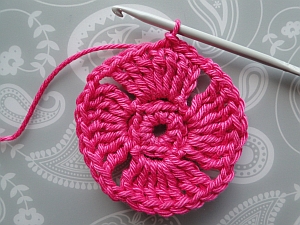
End of Round 3.
Ss to middle stitch of 1st petal if continuing same color
You might notice that the top of this middle stitch of the petal sits a little to the right of the rest of the stitch, and you might think you are not in the middle. But you are :)
Round 4
trc = UK dtr
dc = UK tr
Ch 4; (3 trc, ch 2, 4 trc) into the same stitch you just joined or slip-stitched into; 5 dc into next 2 ch space:
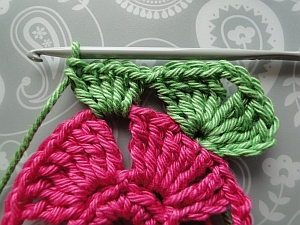
Beginning of Round 4
*(4 trc, ch 2, 4 trc) into top of 4th trc of next petal, 5 dc into next 2 ch space*
Repeat from * to * twice.
Join with a ss into the top of 4 ch:
End of Round 4
Round 4 stitch count: 52 stitches (not including the 2 ch at each corner.)
Round 5
sc = UK dc
hdc = UK htr
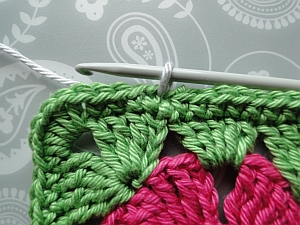
Ch 1, sc into same stitch; 1 sc into each of the next 3 stitches.
Below, I have chained 1 and worked my first stitch. Don't miss the next stitch by mistake! It likes to hide a little, as it's pulled tight by the join you made into the 4 ch. I've stitch marked it for you to double-check:
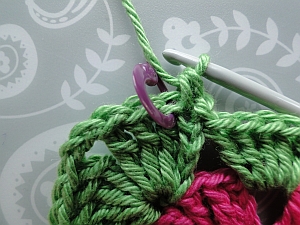
Check you can see where to work the 2nd stitch
OK - your 4 little stitches should now be sitting on top of your 4 long stitches from the previous round:
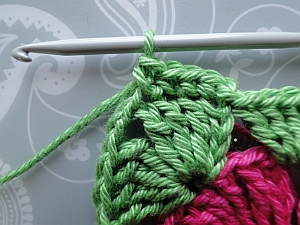
First 4 stitches, Round 5
Work 5 hdc into the next 2 ch space.
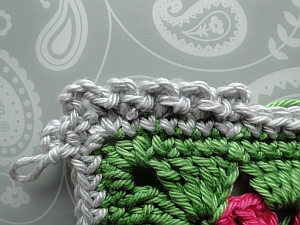
Now we will work along the edge. The stitch marker in the pic below shows you where your next stitch (a sc/UK dc) will be made. You will simply work into the first of the next four trc (UK dtr) of the previous round. Again, the top two loops of the first stitch to work into are sitting a little further right than you might expect them to be, and are probably hiding under the 5 corner stitches:
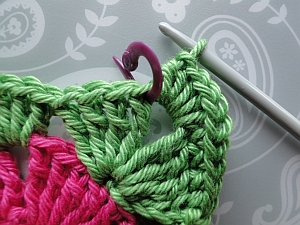
Stitch marker shows where to work 1st of next 13 sts
Right - now you know where to work your next stitch, let's continue!
(1 sc into each of next 13 stitches, 5 hdc into next 2 ch space) 3 times; 1 sc into each of next 9 stitches, join with a ss into 1st sc:
End of Round 5
Round 5 stitch count: 72 stitches
To end here and work a loopy edging: don't tie off unless you want to!) - continue with my loopy edging instructions.
To change color: tie off and join new color into the same stitch where you joined with a ss:
Joining new yarn at start of Round 6
Round 6
sc = UK dc
Ch 1, sc into the same stitch. 1 sc into each of the next 5 stitches; 4 sc into next stitch, which is the centre stitch of your 5 hdc (UK htr) below, and which I have stitch marked:
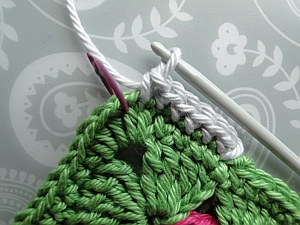
Ready to work 4 stitches into center of corner
(1 sc into each of next 17 stitches, 4 sc into next stitch) 3 times.
1 sc into each of the next 11 stitches, ss into 1st sc to join.
We join into this ss at the end of the next round, so stitch mark this if you like.
Tie off here if you are going to join your squares together:
End of Round 6
Round 6 stitch count: 84 stitches
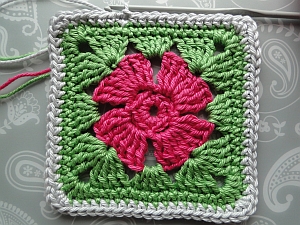
Work these six rounds only if you want to join your squares together.
Round 7 - Frill Edge for a Single Square
sc = UK dc
Ch 3, ss into the same stitch you joined into - first frill made.
Frill: For the rest of our frills, we work (ss, ch 3, ss) into the same stitch.
So: (Skip next stitch, frill into next stitch) 3 times.
Corner: sc into next stitch, ch 3, sc into next stitch; frill into next stitch.
*(skip next stitch, frill into next stitch) 9 times; work the corner as above*
Repeat from * to * 2 times.
(Skip next stitch, frill into next stitch) 5 times; skip last stitch, ss into the joining ss from last round to join.
Starting with 4 frills; then sc, ch 3, sc - and a frill into the next stitch
End of Round 7
You should have 40 frills (10 along each edge) - plus 4 corners of 3 chain.