Crochet Little Bunnies Guide

Crocheting little bunnies can be a delightful and heartwarming activity that brings joy to both the maker and the recipient. These charming creations are not just cute decorations, but they also carry a sense of handmade love and care. As you work on each stitch, imagining the fluffy tail and whiskers taking shape, you can't help but smile at the thought of someone holding the finished bunny in their hands. Whether you're a seasoned crocheter or a beginner eager to try something new, crafting these adorable creatures is a wonderful way to spread happiness and creativity. So grab your yarn, hook, and a dash of imagination, and let's crochet some little bunnies together!
These bunnies are worked from pieces: head, body, legs, arms, ears, and tail; then all the pieces are assembled by sewing all the parts together.
- Ch – chain
- Sc – single crochet
- St(s) – Stitch(es)
- Inc – Increase (2 sc in same st)
- Dec – Decrease (2 sc together)
We will work all pieces in continuous rounds (without joining at the end of the row).
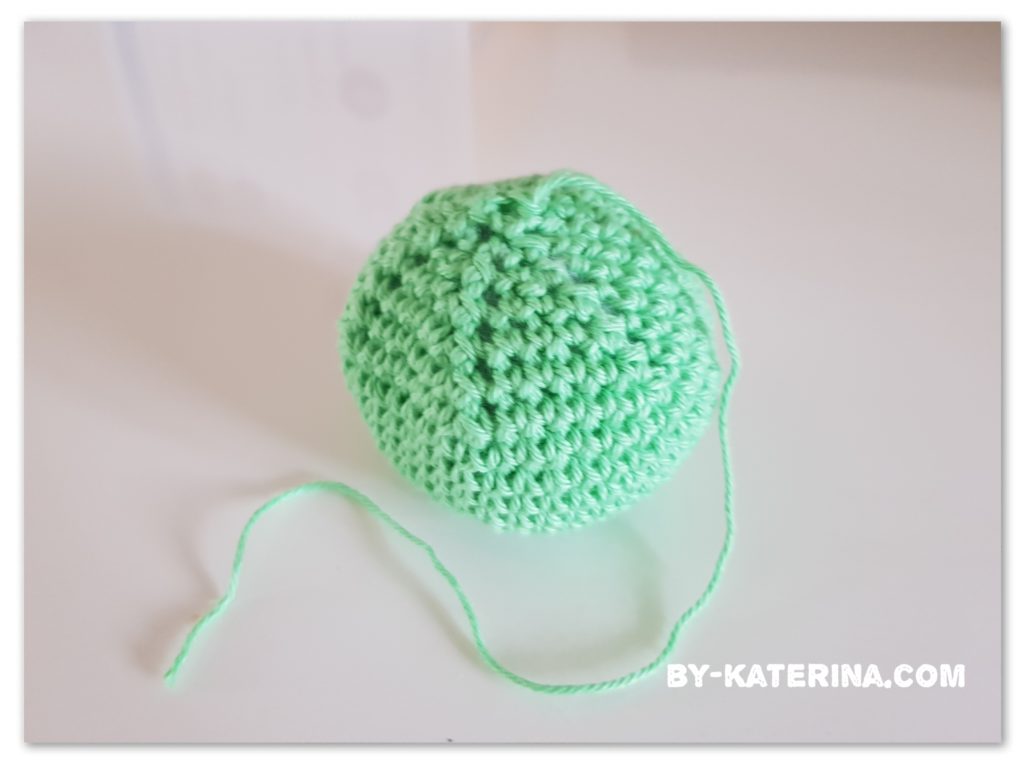
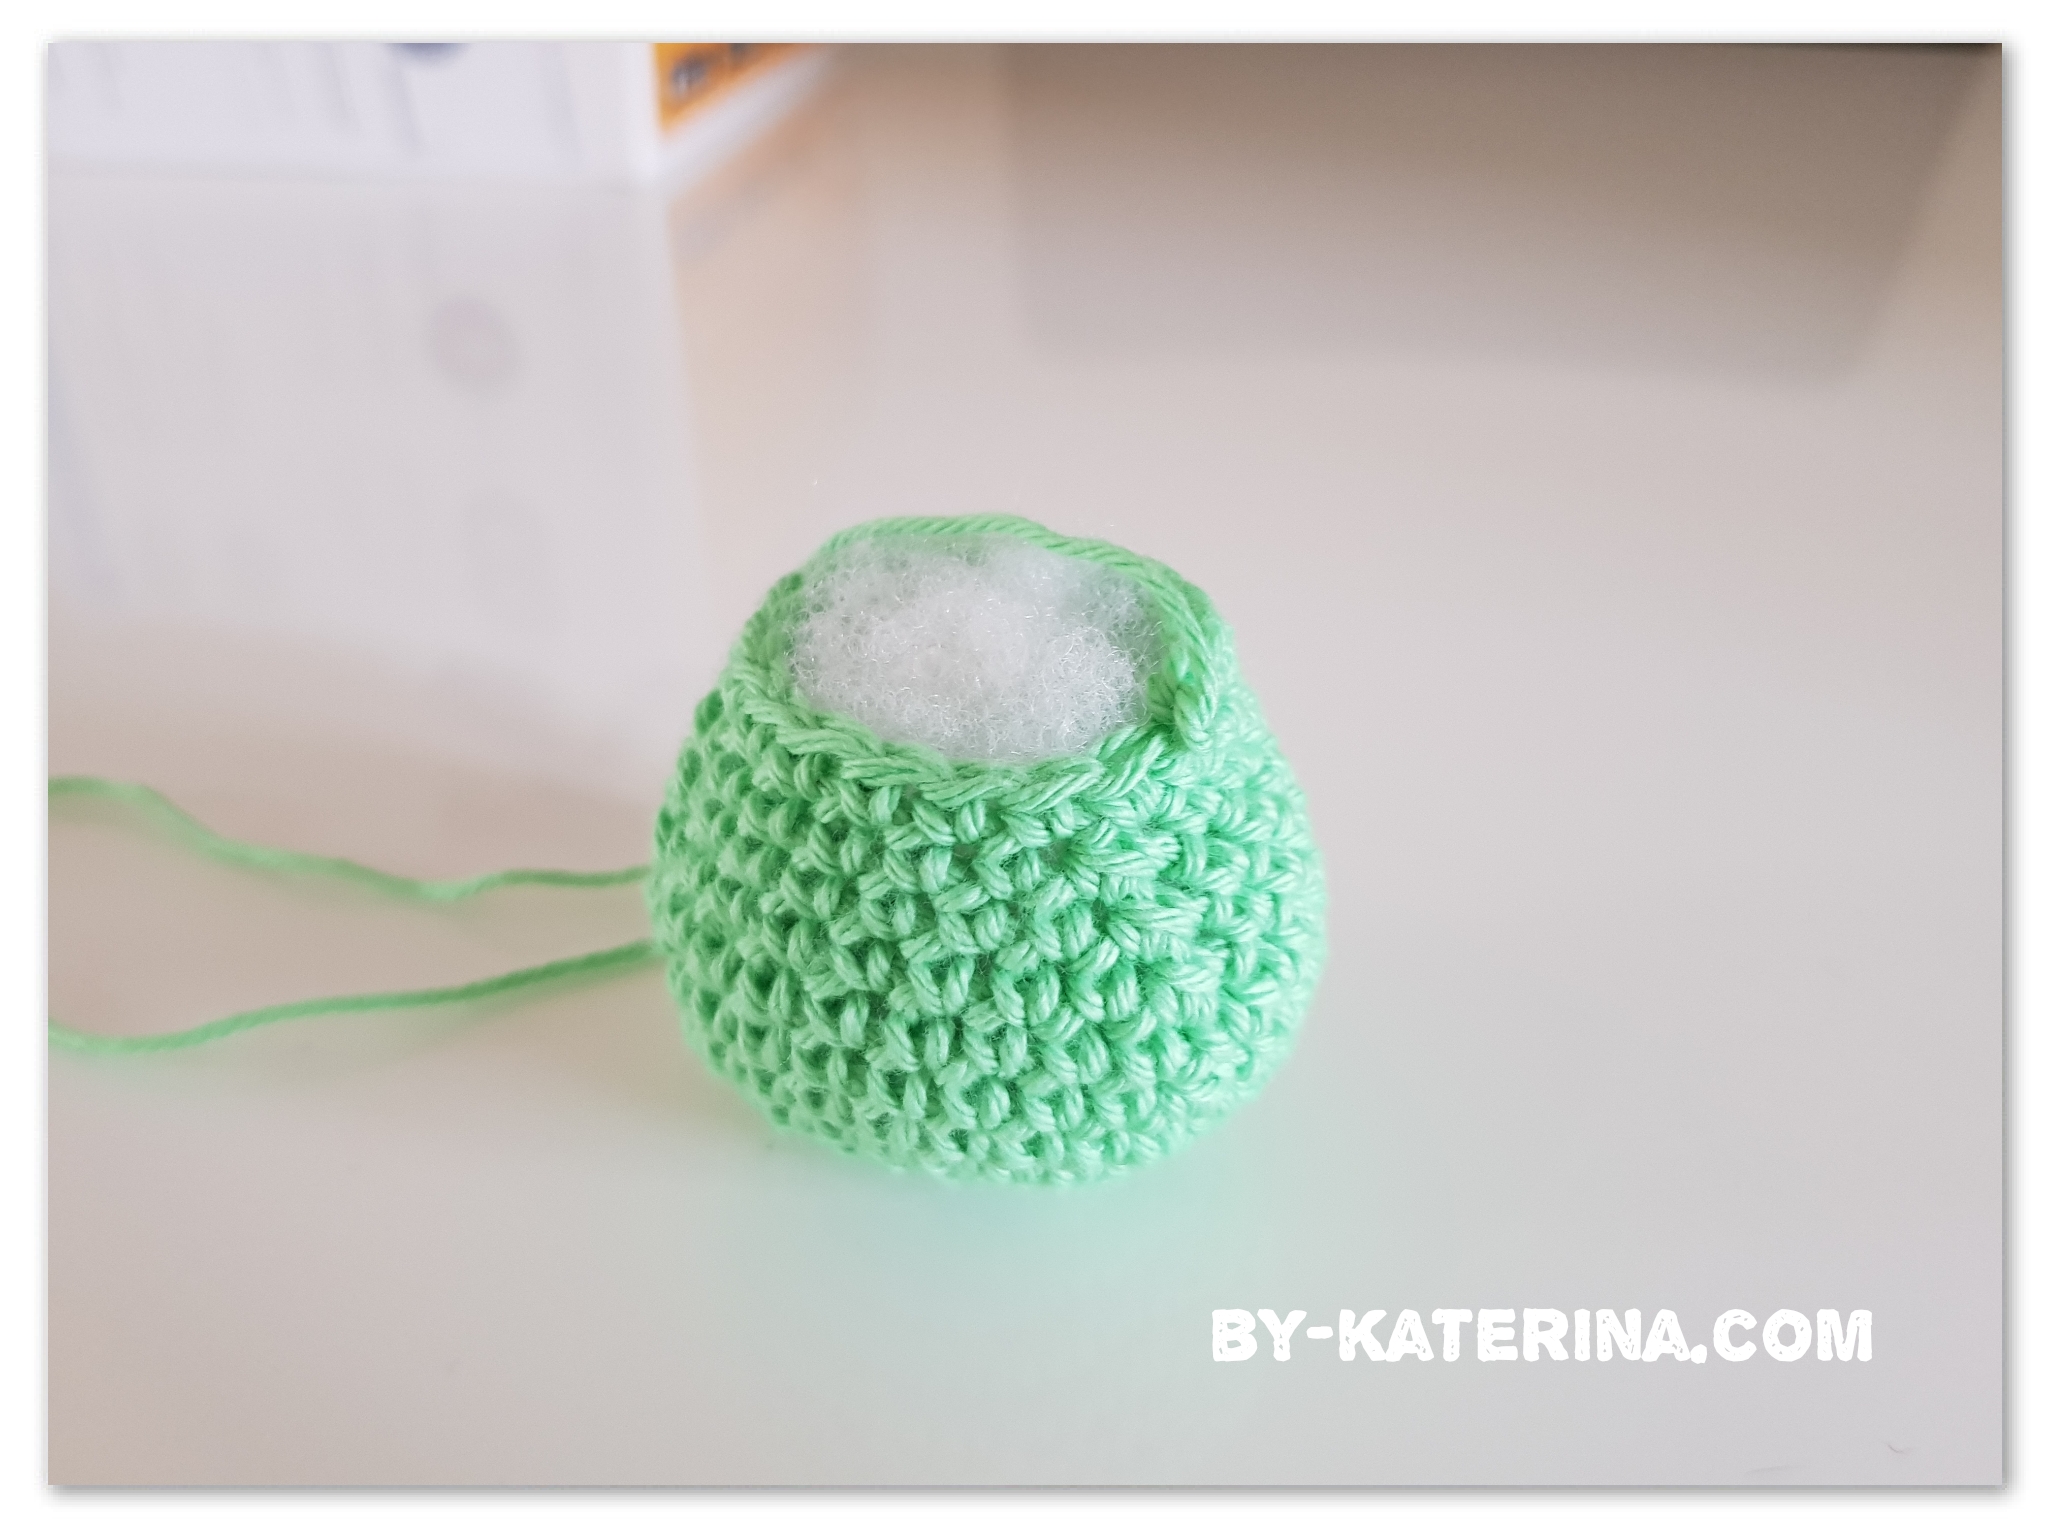
Head
Row 1: Magic ring and 6 sc in it
Row 2: [Inc] repeat 6 times (1 inc in each st) (12 sts)
With every row, mark your first stitch. It will be easy to know where to start your row and where it ends. Stuff with fiber as you go.
Row 3: [1 sc, 1 Inc in the next st] repeat 6 times (18 sts)
Row 4: [2 sc, 1 Inc] repeat 6 times (24)
Row 5: [3 sc, 1 Inc] repeat 6 times (30)
Row 6: [4 sc, 1 Inc] repeat 6 times (36)
Row 7: [5 sc, 1 Inc] repeat 6 times (42)
Rows 8 – 12 (5 rows): 1 sc in each st (42)
Row 13: [1 dec, 5 sc] repeat 6 times (36)
Row 14: [1 dec, 4 Sc] repeat 6 times (30)
Row 15: [1 dec, 3 sc] repeat 6 times (24)
Row 16: [1 dec, 2 sc] repeat 6 times (18)
Row 17: [1 dec, 1 sc] repeat 6 times (12)
Row 18: [1 dec] repeat 6 times (6).
Fasten off and weave in the end.
Body
Row 1: Magic ring and 6 sc
Row 2: [Inc] repeat 6 times (12)
Row 3: [1 sc, 1 Inc in the next st] repeat 6 times (18)
Row 4: [2 sc, 1 Inc] repeat 6 times (24)
Row 5: [3 sc, 1 Inc] repeat 6 times (30)
Rows 6 – 7: 1 sc in each st (30)
Row 8: [1 dec, 8 sc] repeat 3 times (27)
Row 9: 1 sc in each st (27)
Row 10: [1 dec, 7 sc] repeat 3 times (24)
Row 11: [1 dec, 6 sc] repeat 3 times (21)
Row 12: [1 dec, 5 sc] repeat 3 times (18)
Row 13: 1 sc in each st (18)
Stuff with fiber and leave a long tail for sewing at the end.
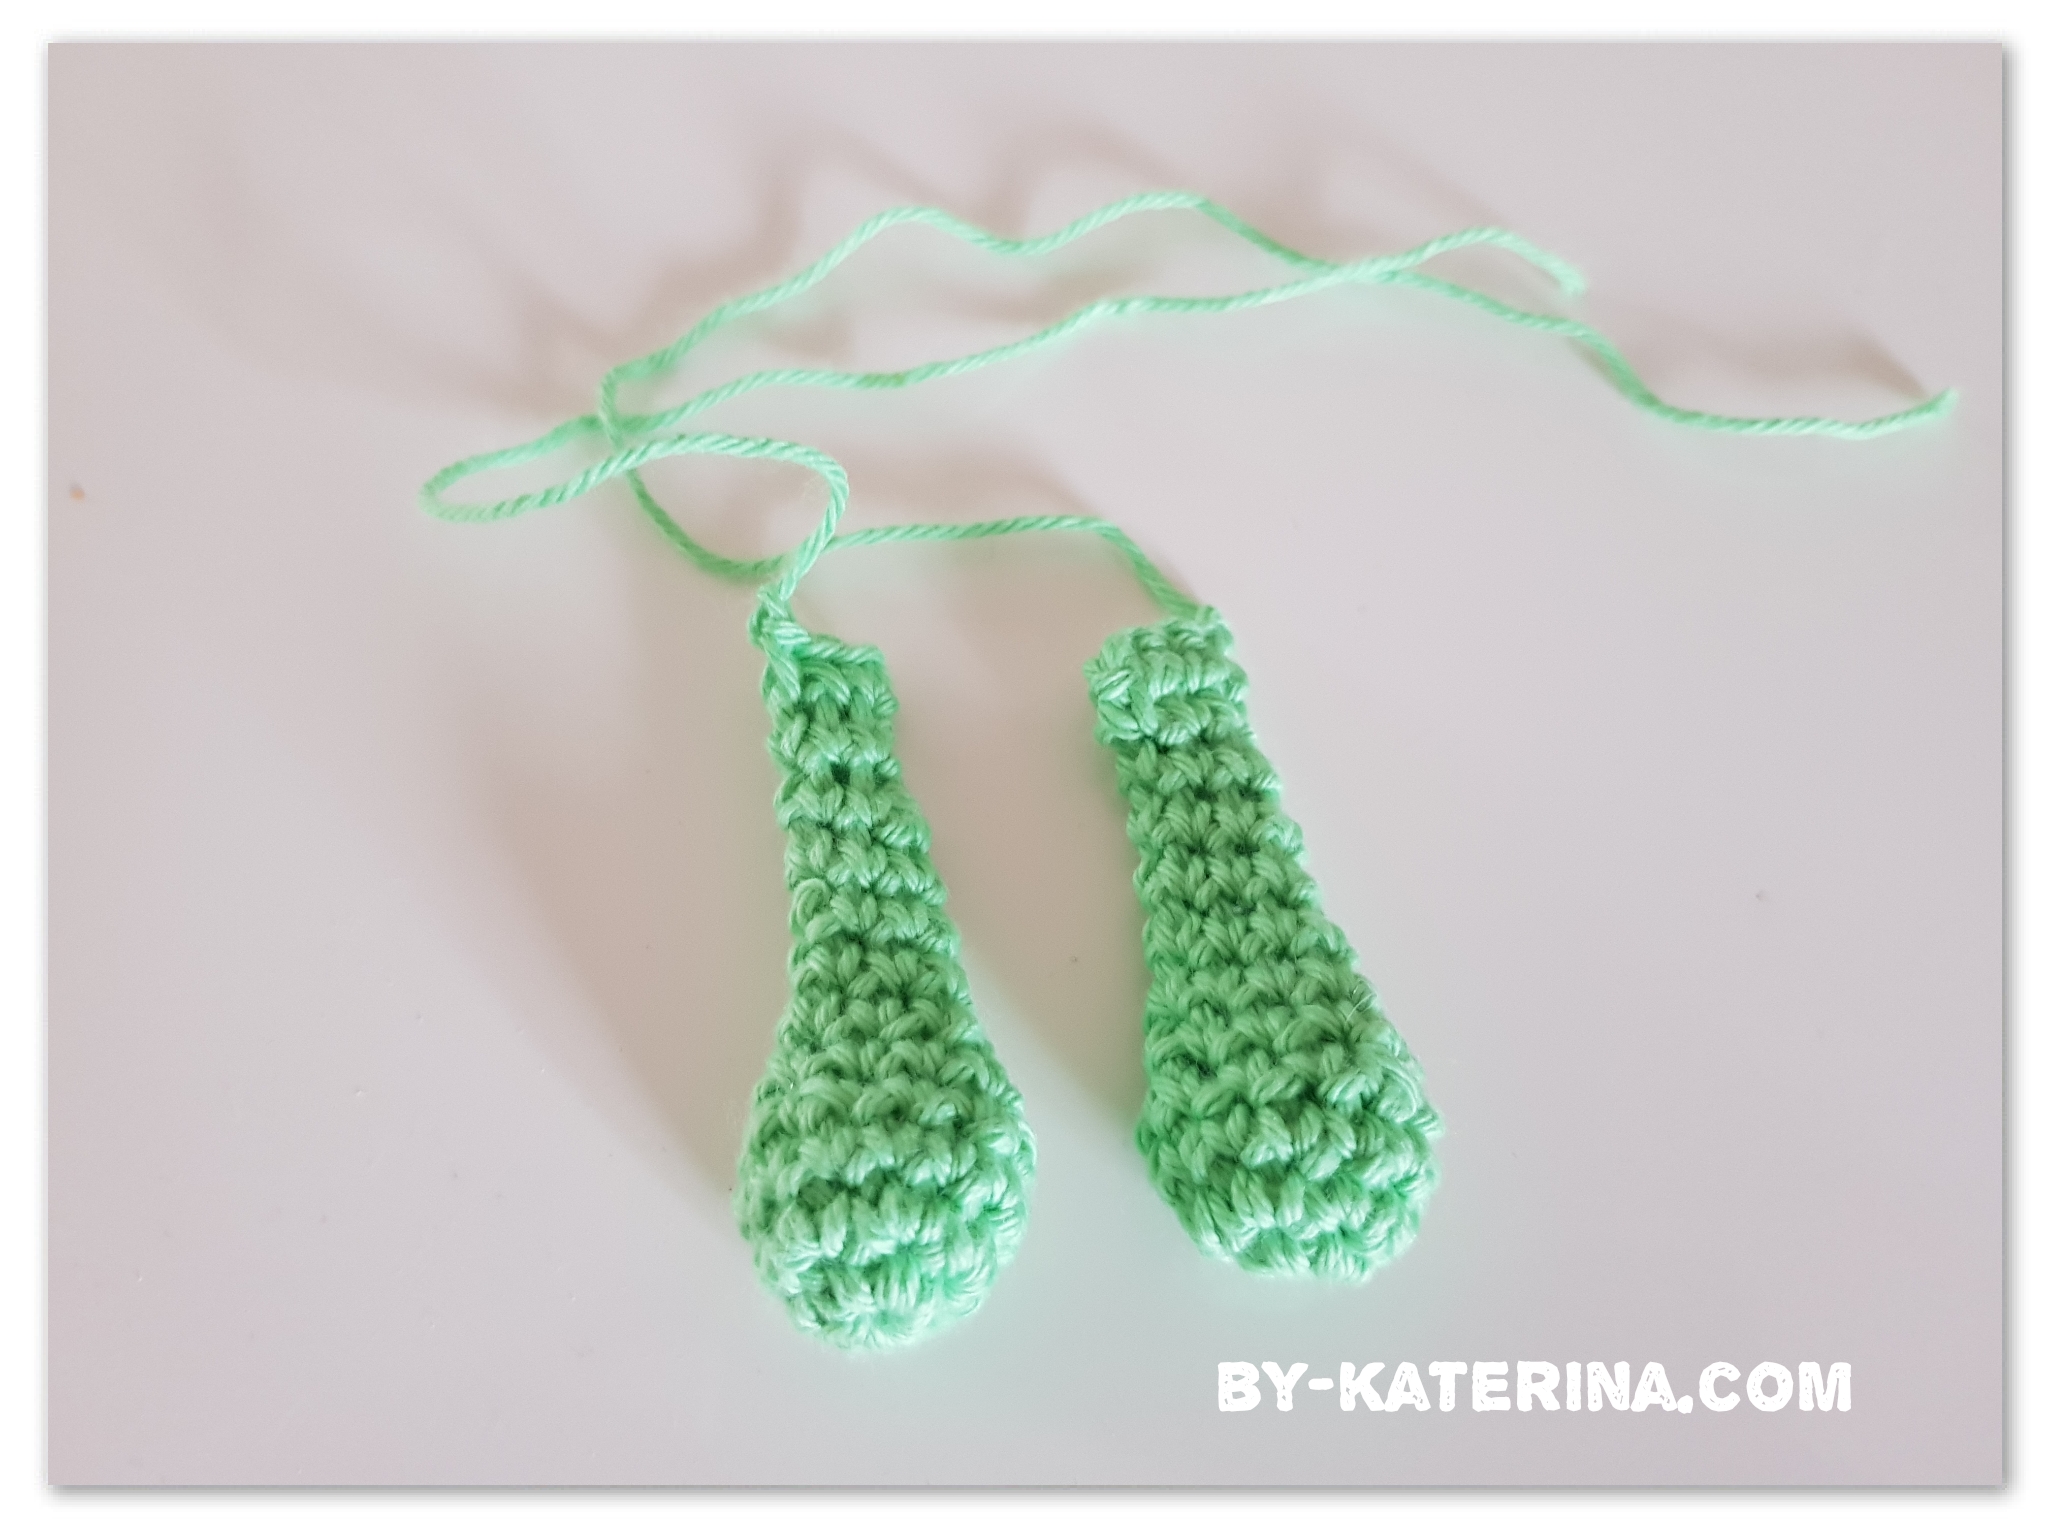
Legs
Ch 5. We will work in continuous rounds making an oval.
Row 1: Start with the second st and make 3 sc, 1 inc in the next st. Turn to the other side of the chain and sc in the next 2 sts, 1 inc in the last st (10)
Row 2: [1 sc, 1 inc] repeat 5 times (15)
Row 3: [4 sc, 1 inc] repeat 3 times (18)
Rows 4 – 5: 1 sc in each st (18)
Row 6: 3 sc, [1 dec] ×6, 3 sc (12)
Stuff with fiber
Row 7: 3 sc, [1 dec] ×3, 3 sc (9)
Rows 8 – 9: 1 sc in each st (9)
To close the top of the leg, make one row in sc through the sts from both sides. Fasten off and leave a long tail for sewing.
Repeat the pattern for the second leg.
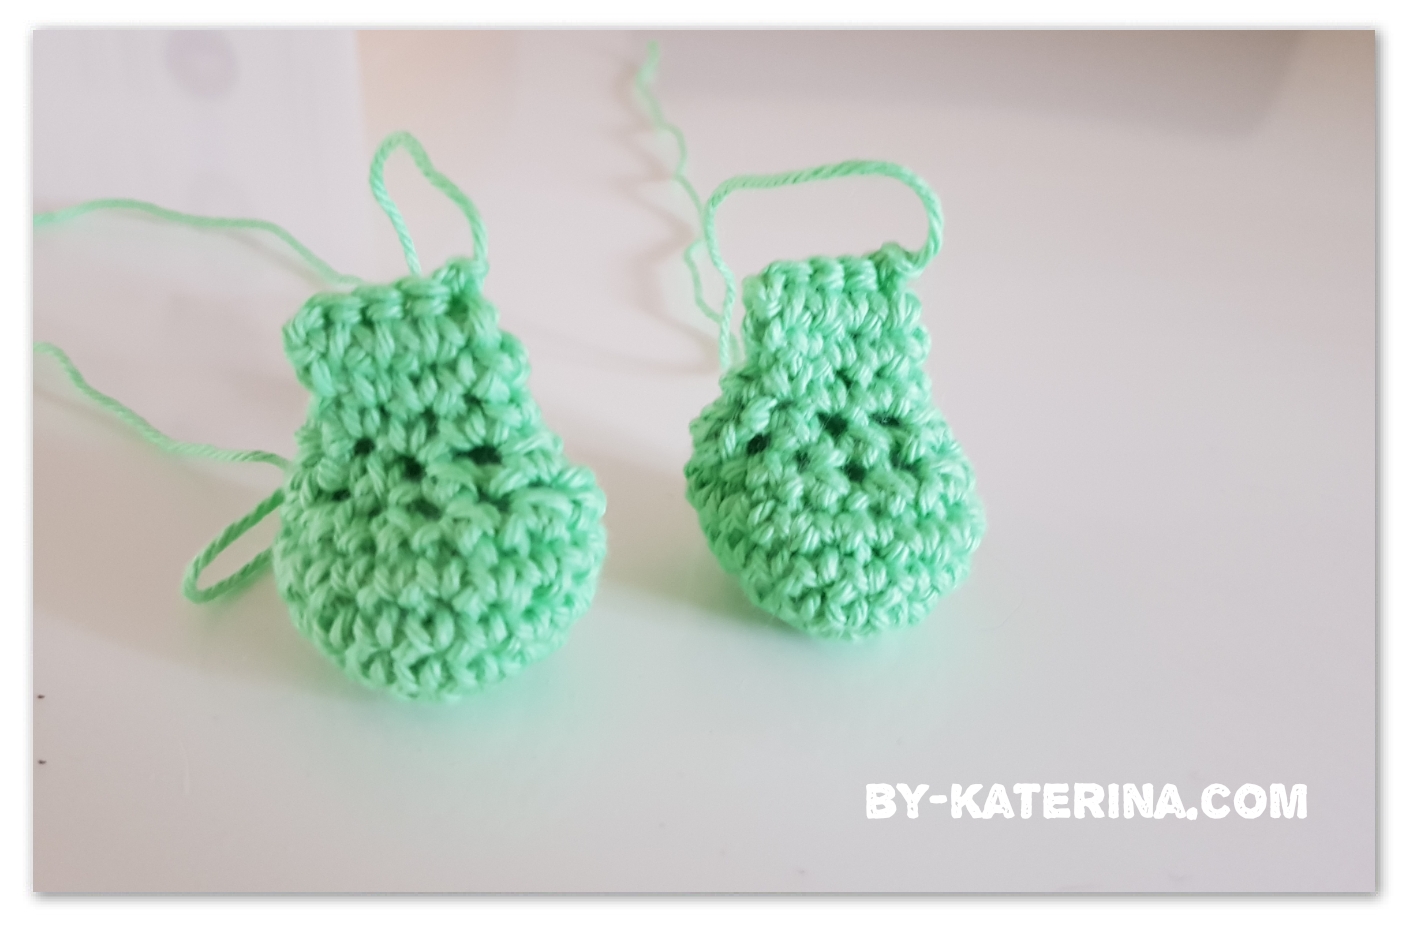
Arms
Row 1: Magic ring and 6 sc
Row 2: [Inc] repeat 6 times (12)
Row 3: 1 sc in each st (12)
Row 4: [2 sc, 1 dec] × 3 (9)
Row 5: 1 sc in each st (9)
Row 6: 1 dec, 7 sc (8)
Row 7: 1 sc in each stitch (8)
Stuff the bottom of the arm
Row 8: 1 dec, 6 sc (7)
Row 9: 1 sc in each st (7)
Row 10: 1 dec, 5 sc (6)
Row 11: 1 sc in each st
Close the arm opening as you made for the legs. Leave a long tail for sewing. Repeat the same pattern for the other arm.
Ears
Row 1: Magic ring and 6 sc
Row 2: [Inc] repeat 6 times (12)
Row 3: 1 sc in each st (12)
Row 4: [1 sc, 1 Inc] × 6 (18)
Rows 5 – 7: 1 sc in each st (18)
Row 8: [1 dec, 4 sc] × 3 (15)
Rows 9 – 10: 1 sc in each st (15)
Row 11: [1 dec, 3 sc] × 3 (12)
Row 12: 1 sc in each st (12)
Row 13: [1 dec, 1 sc] ×4 (8)
Fasten off and leave a long tail. You don’t have to stuff the ears.
Repeat the same pattern for the second ear.
Tail
Row 1: Magic ring and 6 sc
Row 2: [Inc] repeat 6 times (12)
Row 3: 1 sc in each st (12)
Row 4: [1 dec, 2 sc] ×3 (9)
Fasten off and leave a long tail. Stuff just a little.
Now all the pieces are done, and it is time for assembling.
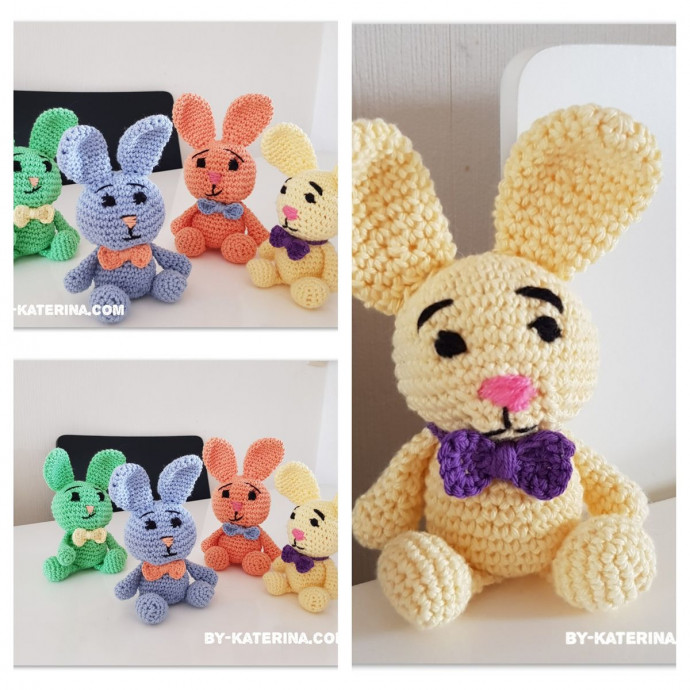
Sew each piece using the long tail. At the end, make the face details. If you want, you can use beads for the eyes. I embroidered the eyes and nose and made also a little mouth and eyebrows. Make it as you wish. As you see in the picture, none of my 4 little bunnies are the same, but they are all cute.
I also add a bow that I made from 3 sts in sc. Then I just wrap the middle with yarn to make the little piece look like a bow. I sew it on the neck of the little bunnies. Again, feel free to add anything you like (a bow near the ear, for example).