Crochet Little Angel Amigurumi: A Charming DIY Project

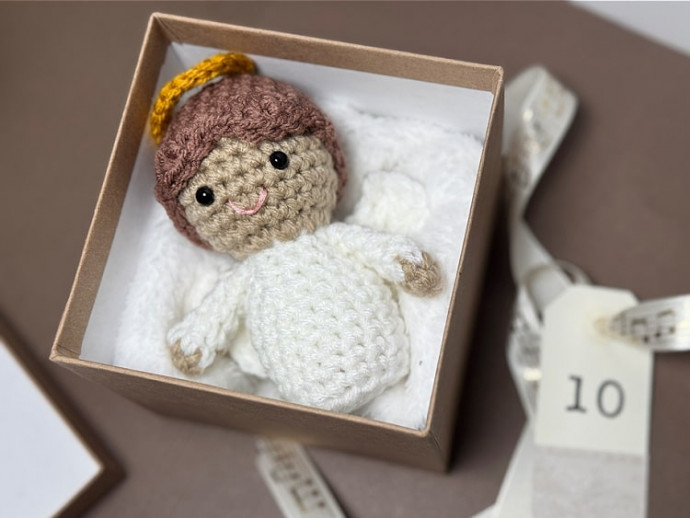
Crochet little angel amigurumi is an adorable and charming project for anyone who loves crafting and spreading joy. These tiny handmade angels are perfect for adding a touch of sweetness to your home decor or as thoughtful gifts for loved ones. With their delicate wings and sweet smiles, they hold a special kind of magic that brightens everyone's day. So grab your yarn and hook, and get ready to create these lovable little angels that will surely put a smile on your face!
Finished Size about 4" tall
You Will Need:
- Worsted weight yarn in 4 colors: skin tone, hair color, white, and gold (Sample made with Loops & Threads Impeccable in Almond, and Gold, Red Heart Super Saver in Soft White, and Loops & Threads Soft Classic in Coffee)
- G crochet hook (4/4.25 mm)
- 2- 6mm safety eyes
- Pink or black embroidery floss and needle
- Stuffing
- Yarn needle
- Stitch markers
- Scissors
- Optional: if you want to add weighted bases to your figures, you will need some scrap fabric and Poly-Pellets
Instructions:
Some of the pieces are made beginning with a magic ring, while others start with a chain, which is indicated at the beginning of the pattern for that piece.
If you want to add weighted bases to the bottom of your figures, you can cut out a circle of fabric about 3" in diameter. Work a running stitch all the way around the outside edge, cinch it to make a little bowl shape, add a little bit of poly-pellets to the circle, then cinch closed. The base of the figure is only about 1.5" in diameter, so it needs to be kept pretty small. If using a weighted base, place it in the bottom of the figure when the pattern says to begin stuffing, and then continue with stuffing. This does help keep your figures upright easier but is an optional step.
Body/Head
Make 1 starting with clothing color/white, changing to skin tone/tan where directed, beginning with magic ring.
Arms
Make 2 starting with skin tone/tan yarn and changing to clothing color/white where directed, beginning with a magic ring.
Hair
Make 1 hair and 1 bun with hair color/brown yarn, beginning with a magic ring.
Hair
Rounds 5-9: 1 sc in each st (24 sc)
Bun
Finish off and cut yarn, leaving a long tail for sewing.
Place the hair on top of the head tilted down in the back with the shells at the front as bangs, stitch in place.
Add a tiny bit of stuffing to the bun and stitch to the back of the head at the base of the hair.
Wings
Make 1 with wing color/white, beginning with magic ring.
Round 5: [2 sc in first st, 1 sc in next 3 sts] repeat around (30 sc)
Fold the wings in half and continue with the final round working through both layers of the semicircle.
Halo
Make 1 with halo color/gold yarn.