Crochet Daisy Farmer’s Market Bag


Introduction
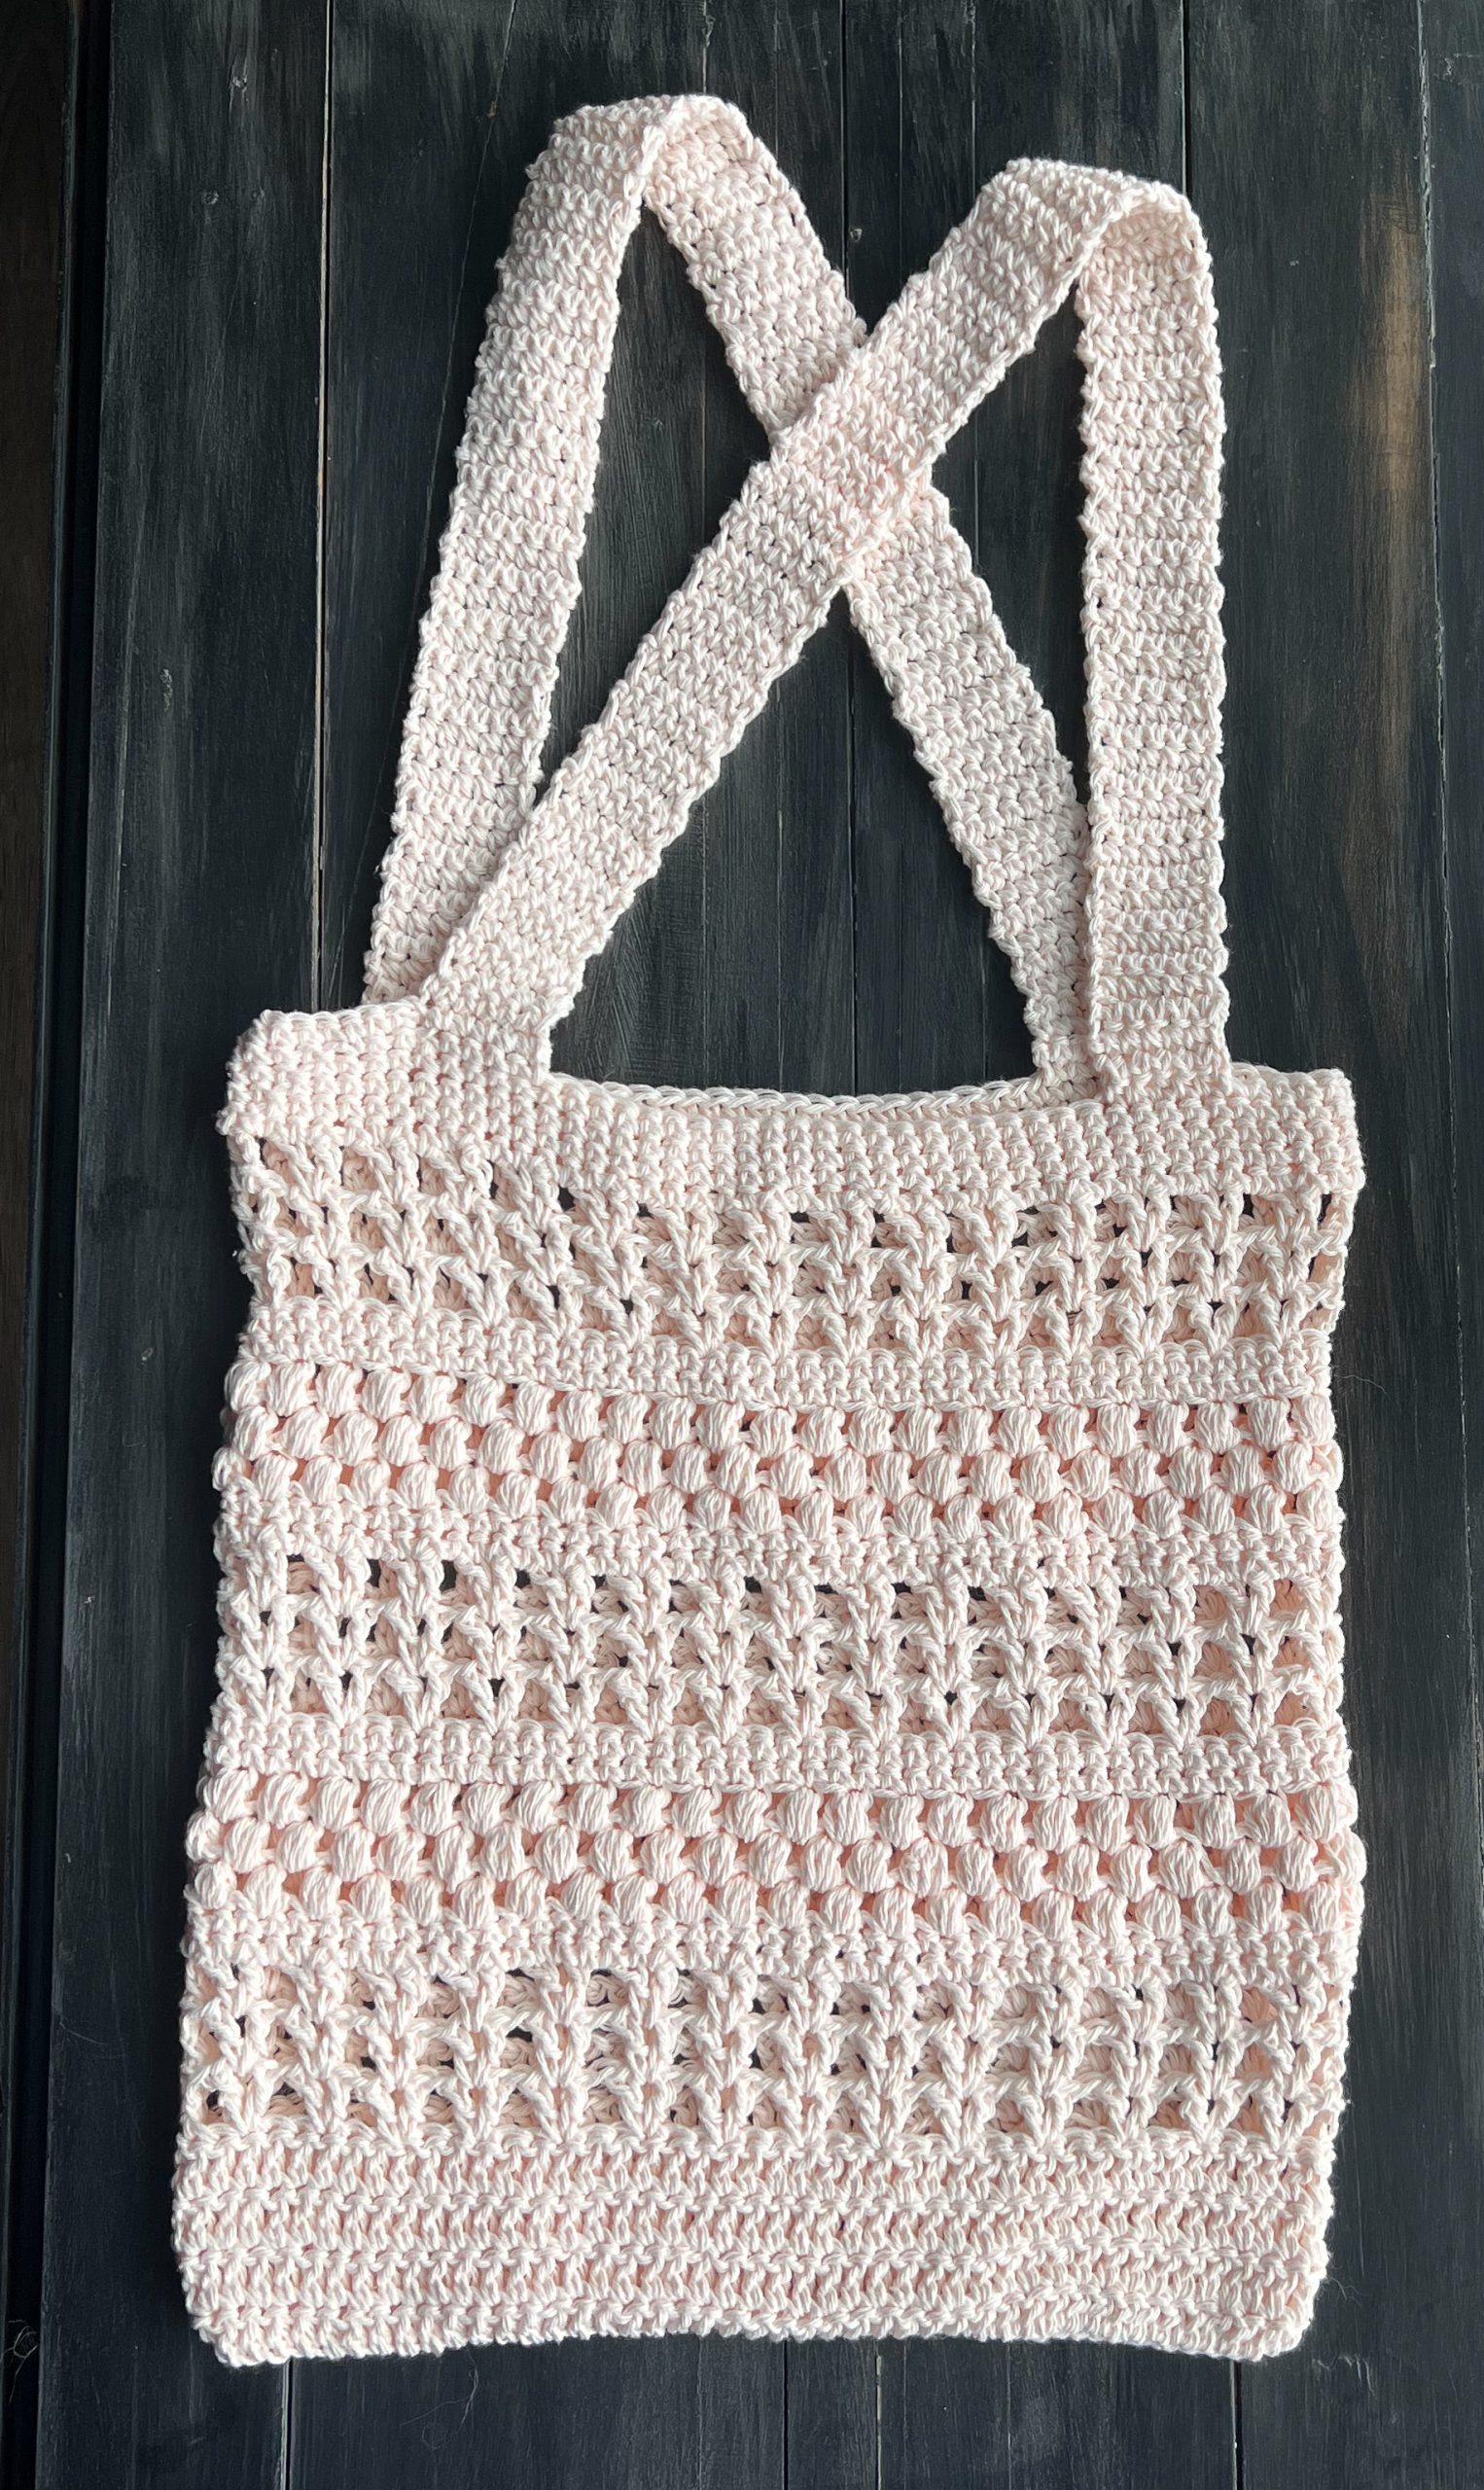
The Crochet Daisy Farmer’s Market Bag is a charming and practical accessory that combines style and sustainability. With its whimsical daisy design and sturdy construction, this bag is perfect for carrying fresh produce, groceries, or essentials for a day out. The intricately crocheted details add a touch of handmade charm, making it a delightful companion for your trips to the farmer’s market or grocery store. You'll not only be making a fashion statement but also reducing your environmental impact by opting for a reusable and eco-friendly bag. So go ahead, fill up your Crochet Daisy Farmer’s Market Bag with goodies, and enjoy a day of shopping with a smile on your face!
Level of Difficulty
Materials Needed
- 410 yards of 100% Cotton Yarn (Lily’s Sugar and Creme recommended)
- Size 5.0mm Hook
- Scissors
- Yarn Needle (for sewing in ends)
Stitches Used
- Slip Stitch (SL ST)
- Double Crochet (DC)
- Single Crochet (SC)
- V-Stitch
- Puff Stitch (Puff)
- Joining Single Crochet
Gauge
6 stitches across & 4 DC high for a 2×2 square
Notes
- This bag is worked from bottom to top.
- This pattern includes beautiful textured stitches. To get the most texture from these stitches, whenever you get to the V-Stitch sections, turn your work, so the V stitches are facing outwards. Otherwise, work in a continuous round.
- To customize this pattern you can add or subtract multiples of 6 from the foundation chain.
Pattern
CH 90. SL ST into the first CH.
Round 1: CH 3 (this counts as a DC). DC in each CH. SL ST into the top of the CH 3 from the beginning of the round. (90 DC)
Rounds 2-4: Repeat Round 1. (90 DC) Turn your work.
Round 5: CH 4 (this counts as a DC plus 1 CH), DC in the first stitch…this creates a modified V Stitch. CH 1 and skip the next two stitches. DC in the third stitch from the hook, CH 1, DC in the same stitch (V Stitch). CH 1.
**Skip 2 stitches. V Stitch in the third stitch from hook. CH 1.**
Repeat from ** to ** the rest of the round. SL ST into the third CH at the beginning of the round. (30 V-Stitch)

Round 6: SL ST into the CH space from the modified V Stitch from Round 5. CH 4 (counts as DC plus 1 CH), DC in the same CH space. CH 1.
**V Stitch into the next V Stitch’s CH space. CH 1.**
Repeat from ** to **. (30 V Stitch)
Pattern Notes
- Rounds 5-7 are also considered V-Stitch Rows later in the pattern.
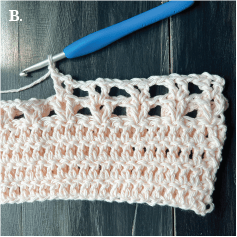
- Each V stitch should only yield 3 SC as pictured in Photo C.

Round 7: Repeat Round 6. (30 V Stitch) Turn your work.
Round 8: CH 1 (does not count as a SC). SC in the CH 1 space after the last V Stitch. **SC in the V Stitch DC. SC in the CH 1 space in the V stitch. SC in the CH space between the next V Stitch.**
Repeat from ** to **. SL ST into the CH 1. (90 SC)
Round 9: CH 1 (does not count as a stitch), SC in each stitch in the round. SL ST into the CH 1. (90 SC)
Round 10: CH 1 (does not count as a stitch), Puff Stitch into the first stitch. **Skip the next stitch. In the second stitch from the hook, Puff Stitch.**
Repeat from ** to ** around the row. SL ST into the CH 1 space. (45 Puffs)
Pattern Notes
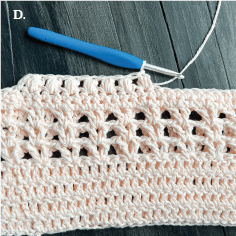
- Don’t forget to close your Puff Stitch with the closing CH. See Photo D.
- Rounds 10-12 are also considered Puff Stitch Rows later in the pattern.
Round 11: SL ST past the first Puff from previous row into the space between the next Puff. CH 1, Puff Stitch into that space. **Puff Stitch into the next space between the previous row’s Puffs.** Repeat from ** to ** in the rest of the round. (45 Puffs)
Round 12: Repeat Round 11.
Round 13: CH 1 (does not count as a SC), SC into the SL ST. SC in each Puff stitch in the round. (90 SC)
Pattern Note:
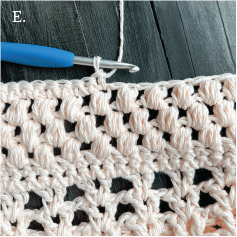
- Each Puff stitch yields 2 SC. See Photo E.
Round 14: CH 1, SC in every stitch in the round. SL ST into the CH 1 space. Turn work.
Rounds 15-17: Repeat Rounds 5-7. (V-Stitch Rows) Turn your work.
Rounds 18-19: Repeat Rounds 8-9. (SC Rows)
Rounds 20-22: Repeat Rounds 10-12. (Puff Stitch Rows)
Rounds 23-24: Repeat Rounds 13-14. (SC Rows) Turn your work.
Rounds 25–27: Repeat Rounds 5-7. (V-Stitch Rows) Turn your work.
Rounds 28-29: Repeat Rounds 8-9. (SC Rows)
Round 30: CH 1, SC in each stitch in the round. SL ST into the CH 1. (90 SC)
Pattern Note
You can repeat or omit Rounds 16-30, until you are satisfied with the length of your bag!
Bag Handle Straps
Pattern Note
There are rows in Round 31 for the handle straps. These are labeled as Handle Rows. You can repeat these rows until you reach your desired length of your handle straps. I liked my handle straps a little long. Whatever your desired length is, I recommend keeping the row length in multiples of two.
Round 31: CH 1 (does not count as SC), SC in the next 6 stitches. SC into the next six stitches. This will be your first Handle Row for your first handle strap.
Handle Row 2: CH 1, and turn your work. SC in the last 6 stitches. CH 1, and turn your work. (6 SC)
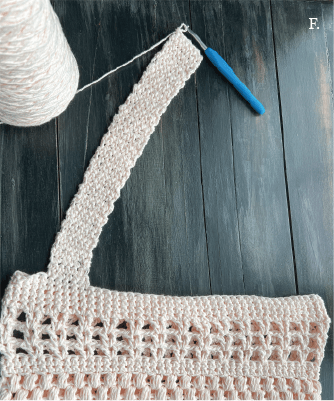
Handle Rows 3-84: Repeat Row 2. (6 SC) See Photo F. for a progress photo!
Once you have reach your desired length, skip twenty-one stitches from Round 30.
Afterwards
Align the last SC of the Handle Row 84 to the twenty-second stitch from Round 30.
Insert hook through both the last stitch of the Handle Row and through stitch twenty-two from Round 30.
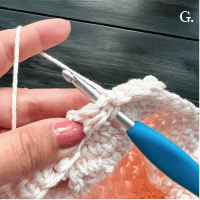
Yarn over, and pull through both stitches. Yarn over and pull through both loops on hook. This is called a Joining SC. See Photo G.
Join SC in the next 5 stitches, making sure that the seam is facing inwards in the bags instead of outwards. The Joining SC should create a seamless look on the outside of your bag. See Photos H.-I.
Photo H. is what the Joining SC seam looks like on the inside of the bag.
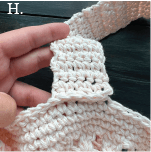
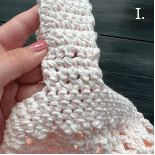
Photo I. is what the Joining SC seam looks like on the outside of the bag.
Returning back to Round 31, SC in the next 12 stitches.
SC into the next six stitches. This will be your first Handle Row for your second handle strap.
Handle Row 2: CH 1, and turn your work. SC in the last 6 stitches. CH 1, and turn your work. (6 SC)
Handle Rows 3-84: Repeat Handle Row 2. (6 SC)
Once you have reach your desired length, skip twenty-one stitches from Round 30.
Join SC the strap to the bag in the next six stitches, making sure that the seam is facing inwards.
Finish Round 31 with 6 SC. SL ST into the CH 1 space.
Leave a 6” tail to weave in and cut off.
Finishing Touches
Cut a 24” strand of the yarn.
Turn the bag inside out.
Center the bag based on the handle straps at the top of the bag. SL ST the bottom of the bag together. Leave a 6” tail and cut off.
Sew in any loose ends and turn the bag outside right.