Crochet Bulky Ribbed Pumpkin Tutorial


Introduction
Creating a Crochet Bulky Ribbed Pumpkin is such a fun and cozy project to bring some autumn vibes into your home decor! Using chunky yarn and a simple ribbing technique, you can whip up these adorable pumpkins in no time. The texture from the ribbed stitches gives them a unique look that adds warmth to any space. Whether you're an experienced crocheter or just starting out, this project is great for all skill levels. Get your crochet hooks ready and let's start crafting some cute and cuddly pumpkins to sprinkle around your home!
Supplies
- US I / 5.5mm Crochet hook
- Hobby Lobby I Love This Chunky, weight (5) bulky, 100% Acrylic, 109 yards, 3.5 oz per skein.
- Body of pumpkin: one skein in the color Spice
- Stem: a small amount of brown
- Tapestry Needle
- Fiber-fil for stuffing
Abbreviations (US Terms)
- ch: chain
- hdc: half double crochet
- hdcblo: half double crochet back loop only
- sl st: Slip stitch
- FO: Finish Off
Sizes
- Small pumpkin: 3″ T x 3.5″ W
- Tall pumpkin: 7″ T and 3.5″ W
(Height does not include stem)
Free Crochet Pumpkin Pattern
Numbers for small pumpkin listed first in the parenthesis. (S, T)
Pumpkin Instructions
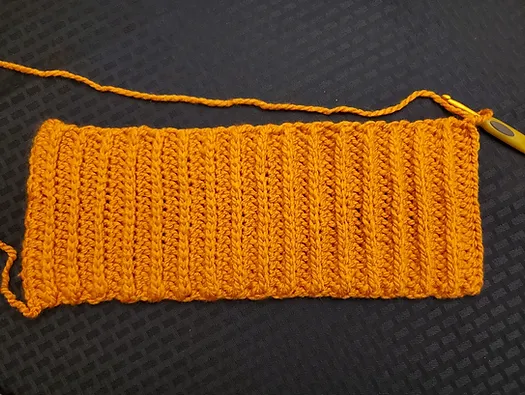
Row 1: Ch 21 (31) hdc in 2nd ch and across. (20 (30) sts)
For the remaining rows, you will be working into the third loop created by the hdc stitch; this will give the ribbed look on your pumpkin. See photos below, I have marked the stitches you will work into with a yellow dot.
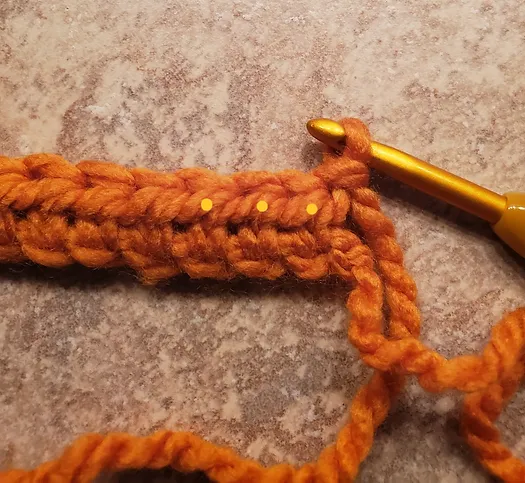
Row 2: ch 1, turn, inserting hook from below the stitch and up to the top, hdc in the 3rd loop across. (20 (30) sts)
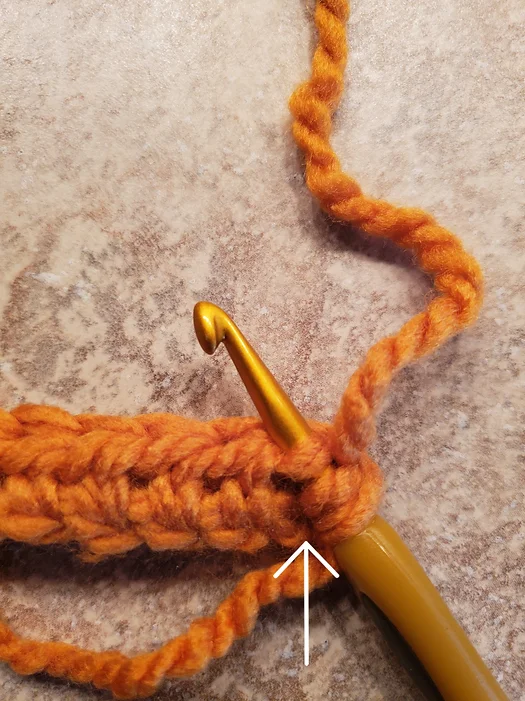
You will now have a raised rib where the top stitches have been pushed forward.
Row 3: ch 1, turn, hdc 3rd loop across.
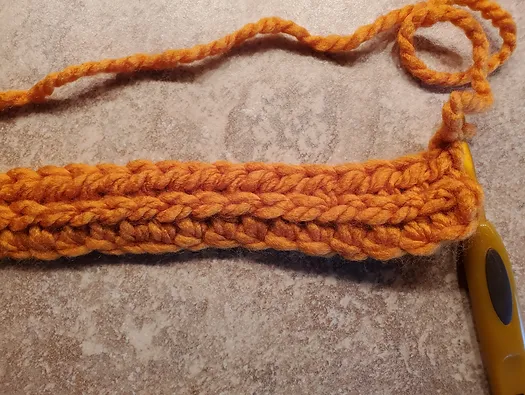
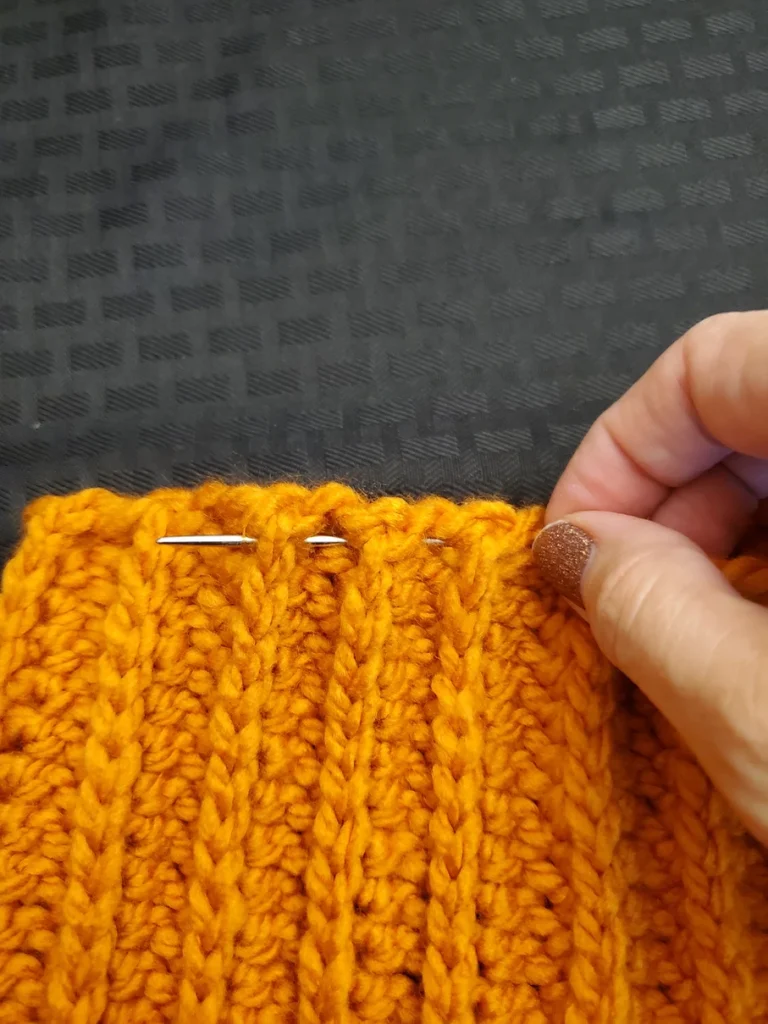
Fold piece in half and SLST the ends together, F/O leaving a long tail, at least 18”.
(Since both sides have ribs, there is no right or wrong side.)
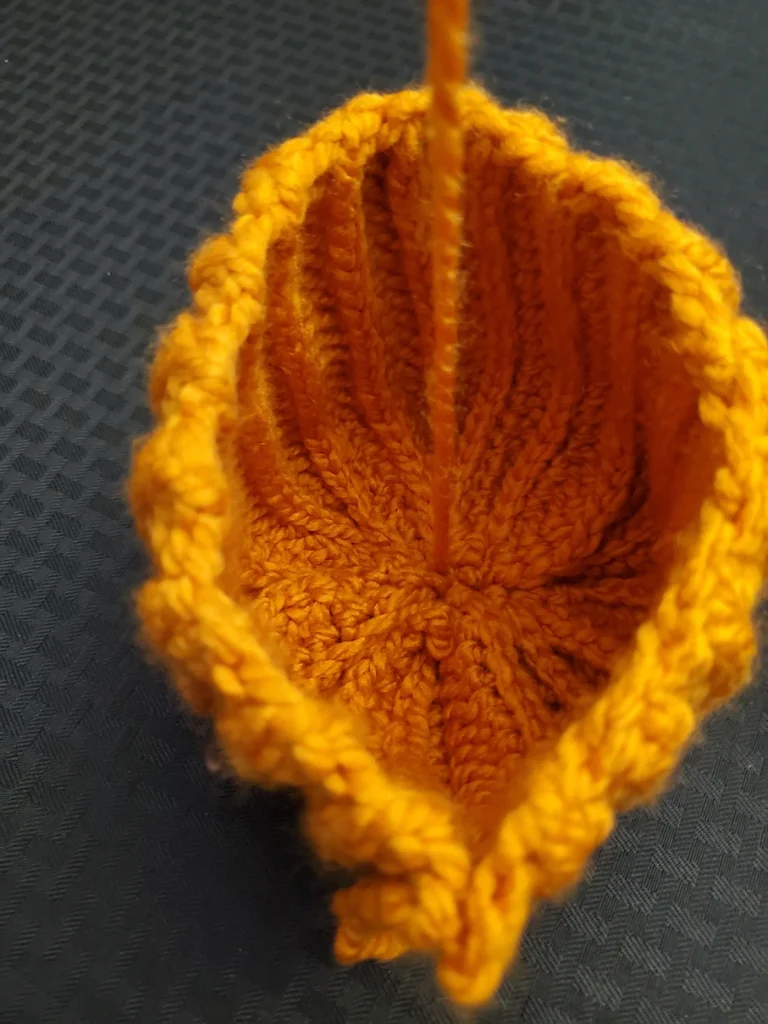
Thread a large needle onto the tail and begin working the needle through the ribs on the end of the rows all the way around. Pull tight to close. To secure weave tail back and forth across the opening, pulling tight.
Insert needle through the center of the end you just secured, pulling your tail through to the opposite end.
Stuff with Fiber-fil and repeat instructions for closing on the second side.
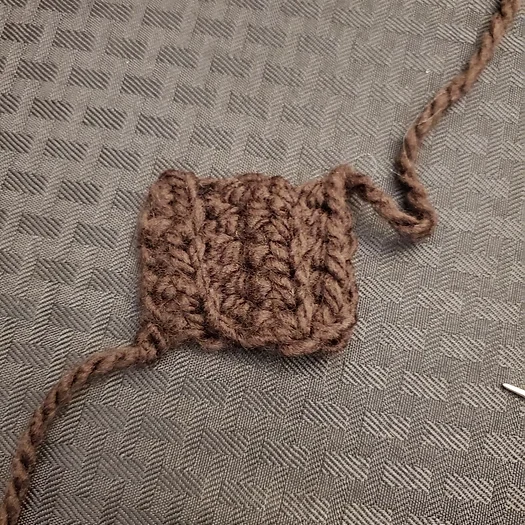
Stem Instructions
Row 1: Ch 6, hdc in 2nd ch and across. (5)
Row 2: Ch 1, turn, hdcblo across. (5)
Rows 3 – 4: Repeat Row 2.
Finish off leaving a long tail. Whip stitch Row 4 to Row 1 to create the stem. Secure to the top of the pumpkin.