How to Make a Crochet Soap Saver

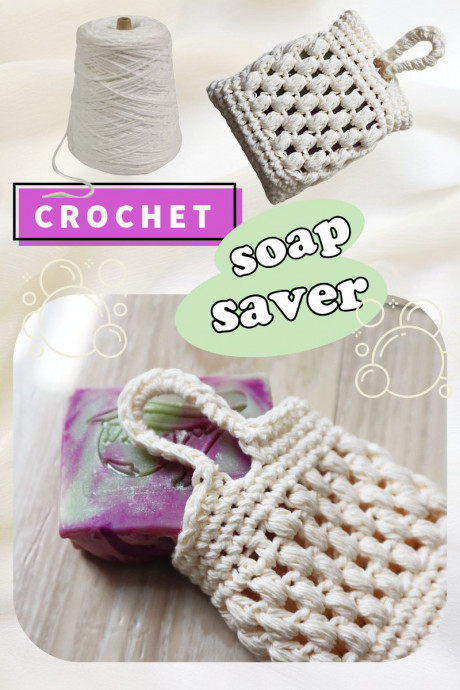
Crochet soap savers are a fantastic way to extend the lifespan of your soap while adding a touch of charm to your bathroom routine! These nifty little accessories not only help your soap dry faster, preventing that slimy goop that forms when it sits in water, but they also provide a gentle exfoliation for your skin. Plus, they are super easy to wash and reuse, making them an eco-friendly choice for your daily hygiene routine. With a variety of colors and patterns to choose from, you can personalize your soap saver to match your bathroom decor or just add a fun pop of color to your shower caddy. Say goodbye to soggy soap and hello to a practical yet playful addition to your self-care routine!
Materials You’ll Need
- Lily Sugar ‘n Cream cotton yarn (or any worsted weight cotton yarn)
- 5mm crochet hook
- Stitch marker
- Scissors
- Yarn needle for weaving in ends
The Pattern
Getting Started
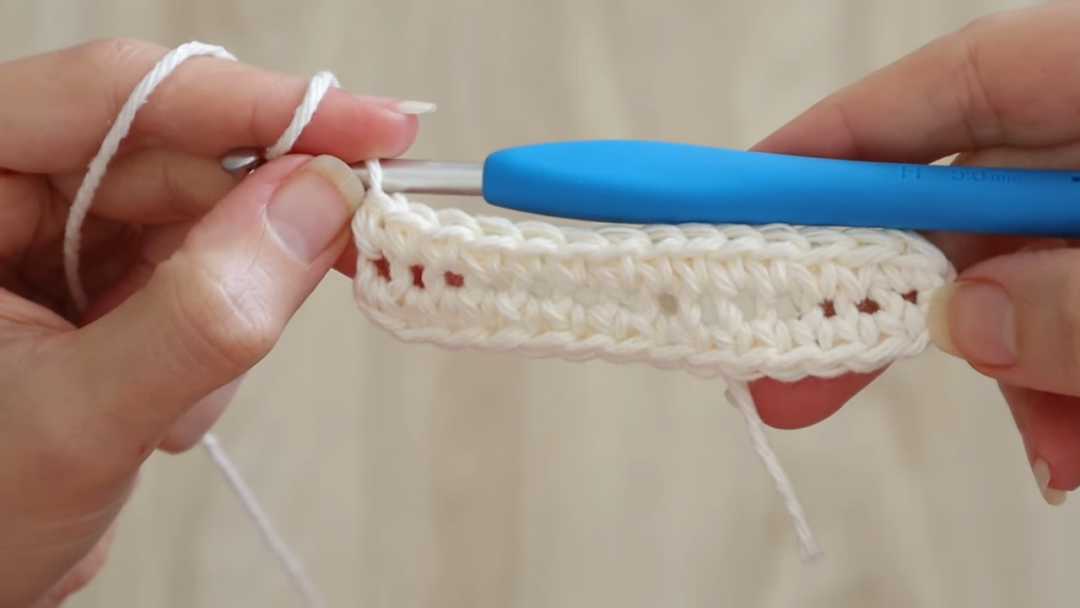
We’ll begin with a slipknot and create a foundation chain. I made my soap saver about a half inch wider than my 3.5″ soap, which required 15 chains. If your soap is larger, simply make a longer chain to accommodate it.
Creating the Base
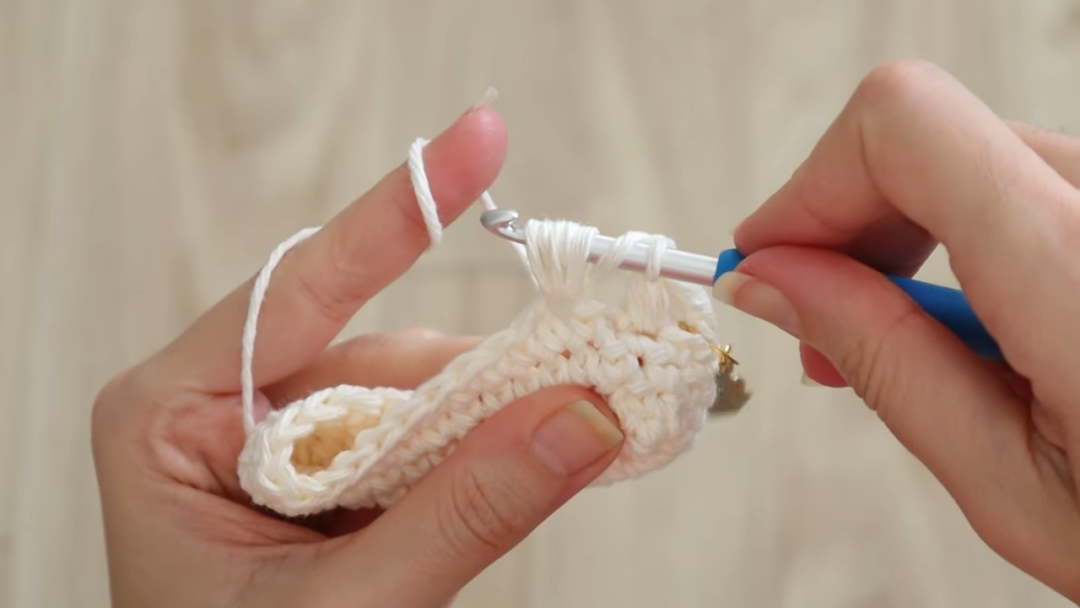
Skip the first chain and make 1 single crochet (sc) in the next chain. Continue making 1 sc in each chain across, for a total of 14 sc across your foundation chain. Now we’ll turn the corner to work along the underside of our chain. To do this, put one more sc in that same last chain. Tilt your work so the underside is facing up, and work a third sc in that same chain. Then work another sc in the underside of the next chain, continuing with 1 sc in each chain to the end. You’ll have 14 sc on the top, 14 sc on the bottom, plus those extra stitches at the corners for a total of 30 sc.
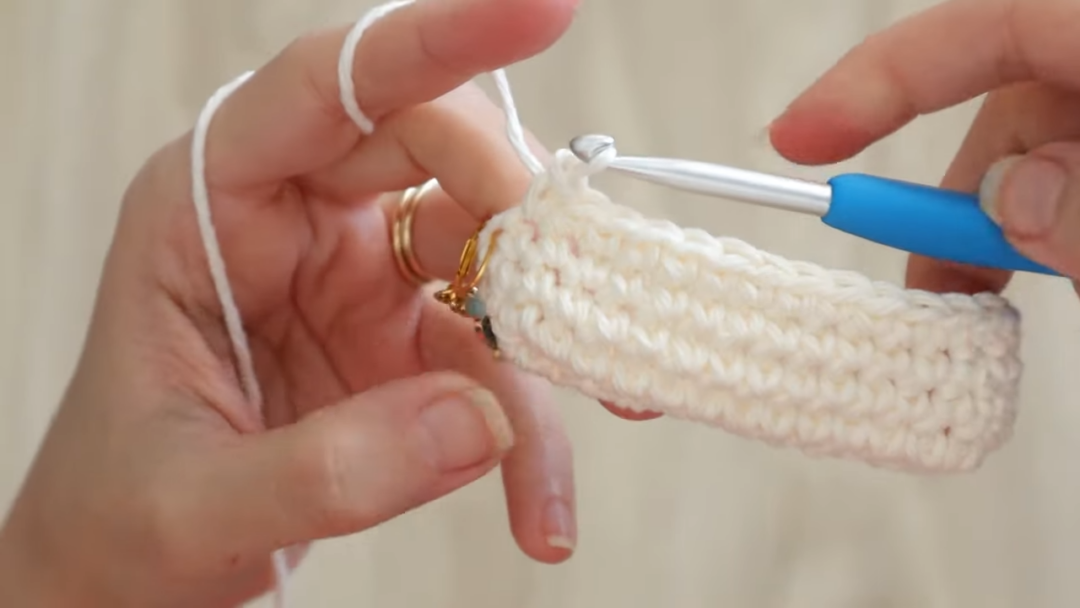
Working in Spirals
Rather than slip stitching and chaining, we’re going to begin working in the round in a spiral. Work 1 sc right into that first single crochet – this is the first stitch of our second round. Place a stitch marker here to help track the beginning of rounds. Continue putting 1 sc in each sc from the previous round, working in a spiral until you’ve completed 4 rounds total of single crochet.
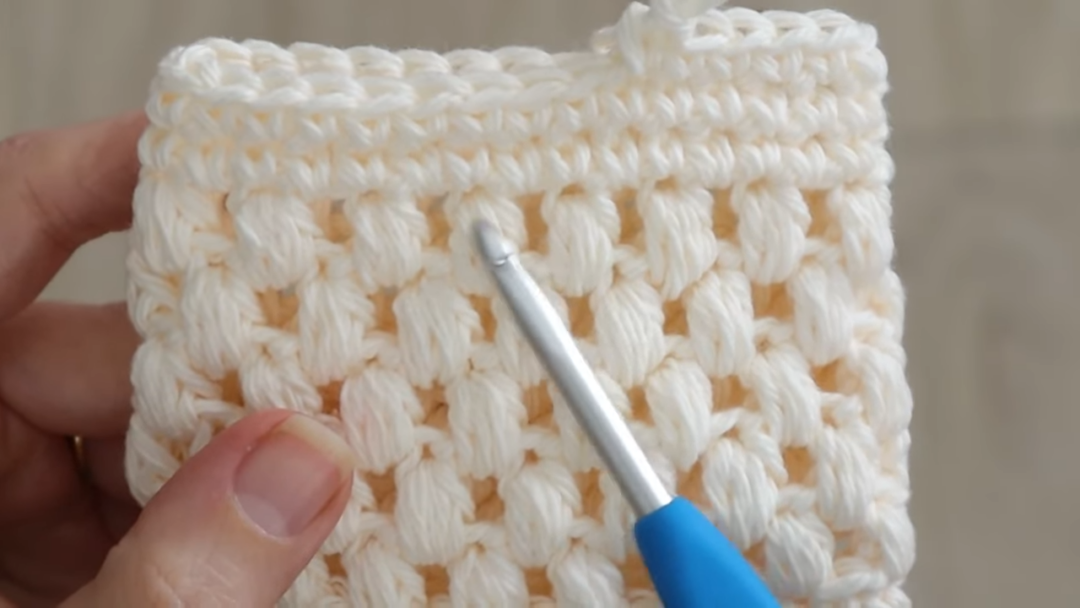
The Puff Stitch Section
Now we’ll start our fun puff stitch pattern! The open weave and scrubby texture make it perfect for a soap saver.
To start the puff stitch motif:
- Chain 1 and skip the marked stitch
- Work your first puff into the next stitch:
- Yarn over, insert your hook, yarn over, pull up a loop (try to pull these loops up a little higher)
- Yarn over, insert into the same stitch, yarn over, pull up a loop
- Yarn over, insert into the same stitch, yarn over, pull up a loop
- Yarn over and pull through all 7 loops on your hook
Chain 1 and move your marker to the first chain or the first puff.
For the next puff:
- Skip the next stitch
- Yarn over, insert hook, pull up a loop (repeat 3 times in the same stitch)
- Yarn over and pull through all 7 loops
- Chain 1
Continue working puff stitches along your single crochet round. When you reach your first puff, work the next puff into that first chain space, and chain 1. Mark that puff as the new first stitch of the round. Continue working puffs in each chain-1 space between puffs from the previous round, going around in a spiral until you have completed 5 rounds of puffs.
Creating the Top Section
After completing your puff stitch rounds, work 1 double crochet (dc) into the next chain space. Into the marked stitch, work a half double crochet, and then work a single crochet into the next space.
After leveling off the puffs, mark that single crochet as the first stitch of your single crochet rounds. Work 1 sc in the top of each puff and 1 sc in each chain space, continuing to work in a spiral. Complete a 2nd round of just single crochet.
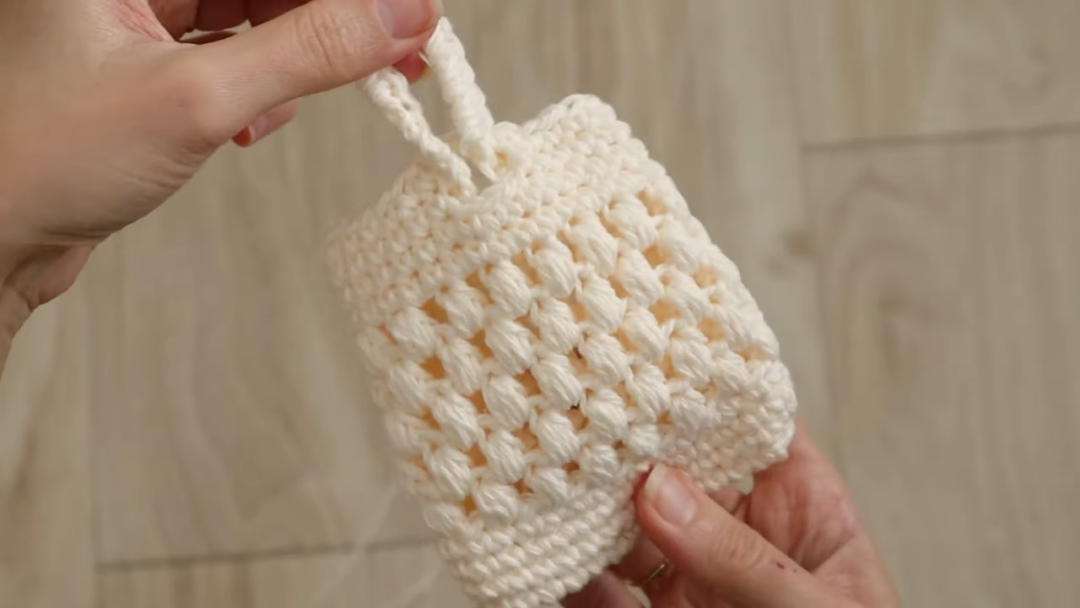
Adding the Hanging Loop and Closure
While working on round 3 of the single crochet section, fold your soap saver flat to identify the center of your piece (roughly the 3 center stitches between the center puff stitches).
Work up to those 3 center stitches, chain 3, skip those 3 stitches, and sc in the next stitch. This creates a small gap for our closure.
Continue around in sc to the back and identify the same center 3 stitches on the back of your piece. Work into the first of these 3 stitches, and begin chaining your hanging strap. I chained about 15, but you can adjust based on how you want to hang your soap.
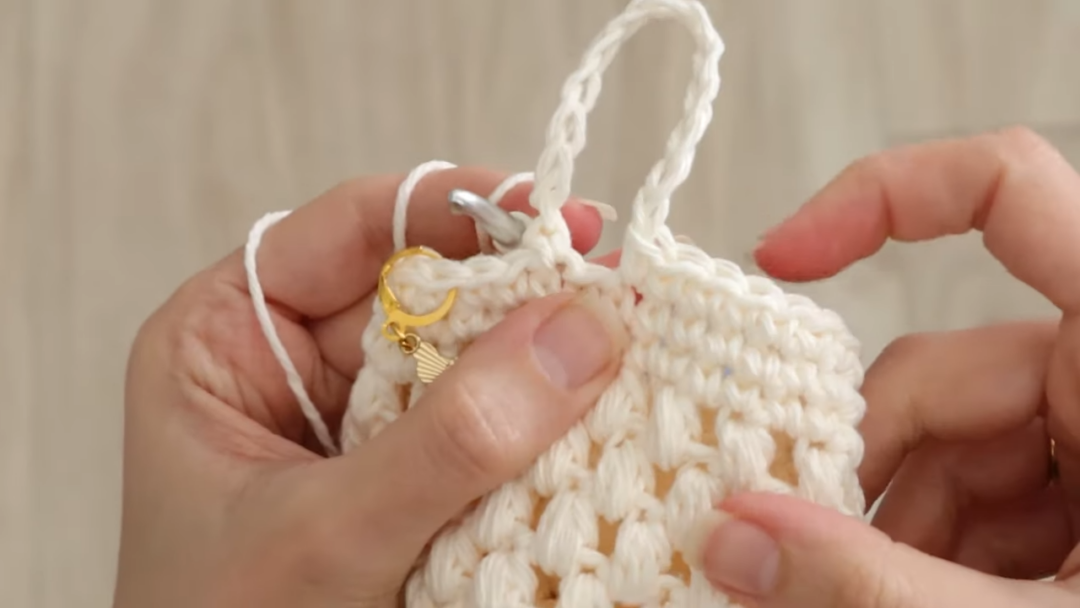
Skip 1 stitch and single crochet into the next stitch. This creates a rope to hang your soap – feel free to make it longer if needed!
Finishing Up
Complete your round of single crochets and work one more round. On this last round, work in single crochet up to your chain-3 opening and work 3 stitches into the space. Continue working single crochets up to your rope section. Work into the chains or simply start working single crochets right into the large chain space. Work as many stitches as you did chains on the previous round (I did 15).
Complete your single crochet round, slip stitch in the next couple of stitches, and fasten off. Weave in your ends, and your soap saver is complete!